Register application in Azure AD
Context
This documentation is to setup new account in Azure active directory to be used in Microsoft OneNote/SharePoint integration through graph API.
Use the Azure Portal to register your application in Azure AD
After you have a Microsoft tenant with the proper subscriptions, you can register your application in Azure AD.
-
Sign into the Azure portal, using the credential of your Microsoft tenant that has the subscription to Office 365 you wish to use. You can also access the Azure Portal via a link that appears in the left navigation pane in the Microsoft 365 admin center.
-
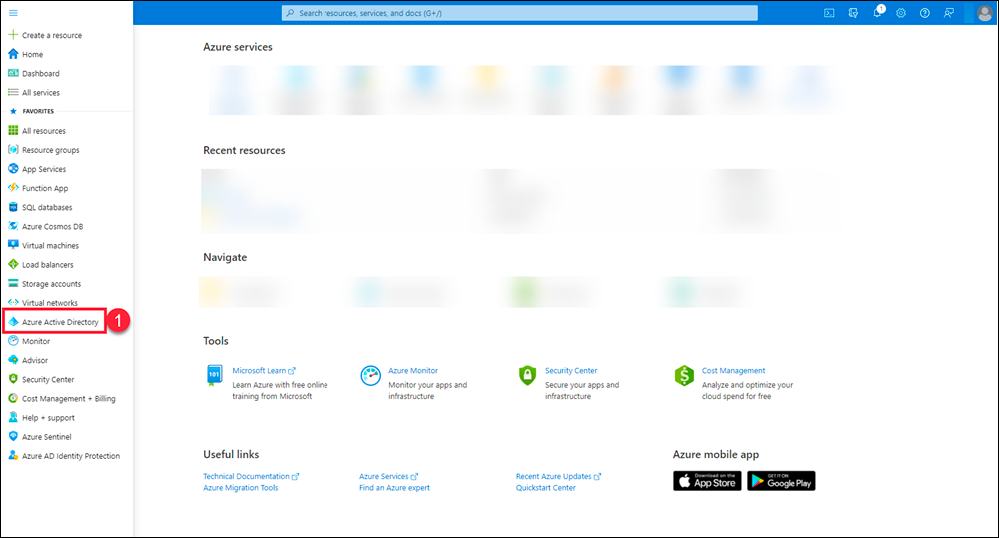
In the left navigation pane, select Azure Active Directory (1).
-
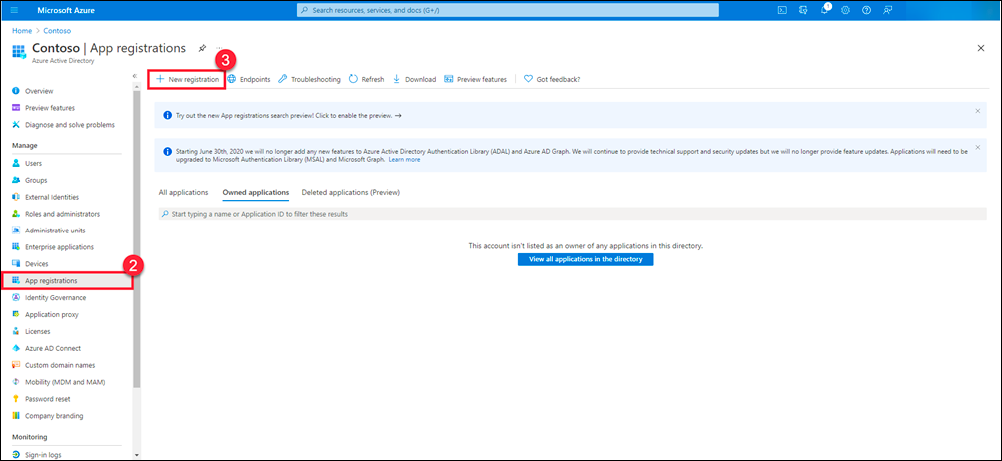
On the Azure Active Directory page, select App registrations (2), and then select New registration (3).
-
On the App registrations page, select New registration. A new page appears for you to start the registration of your app.
-
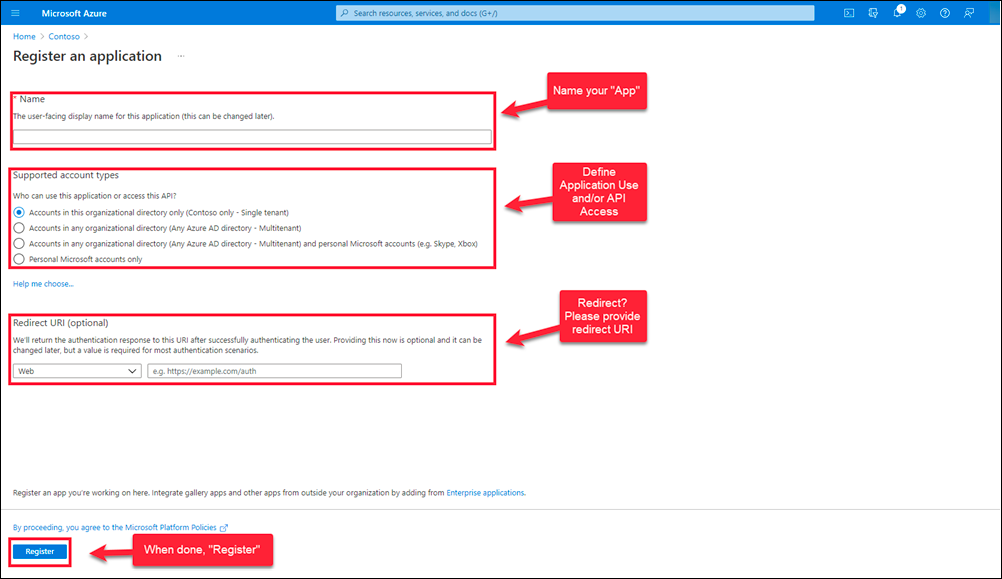
On the Register an application page, do the following things:.
- Name your app.
- Choose who can use the app and access the API.
- Provide a redirect URL for user redirect after authentication [This can be modified later as
well.]
- OneNote -
https://<enterprise hostname>/channelview/callback/onenote/ - SharePoint -
https://<enterprise hostname>/channelview/callback/sharepoint/
- OneNote -
-
Click Register to register the new app.
-
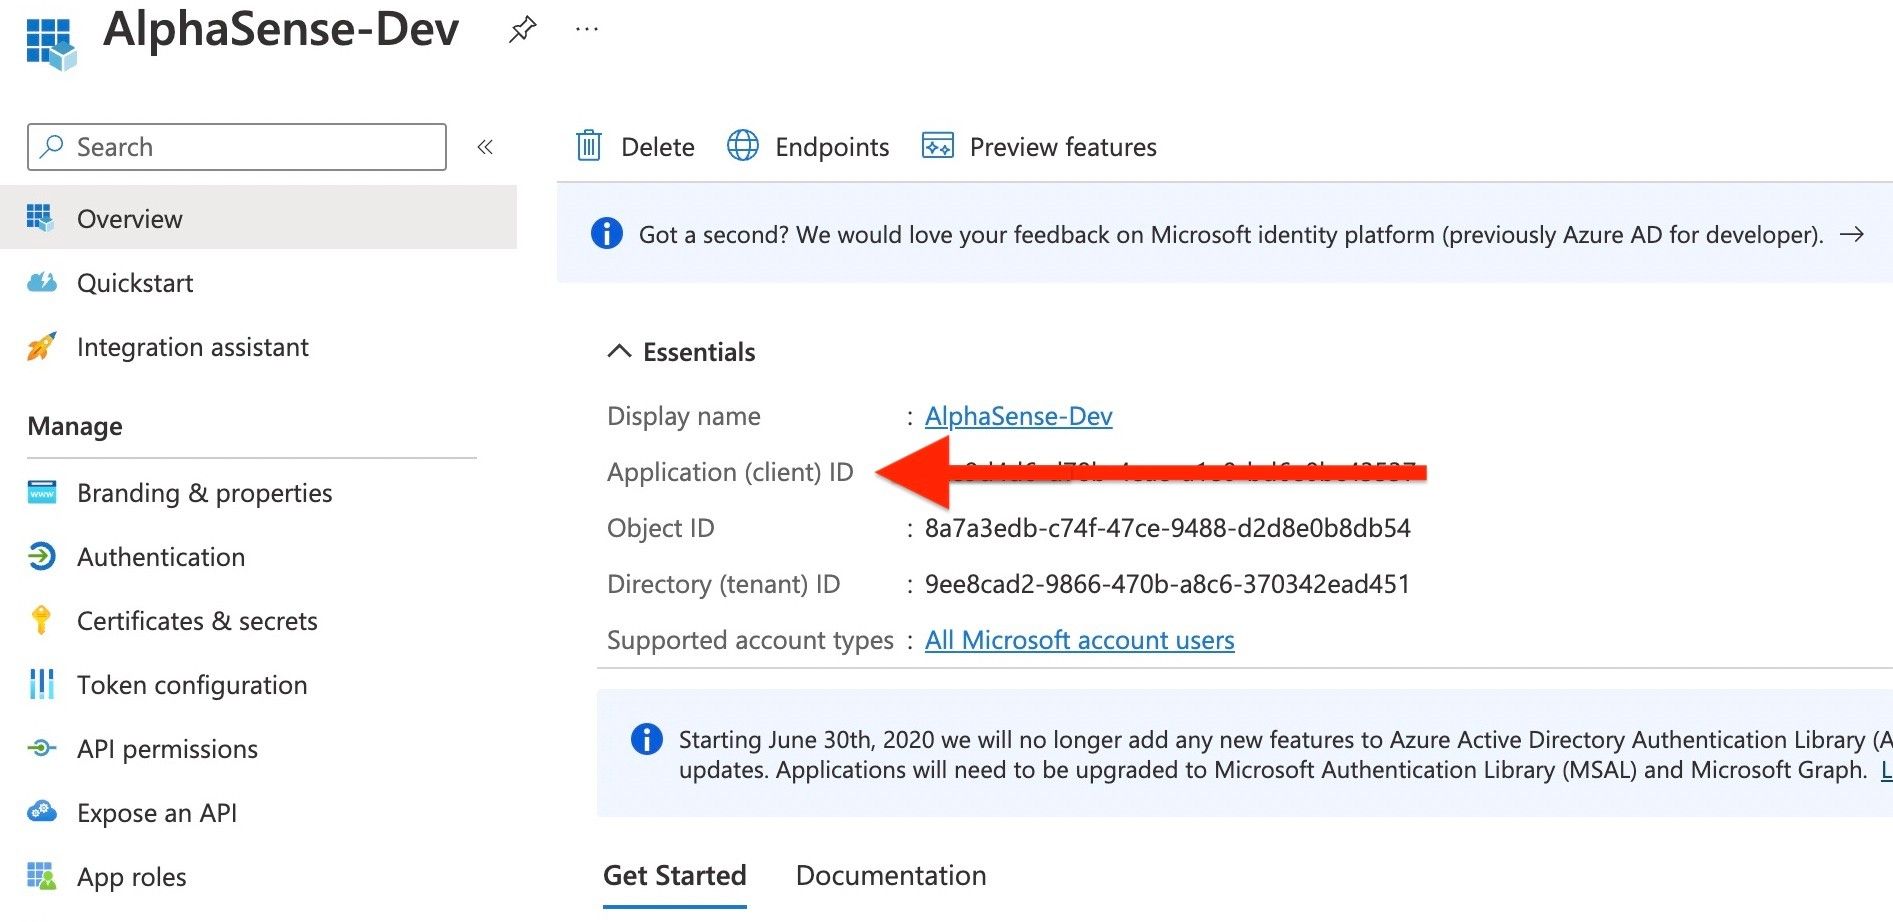
Upon successful app registration, Window will appear displaying a message to that effect. Additionally, it will display the Application (client) ID that is auto-generated and auto-assigned to the Microsoft Graph app. Make sure you copy this ID also to notepad.
-
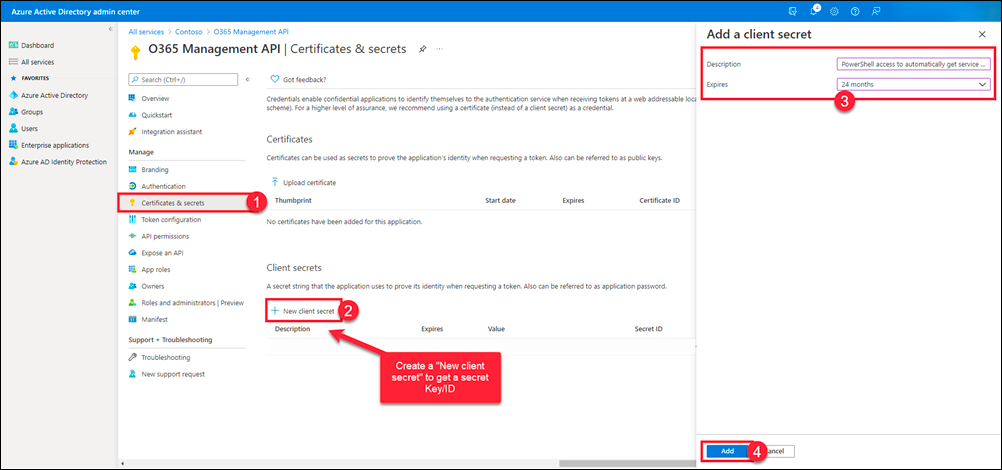
Next, proceed to create a secret for the new app. To achieve this, click on the Certificates & Secrets option (1) under Manage in the left panel. Now, click on the New client secret link (2) in the Client Secrets section in the right panel.
-
When Add a client secret box (3) appears on left appears, provide a Description for the new secret, set expiration, and click the Add button (4) to add the new secret.
-
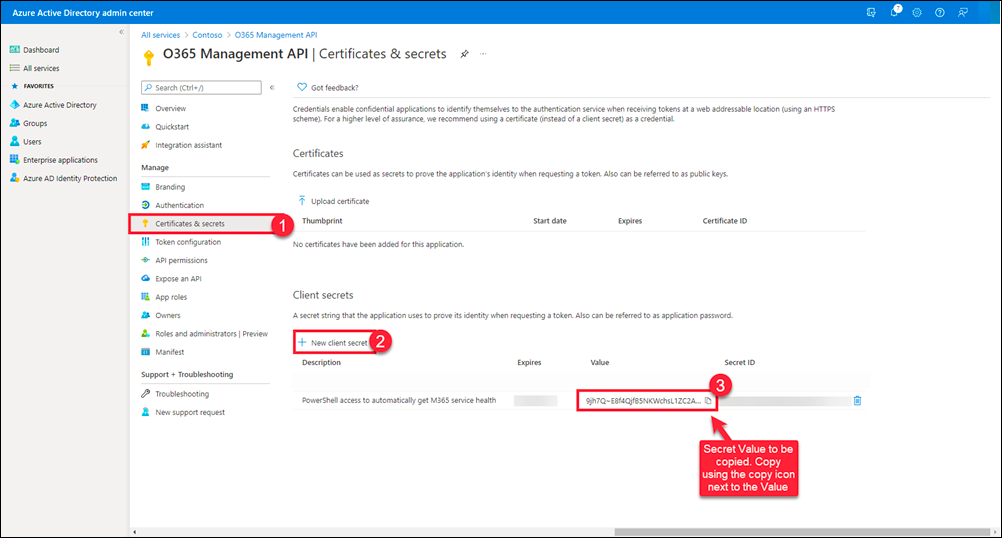
Once the new secret is successfully created, a key Value (3) will be generated for it. Make a note of this key in notepad as this need in secret configuration. [NOTE: Client secret values cannot be viewed later. Be sure to save the secret when created before leaving the page.]
-
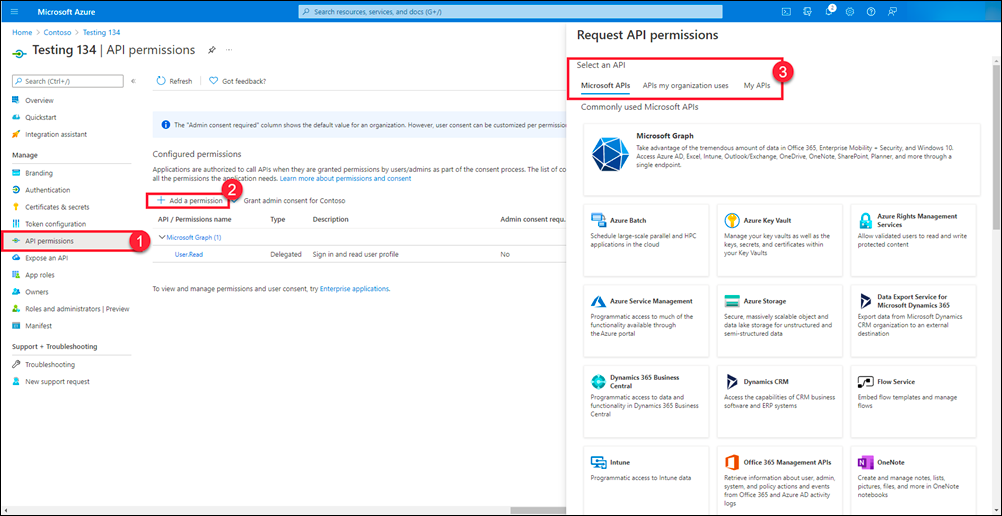
Next, proceed to grant permissions to the Microsoft Graph app, so it can pull the OneNote/SharePoint. For this, click on the API permissions (1) option under Manage in the left panel. Then click on the Add a permission link (2).
-
Then click on Microsoft Graph in the Request API Permissions (3) window that appears.
-
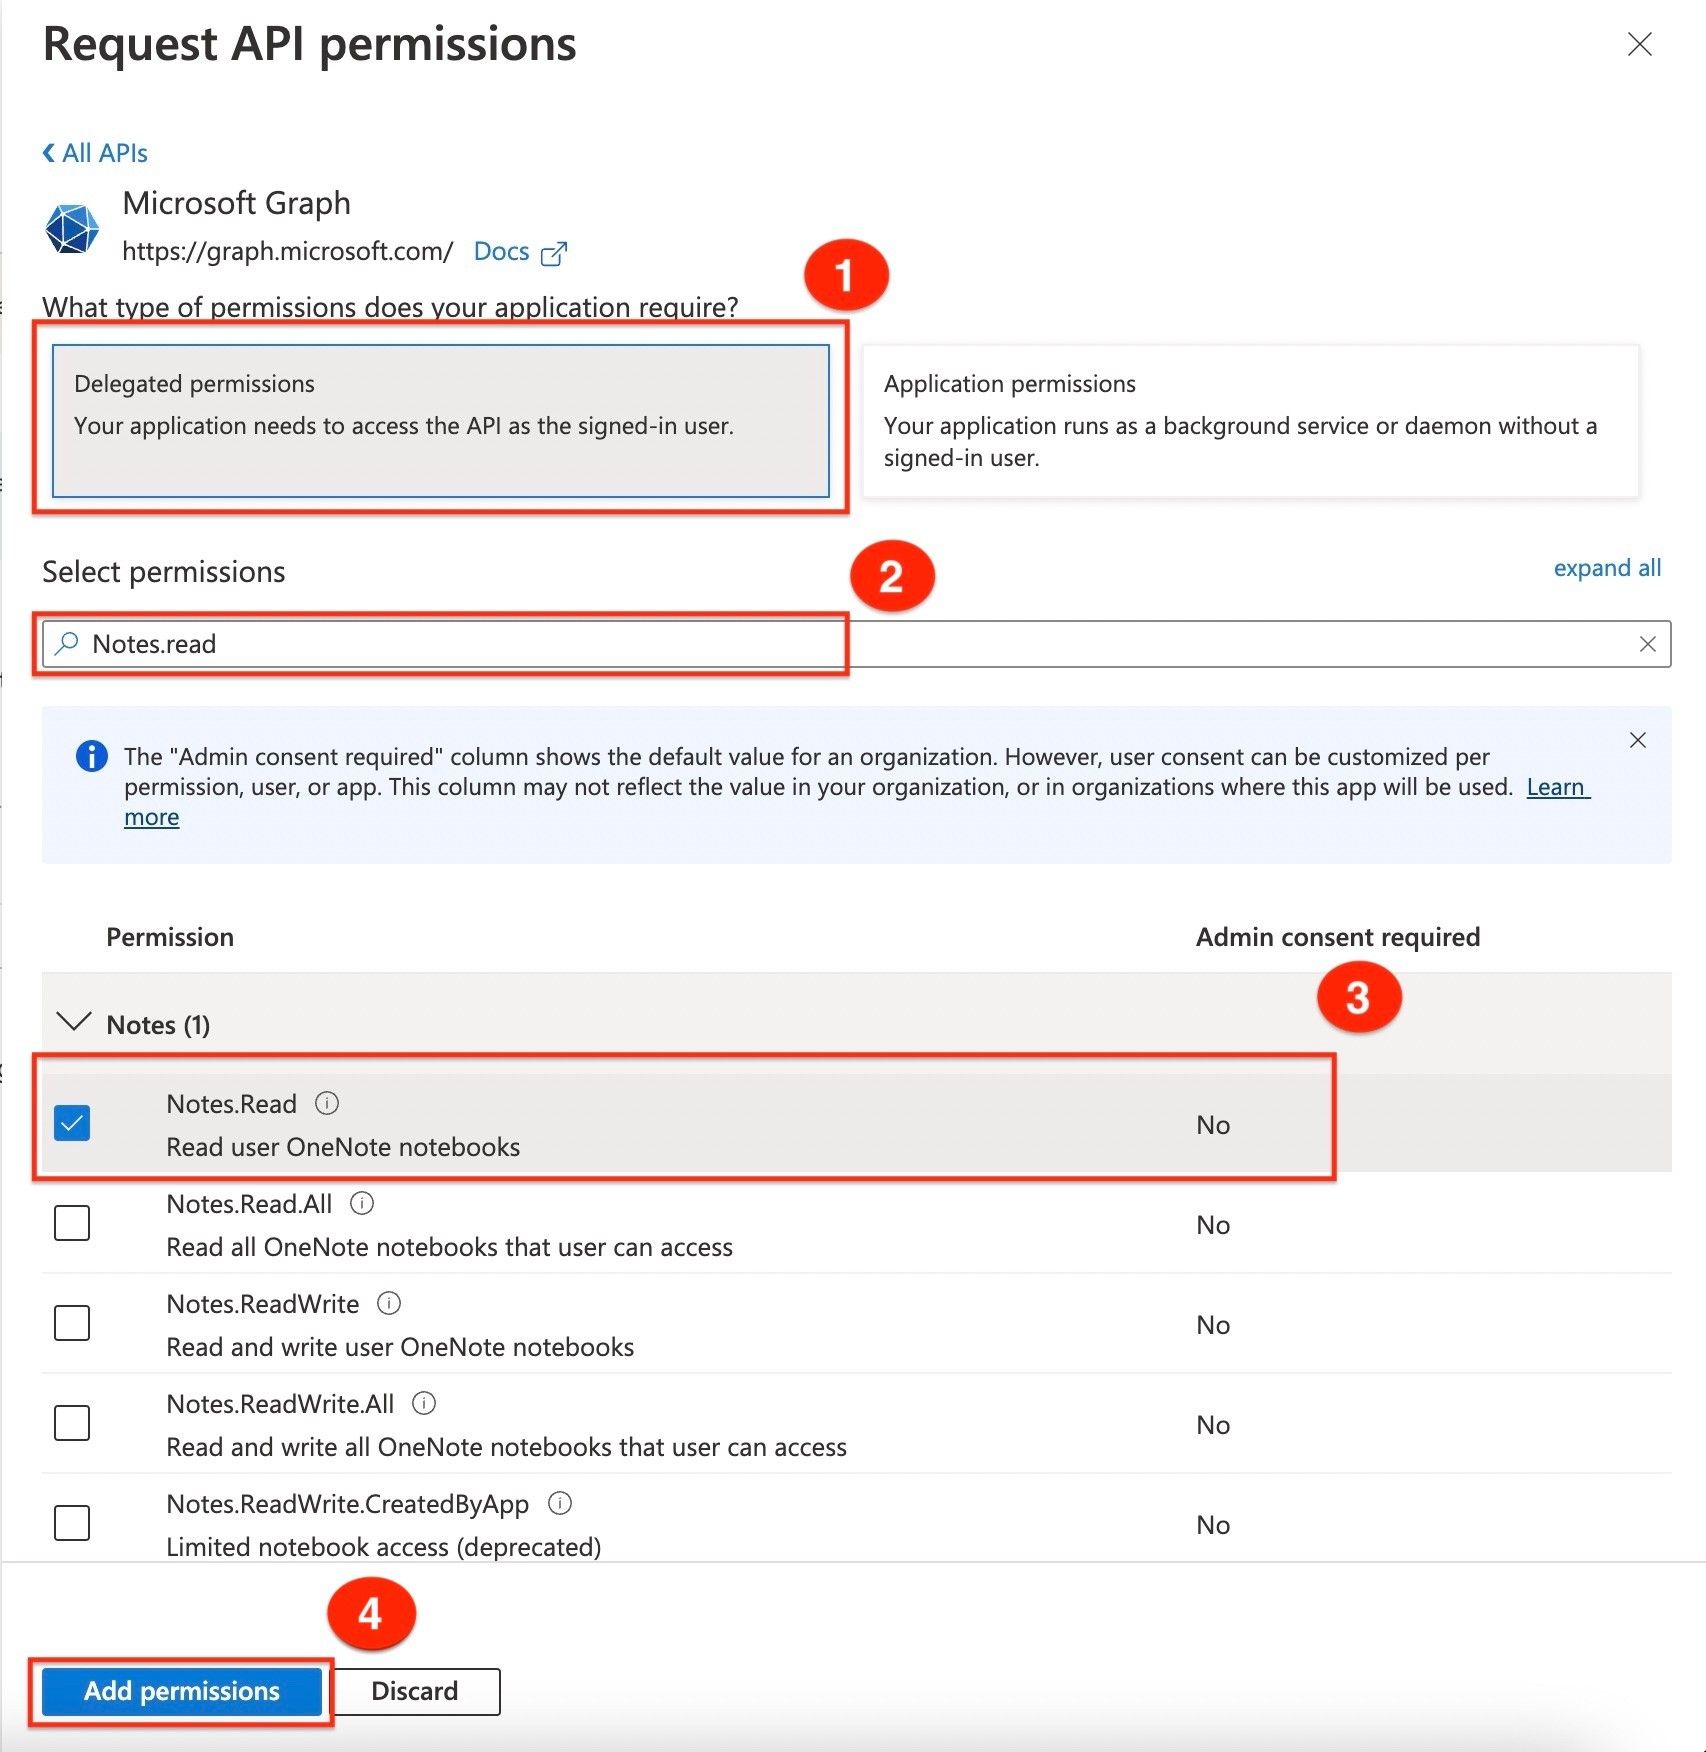
Click on Delegated permissions (1) then search for permissions listed in List of required permissions below in Select permissions (2) one by one and click on checkbox before permission (3). Once all permissions are selected click on Add permissions (4).
List of required permissions
| API Name | Claim Value | Permission |
|---|---|---|
| Microsoft Graph | offline_access | Maintain access to data you have given it access to |
| Microsoft Graph | User.Read | Sign in and read user profile |
| Microsoft Graph | User.ReadBasic.All | Read all users' basic profiles |
| Microsoft Graph | Notes.Read.All | Read all OneNote notebooks that the user can access |
| Microsoft Graph | Notes.Read | Read user OneNote notebooks |
| Microsoft Graph | openid | Sign users in |
| Microsoft Graph | Sites.Read.All | Read items in all site collections |
| Microsoft Graph | Files.Read.All | Read all files that the user can access |
References
Get started with Office 365 Management APIs
Microsoft Graph REST API v1.0 endpoint reference - Microsoft Graph v1.0