Configure AWS SES
This setup requires configuration of two email addresses in SES to initiate mail reception within the platform.
AWS offers multiple methods for creating and setting up identities for email reception. Here are the methods available for SES identity creation and verification:
- Creating and verifying email-based identity (quickest method to begin): Link to AWS documentation
- Creating and verifying domain-based identity: Link to AWS documentation
For details on email-based identity setup, please refer to the provided AWS documentation and follow the steps outlined for Setting up rules to receive email. Steps for configuring domain-based identity are provided below. For comprehensive setup instructions, we recommend consulting the AWS documentation
Add Domain to Verified Identities in Amazon SES
Access the AWS console and navigate to Amazon SES.
To create a new entity, proceed to Configuration → Identities → Click on Create Identity.
When opting to set up a domain, it is recommended that the domain already exists with your DNS provider so that SES can verify the domain identity added in this step.
Select the domain type and add the domain (e.g., api.alpha-sense.com), then click on Create Identity. If the domain belongs to the same AWS account, it should be automatically verified, and you can skip the Verify Domain (next) step.
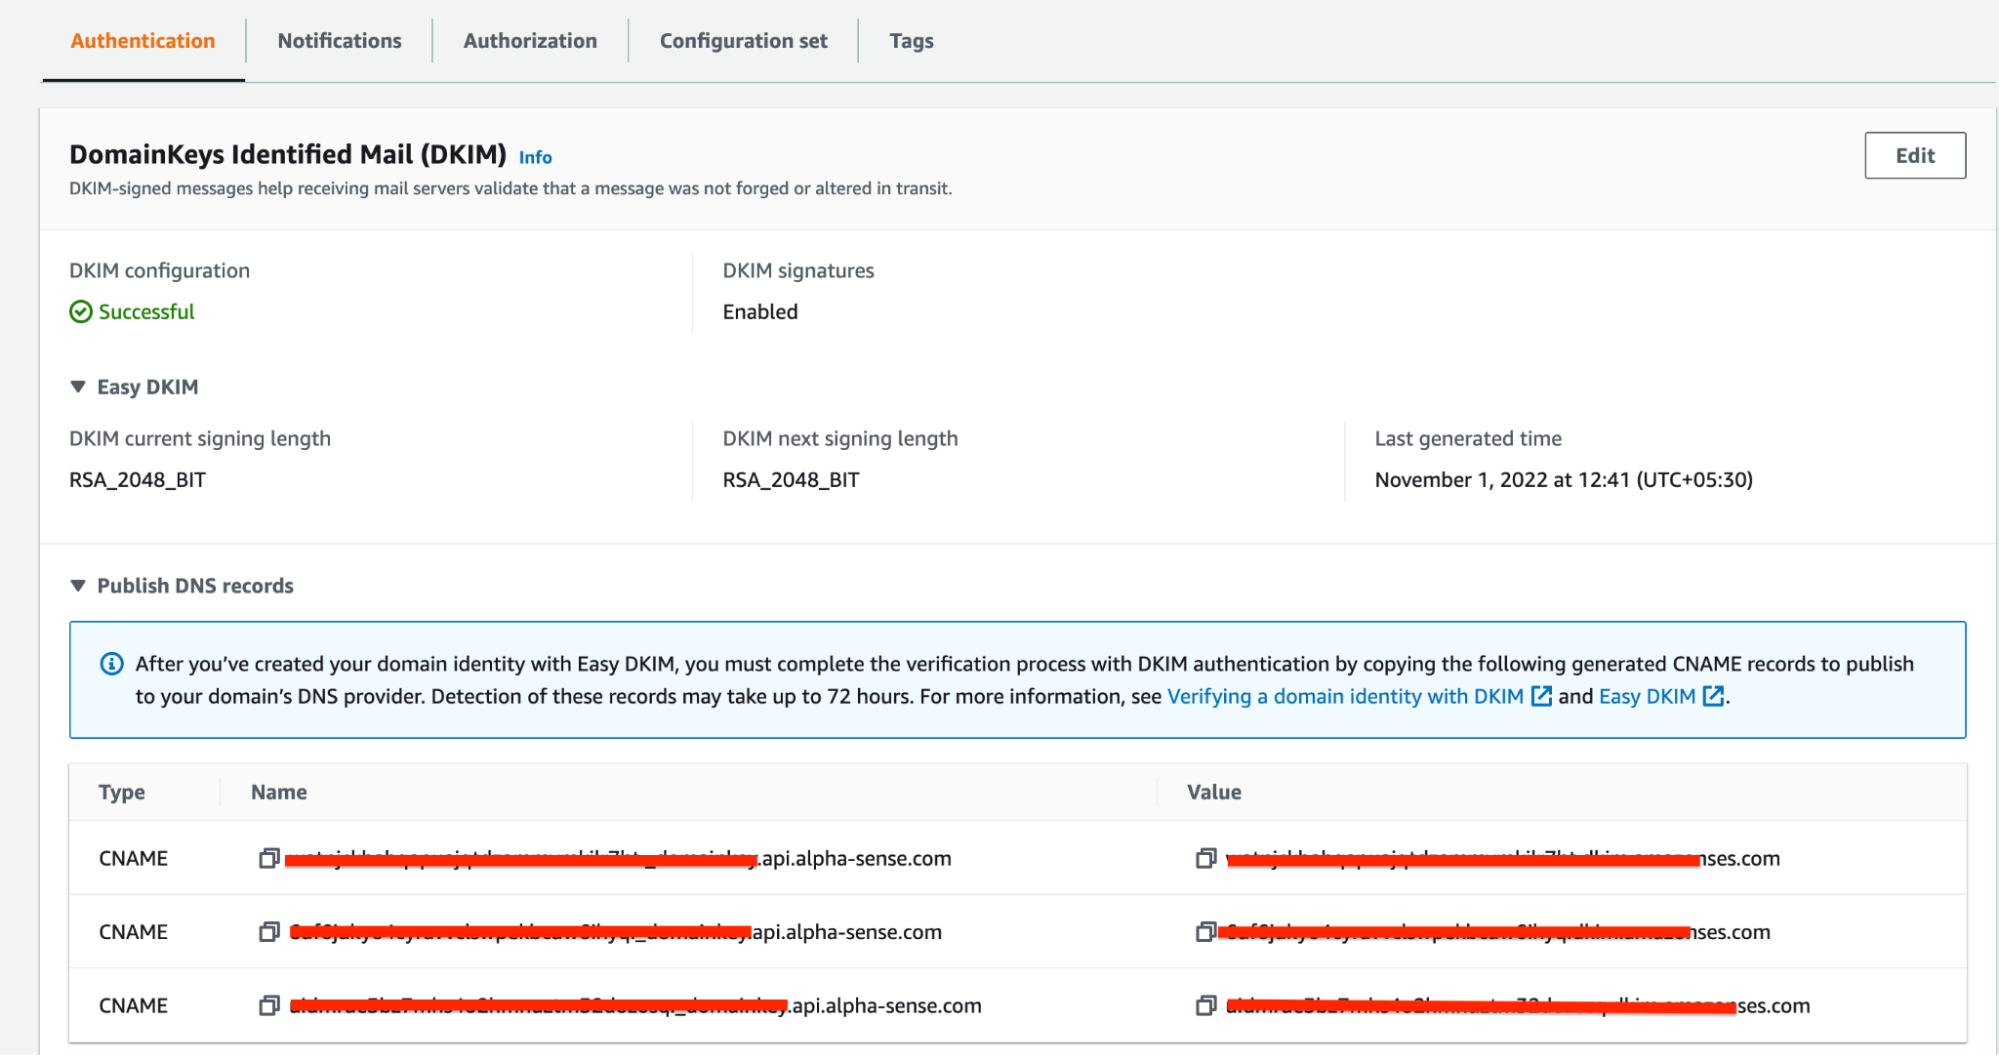
After the identity is created, SES will generate certain CNAME key values that need to be configured with your DNS provider to perform the DKIM authentication process.

To Verify the Domain:
Proceed to your DNS provider or AWS account Route 53 where your domain is registered and add the CNAME entries generated by SES in the earlier step.
Once the domain is verified, the identity should be displayed as Verified in SES.

Add MX Record for SES
To enable SES to accept emails for our identity, add an entry of type MX with the following value in the DNS record (Route 53 hosted zone if the domain is hosted in AWS): 10 inbound-smtp.< region >.amazonaws.com.
Replace < region > with the appropriate value (e.g., 10 inbound-smtp.us-east-1.amazonaws.com).
This can be verified using the following command
knangare@MacBook-Pro ~ % dig MX <domain> +short
10 inbound-smtp.us-east-1.amazonaws.com.
Setup Rule to Receive Email
Refer to the AWS documentation for guidance on setting up rules. SES allows only one active rule set at a time. If a rule set already exists, you can add a new rule under the existing rule set.
To Create a New Rule Set (if it doesn’t exist already):
Navigate to Configuration → Email Receiving → Click on Create Rule Set.
Set a unique rule set name and click on Create Rule Set.
To Create a New Rule
Within the rule set, add a new rule with the action to start receiving emails.
Navigate to the Rule set and click on Create Rule, then follow the steps provided.
Follow Step 2 (Add recipient conditions) and Step 3 (Add actions) as detailed below.
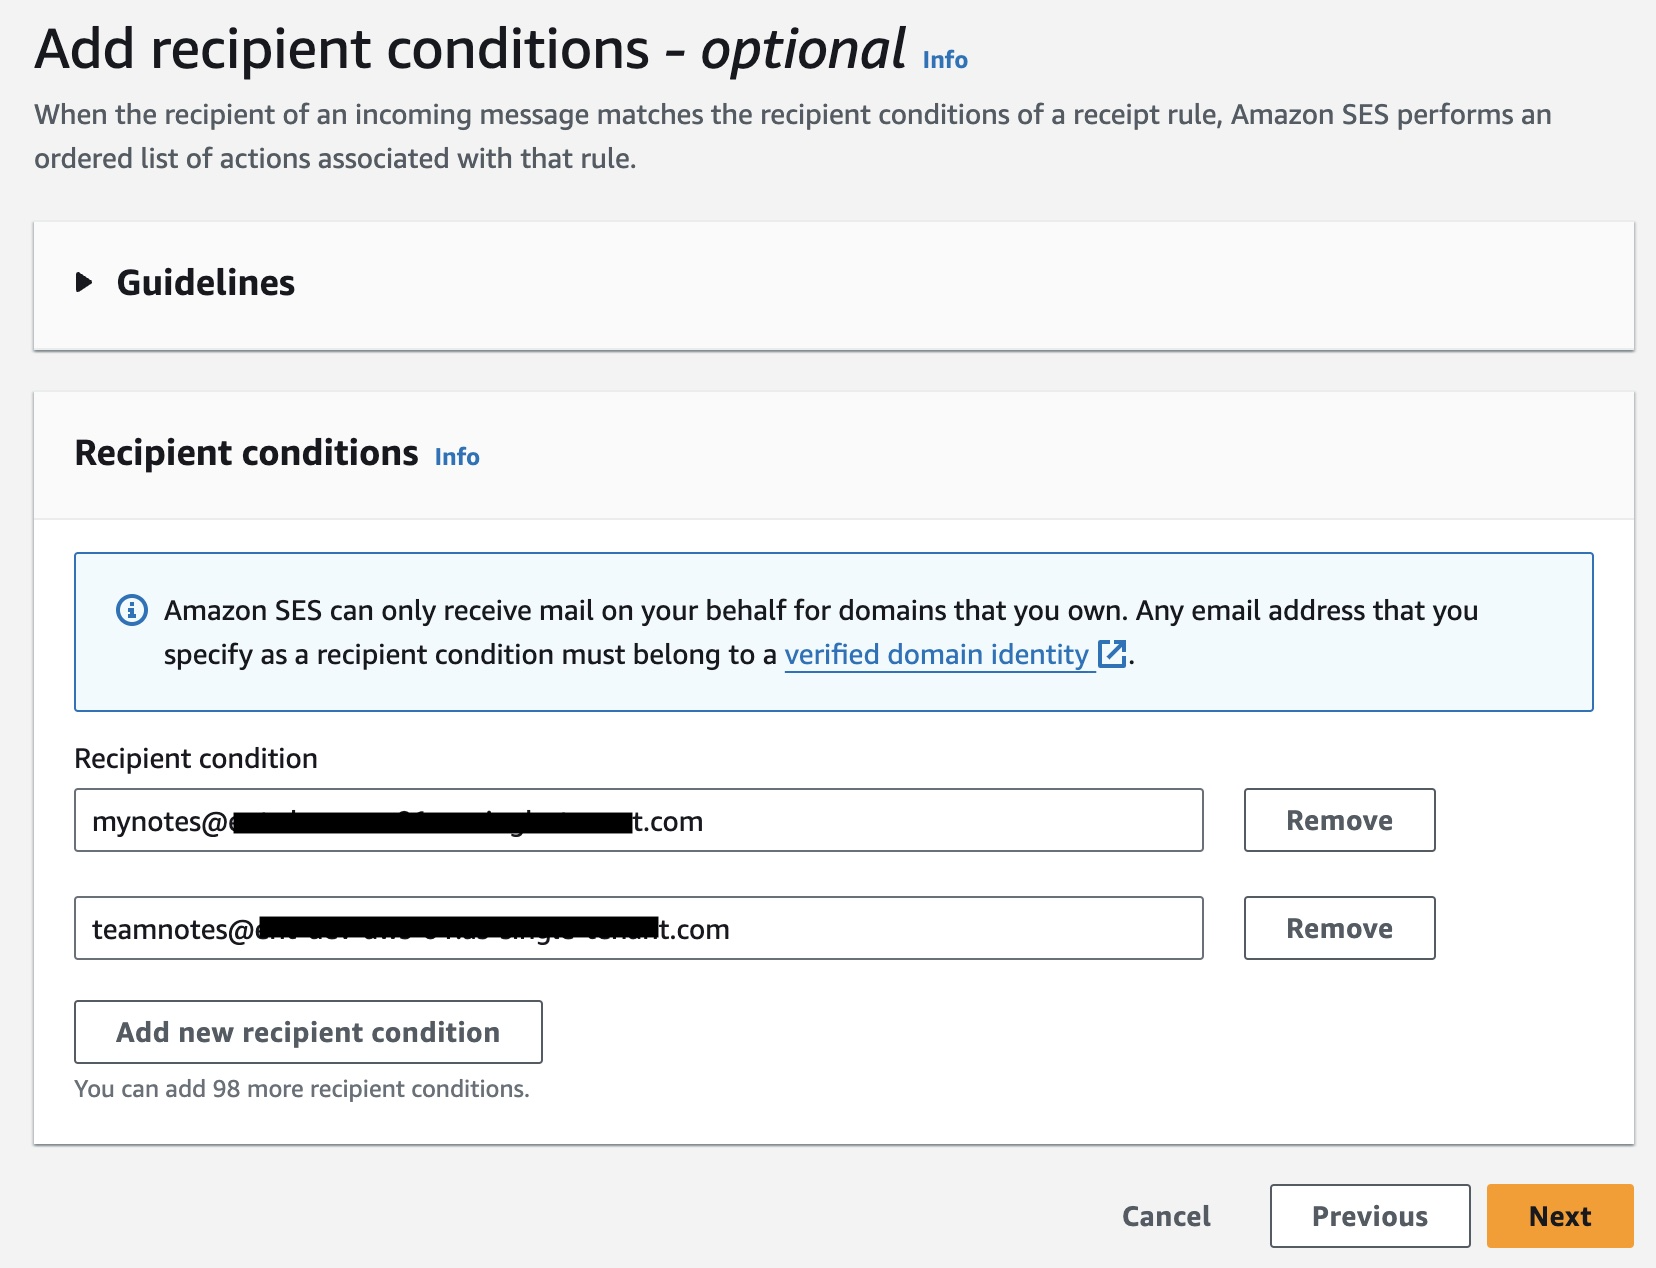
To Add Recipient Conditions
AlphaSense email integration requires configuration of 2 email IDs in this rule:
- For private emails in the format: mynotesxyz@domain.com
- For shared emails in the format: teamnotesxyz@domain.com

Add Actions
Click on "Add New Action" and choose "Deliver to Amazon S3 bucket."
For the S3 bucket, select the pre-existing bucket following the naming convention
as.{cluster_name}.email.attachments.
For the SNS topic, choose the pre-existing topic with the naming convention as.{cluster_name}-emailin-topic.
Click "Next" to proceed.

Review the changes and save
Note: Once the receipt rule setup is complete, ensure to enable the main rule set.
Configure Email IDs for Service
The email IDs configured for receiving emails in SES also need to be set up with the service.
To accomplish this, insert them as a secret in the Kubernetes cluster.
kubectl -n platform create secret generic emailreceiver-vault --from-literal=private-mail-id="<mynotes-email-address>" --from-literal=shared-mail-id="<teamnotes-email-address>"
Once the secret is in place, the service should initiate within a few minutes.