SSO with Okta
1. Prerequisite
- An Admin account created with permission to create new application in Okta.
- A user account with SSO Admin permissions, which can be either:
- The provided SuperAdmin account, or
- The admin accounts assigned under an Admin User License.
- The configuration for sso service is needed for Enterprise Private Cloud customer in Configure SSO service.
2. Create a new application in Okta
info
The mentioned Single sign-on URL and other related values below can be extracted from metadata xml directly. Please head to Extract values from metadata xml for additional information.
- Navigate to Applications → Create App integration (Requires Okta Admin permission to perform this action).
- Select SAML 2.0 for the Sign-in method and click Next.(AlphaSense SSO implementation supports Spring Security SAML 2.0)
- Fill in General Settings and click Next.
- App name: name of application (for example, AlphaSense - SSO - Demo)
- App logo: optional
- App visibility: optional
- Add Configure SAML and click Next.
- Single sign-on URL: The URL pointing to your deployed SSO service.
- Format: {domain name}/services/sso-ws/saml/SSO
- Check Extract values from metadata xml for further instruction.
- Check the box "Use this for Recipient URL and Destination URL".
- Audience URI (entityID): {domain name}.
- Check Extract values from metadata xml for further instruction.
- For SaaS the entityID is
com.alphasense.research
- Name ID format: Select EmailAddress as the attribute for SSO authentication in AlphaSense, as it is configured with email addresses and each one is unique to a user.
- Application username: Select Email to identify users in Okta.Then click Next.
- Single sign-on URL: The URL pointing to your deployed SSO service.
- Enter any optional details as needed in Feedback, then click Finish to complete the creation of your new application.
3. Download metadata file from the created application
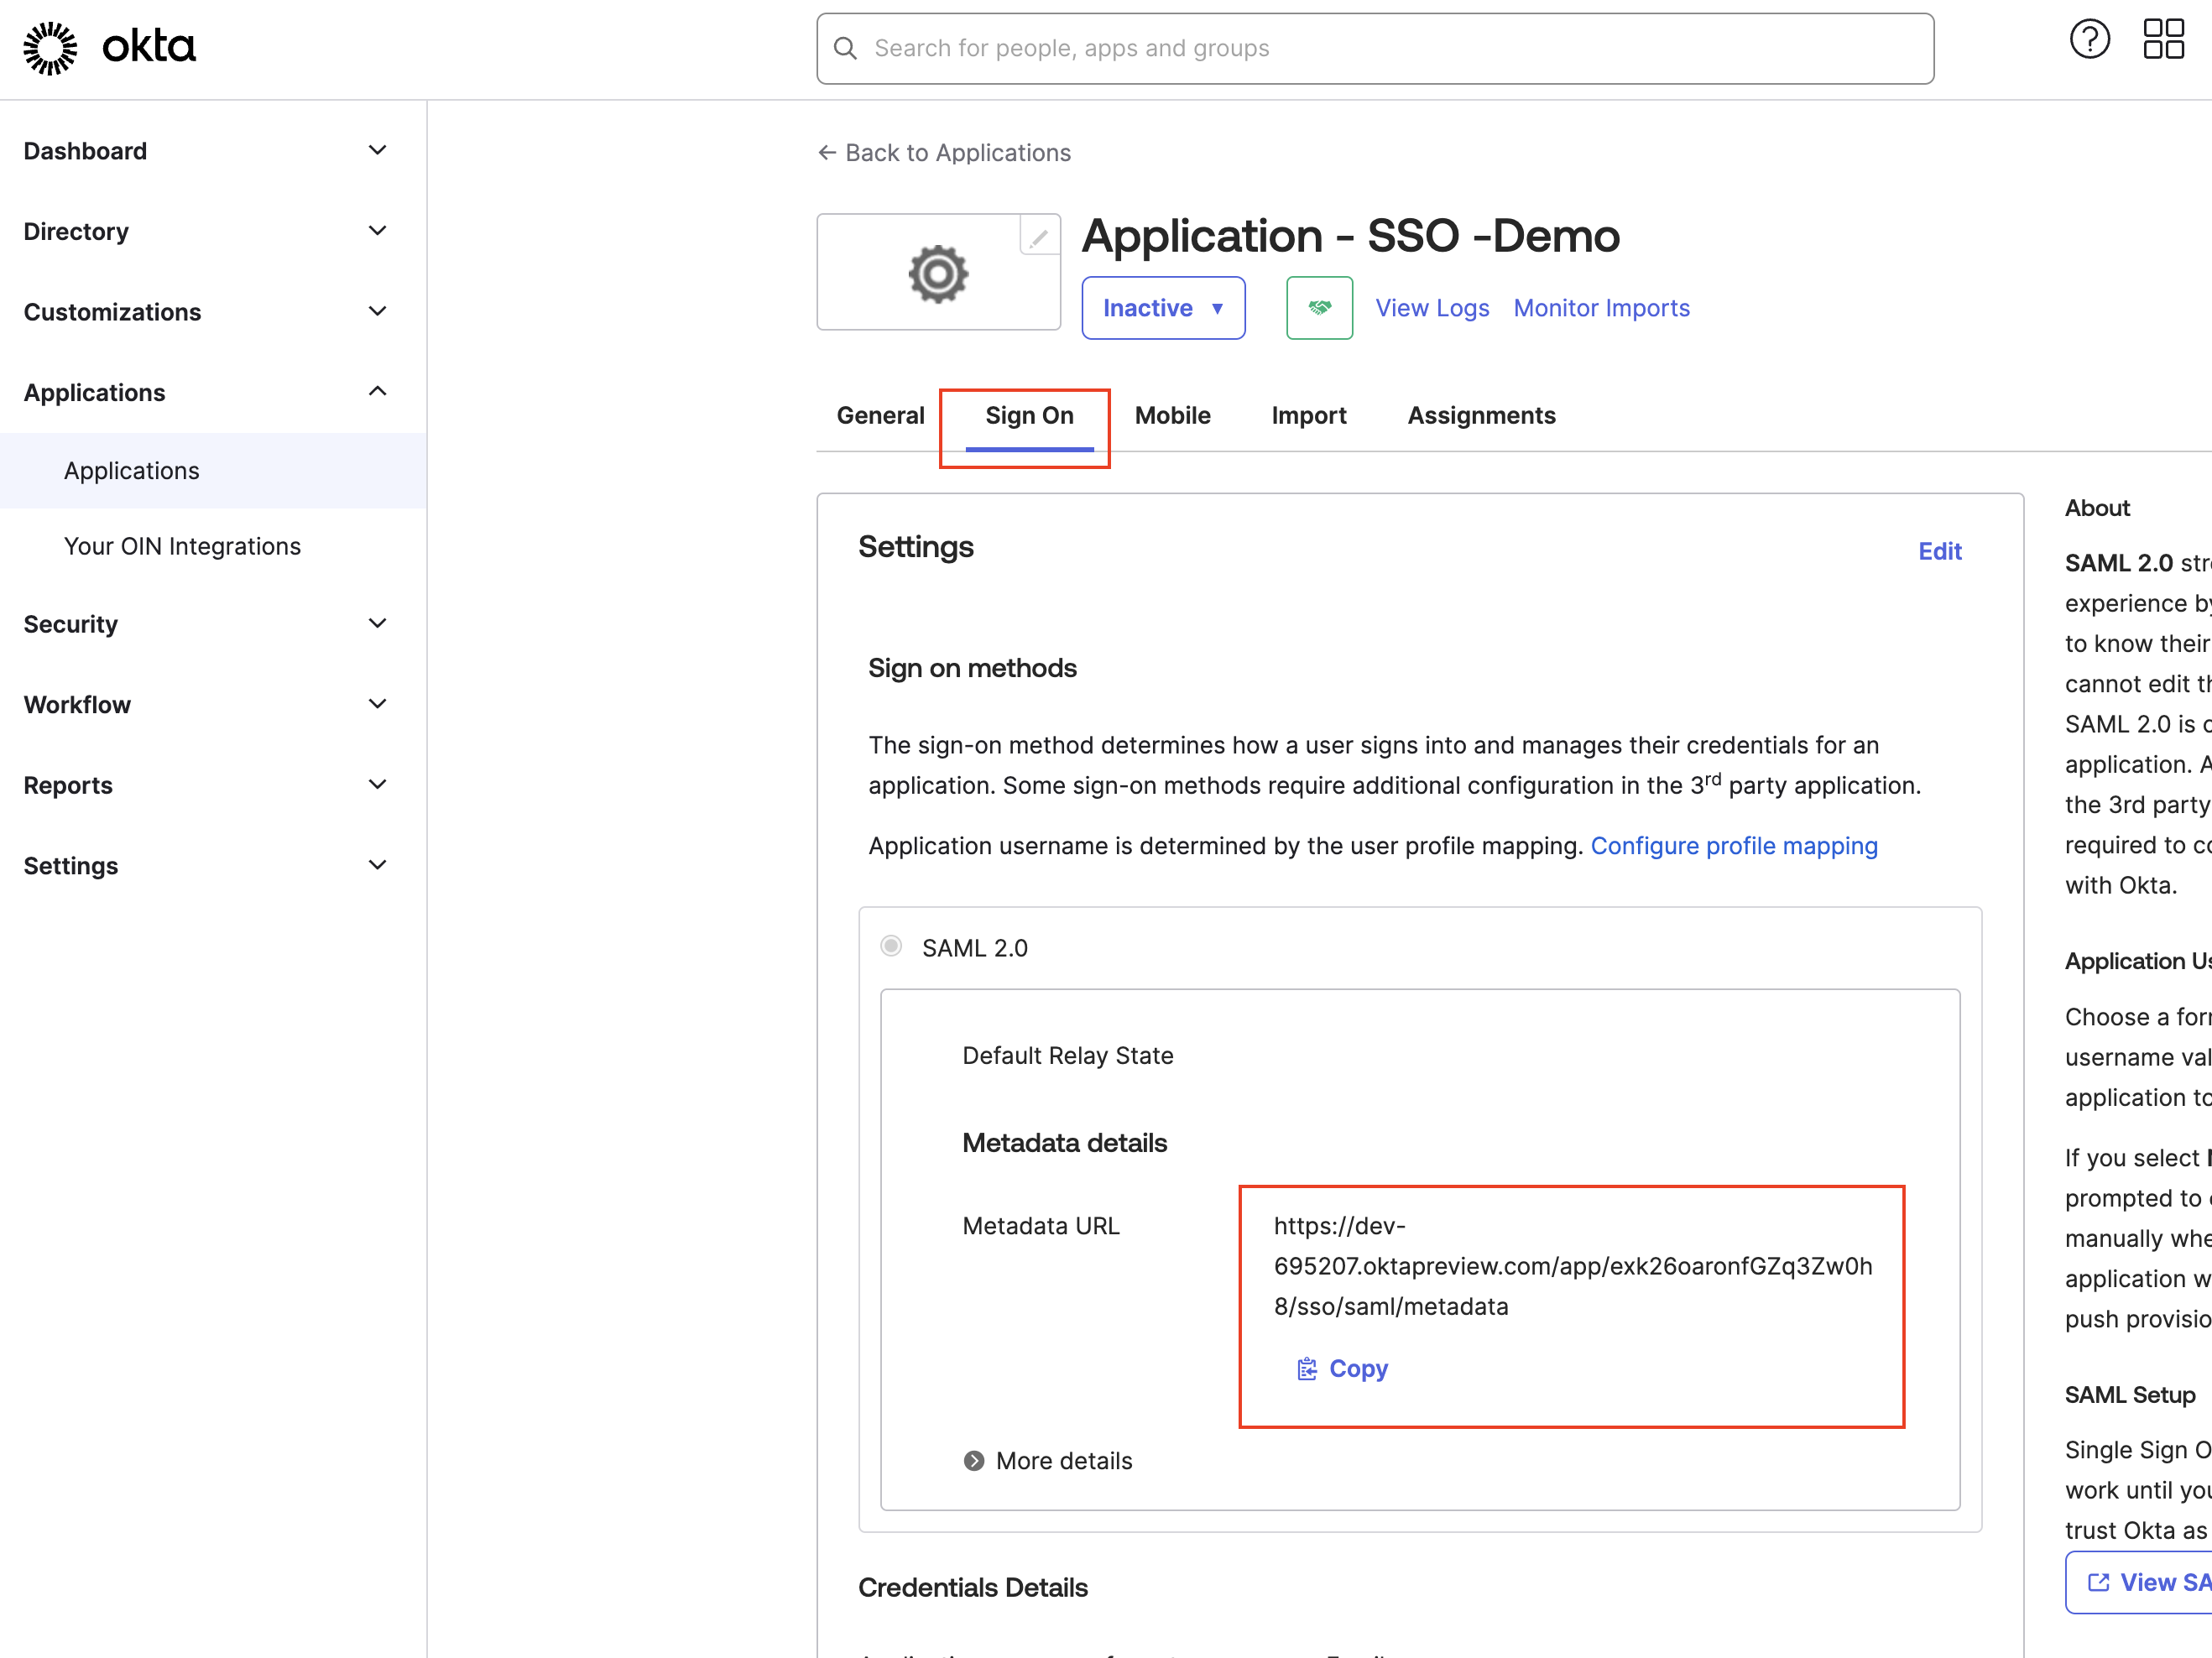
- Navigate to Sign On tab → Metadata URL:

- Copy and open link to generated metadata file in new browser tab:

- Save it as a new file with your preferred name.
4. Upload the metadata file in AlphaSense
- Log in to your deployed AlphaSense product with a user account that has SSO Admin rights, as specified in the Prerequisite.
- Navigate to Profile page and enable SSO Setup.
- Upload the downloaded metadata file, then click Save to finish the setup.
5. Assign user to created Okta application
- Go to Assignments tab and then select Assign → Assign to People.
- Find your desired users and assign them.
- Enter the Username. Use the email address as the username, since users are typically created with email addresses.
- Click “ Save and Go Back ” to complete assignment.
- The user should now be listed under Person.
6. Test the SSO login for assigned user
Before testing, ensure all sessions of Okta are logged out.
- Navigate to the login page of your deployed AlphaSense application, enter the email of the assigned user, and click Next.
- This will redirect you to the Okta sign in page. Provide user credentials.
- Upon successful login, you will be redirected to your deployed AlphaSense homepage.