SSO with Microsoft Entra ID
1. Prerequisite
- An Admin account created with permission to create new application in Microsoft Entra ID.
- A user account with SSO Admin permissions, which can be either:
- The provided SuperAdmin account, or
- The admin accounts assigned under an Admin User License.
- The configuration for sso service is needed for Enterprise Private Cloud customer in Configure SSO service.
2. Create a new application in Microsoft Entra ID
Skip this section if you have already created an application during the SCIM setup or if you have an existing SSO-compatible application in Microsoft Entra ID.
- In Microsoft Entra admin center , select Applications → Enterprise applications from the left menu.
- Select New application → Create your own application.
- Fill in the name, select option “ Integrate any other application you don’t find in the gallery (Non-gallery) " and click Create.
3. Set up the connection
-
Navigate to Single sign-on → SAML of the created application.
-
The AlphaSense team will be sharing the metadata file for customers who use the AlphaSense SaaS product. Customers who use the Enterprise Intelligence product should download the SAML metadata from the domain: {domain name}/services/sso-ws/saml/metadata.
-
Click Upload metadata file, select the file you received or downloaded, and click Add.
-
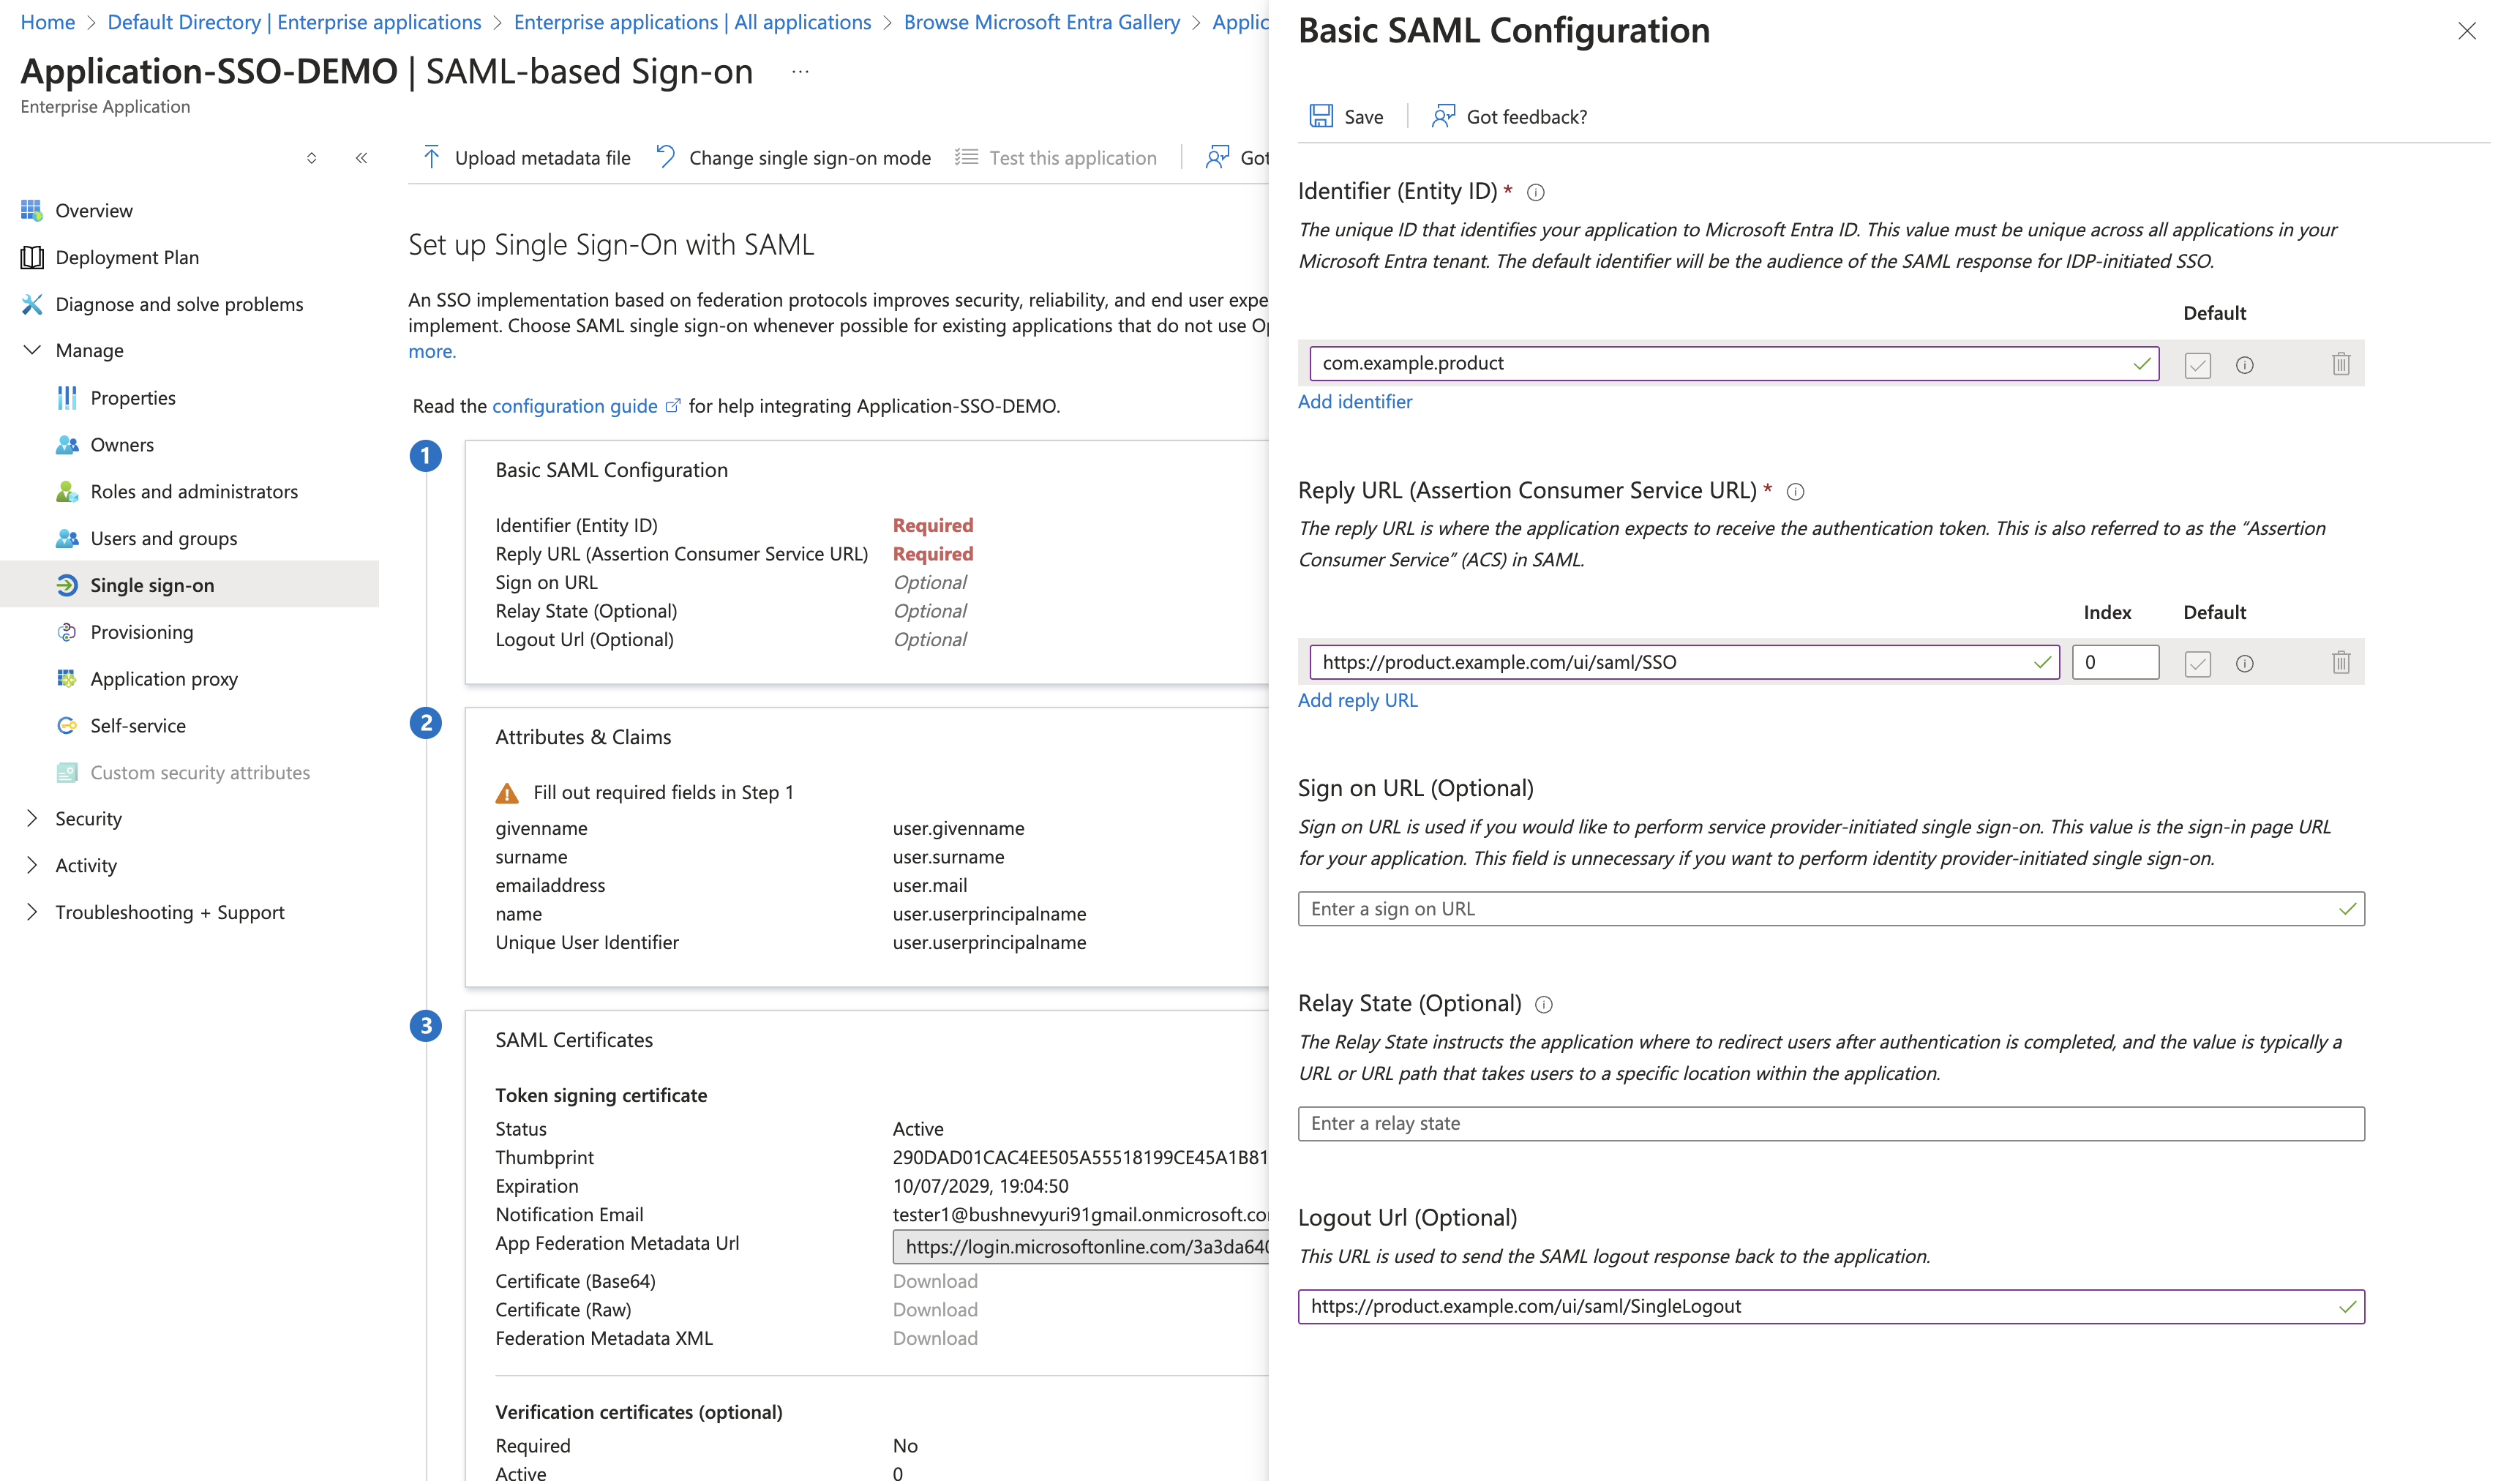
The configuration will be populated automatically from uploaded metadata. Then, click Save:
 info
infoThe values shown in the screenshot are for reference only, the actual values will be automatically populated after uploading the SAML metadata file. For more info about how they are extracted from metadata file, please read Extract values from metadata xml.
4. Upload the metadata file in AlphaSense
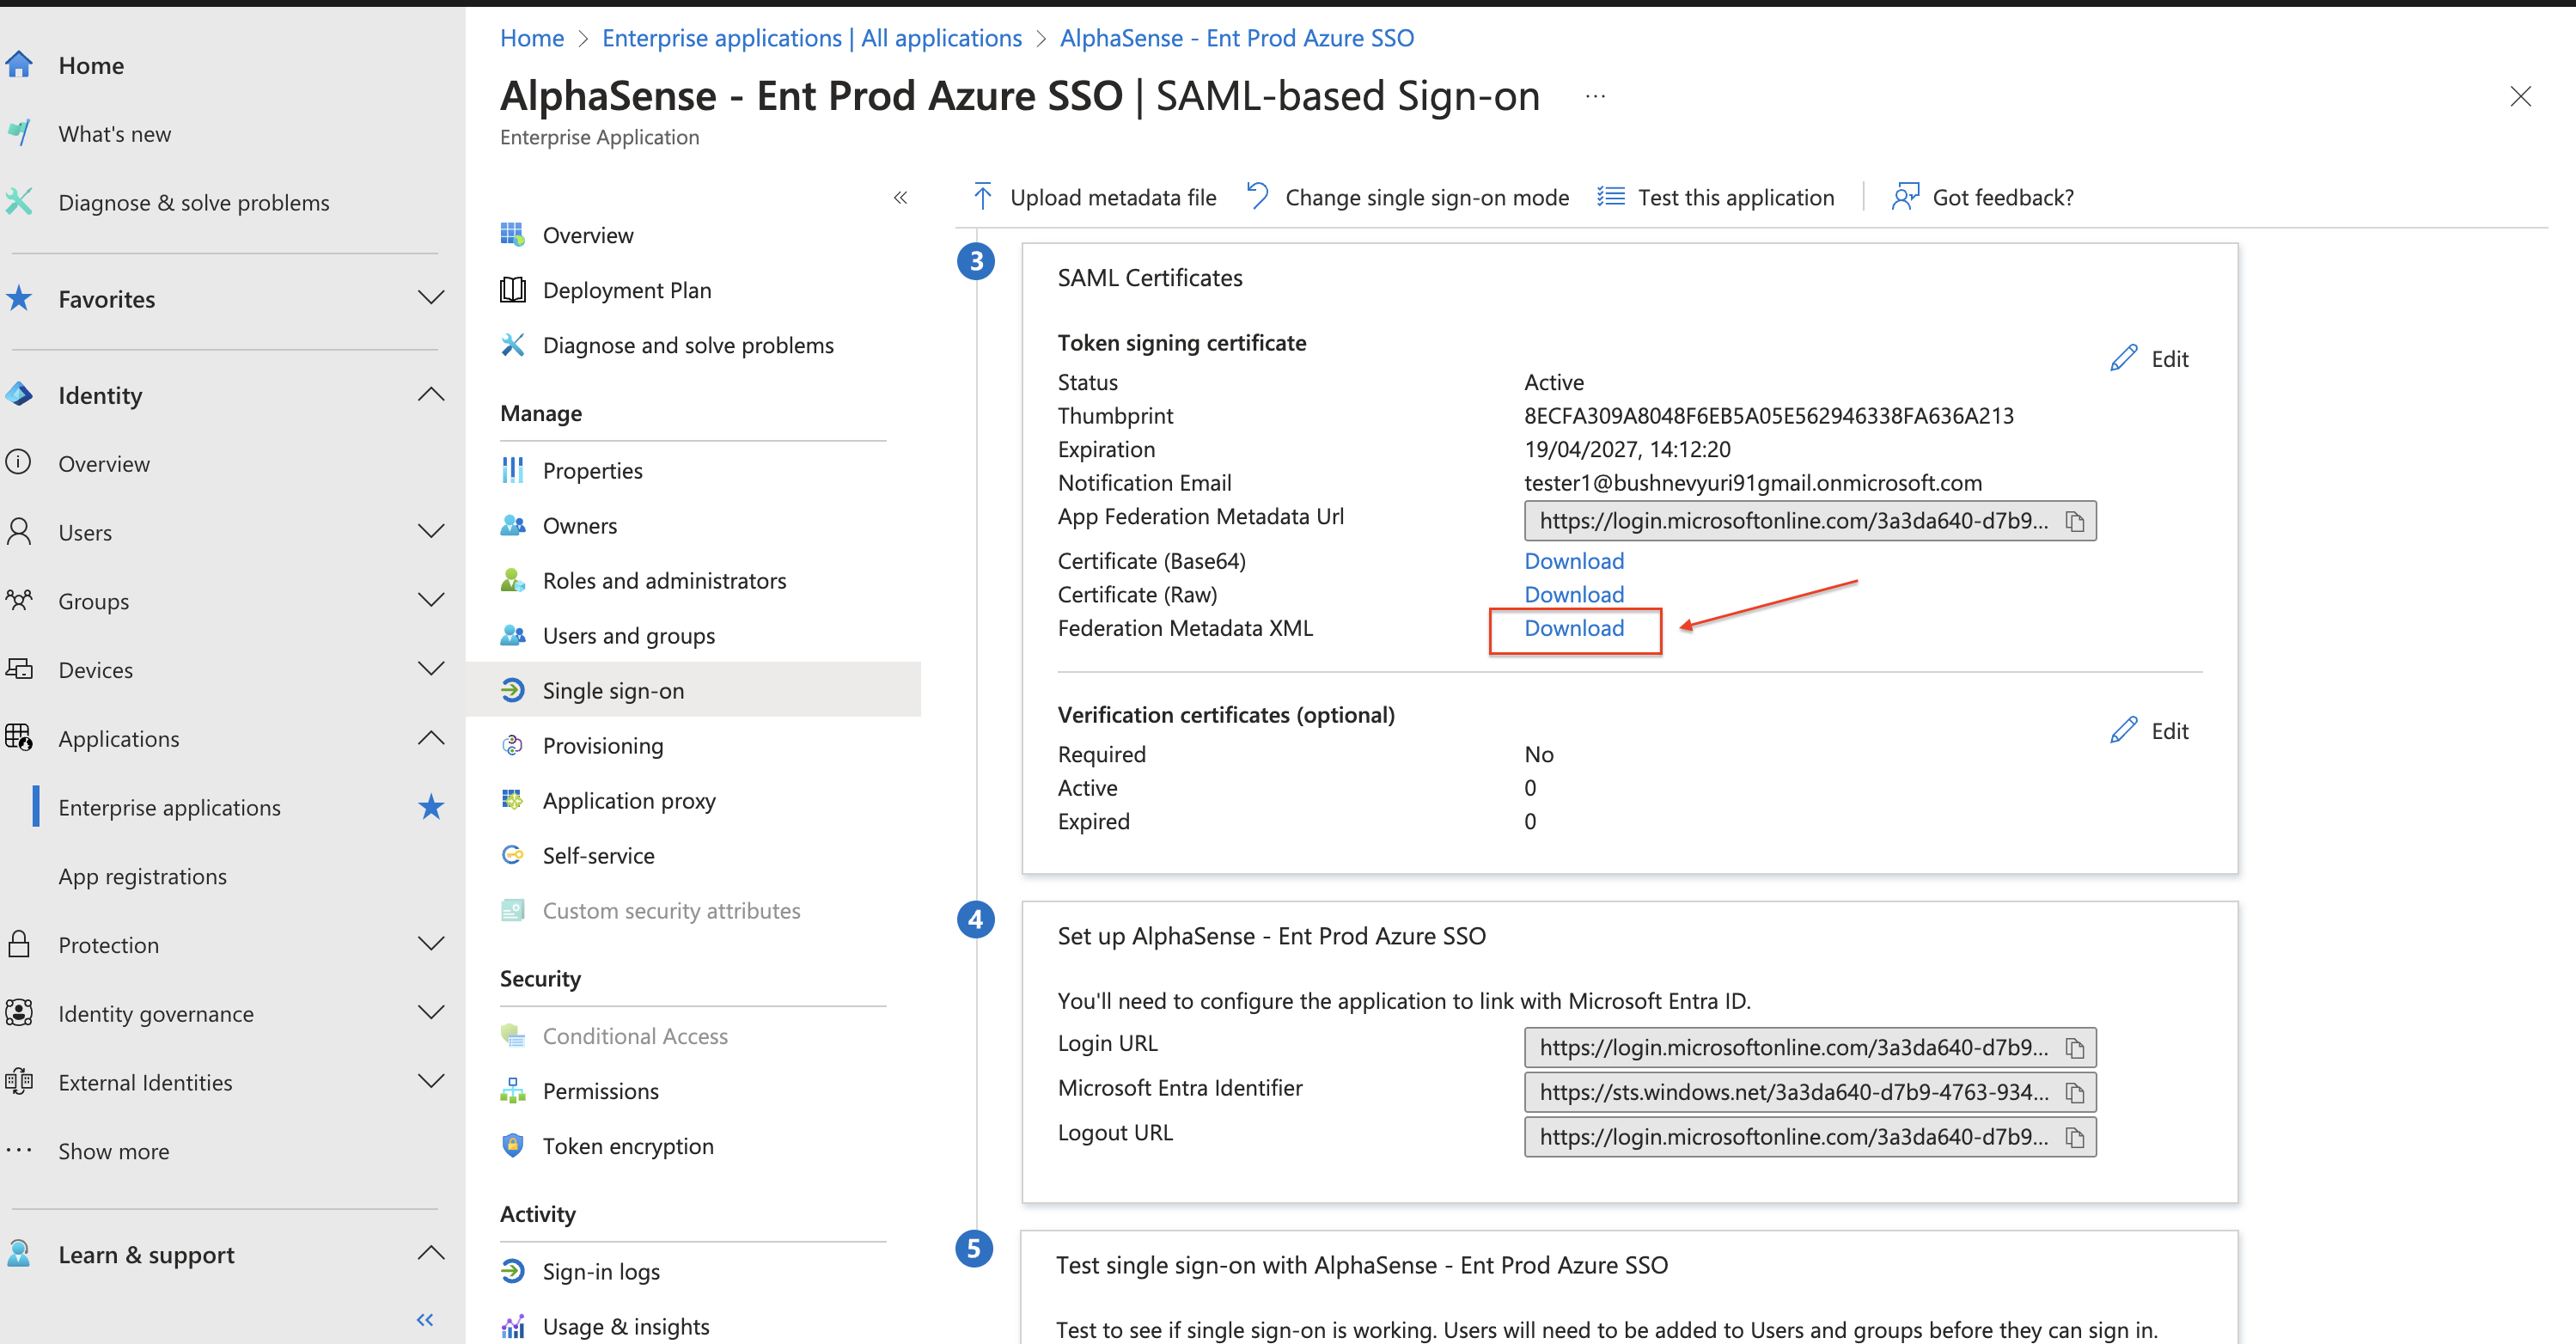
- Download the Federation Metadata XML from your application:

- Log in to your deployed AlphaSense product with a user account that has SSO Admin rights, as specified in the Prerequisite.
- Navigate to Profile page and enable SSO Setup.
- Upload the downloaded metadata file, then click Save to finish the setup.
5. Assign user to the created Microsoft Entra ID application
If you don’t have any available users, please refer to the SCIM with AzureAD - Assign user to you desired application for further instructions on creating and assigning users.
The user’s email will be used for SSO login.
6. Test the SSO login for assigned user
Before testing, ensure all sessions of Microsoft Entra ID are logged out.
- Navigate to the login page of your deployed AlphaSense application, enter the email of the assigned user, and click Next.
- This will redirect you to the MS Azure sign-in page. Provide the user credentials.
- Upon successful login, you will be redirected to your deployed AlphaSense homepage.