SCIM with AzureAD - Microsoft Entra ID
1. Prerequisite
Azure account created with sufficient subscription: Cloud Computing Service | Microsoft Azure
2. How to connect
- Go to your homepage of Microsoft Entra admin center:
Microsoft Entra admin center
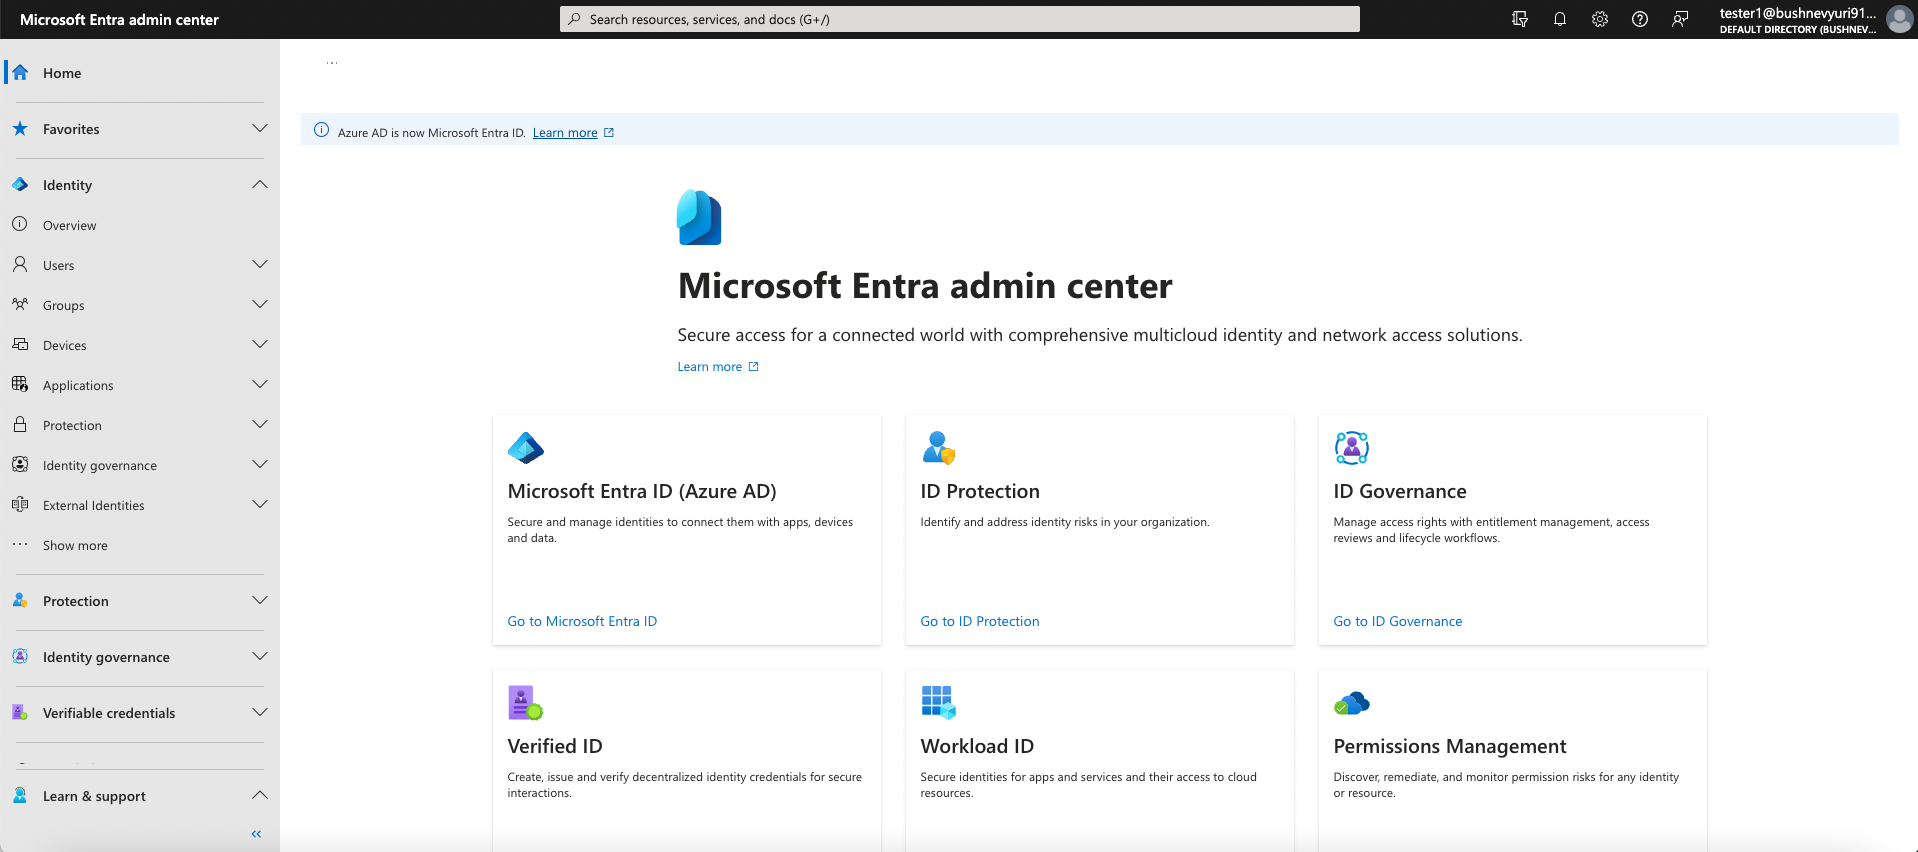
- Go to Microsoft Entra ID (formerly known as Microsoft Active Directory):
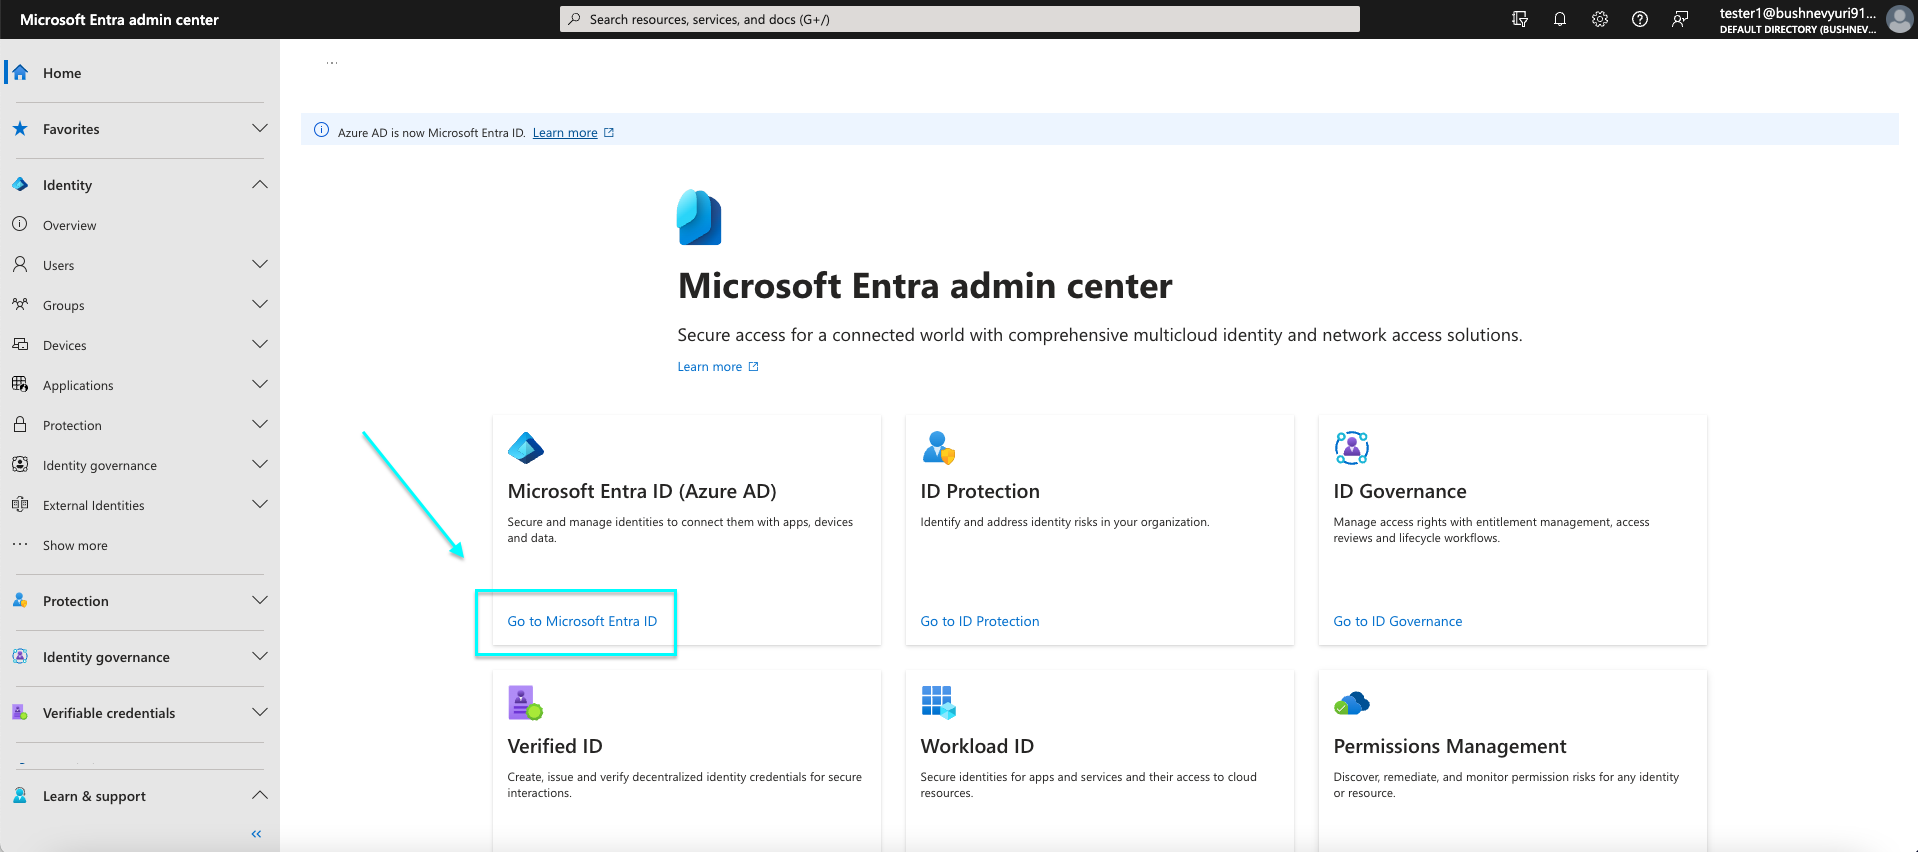
- Navigate to Enterprise applications to see all available applications:
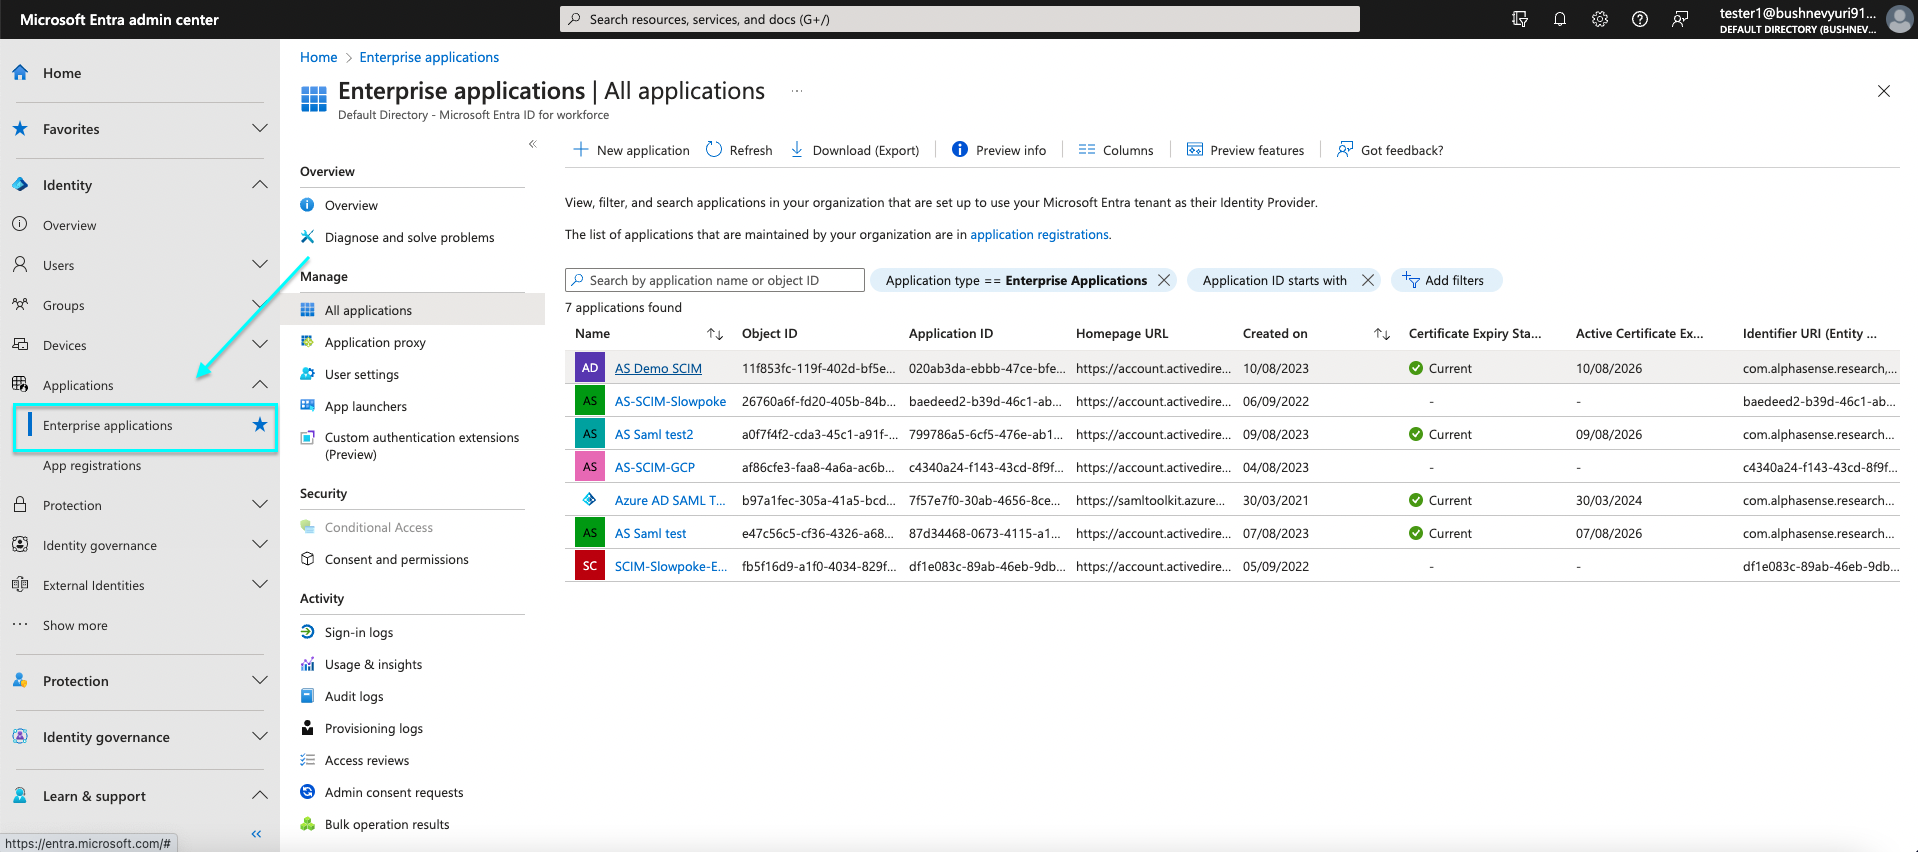
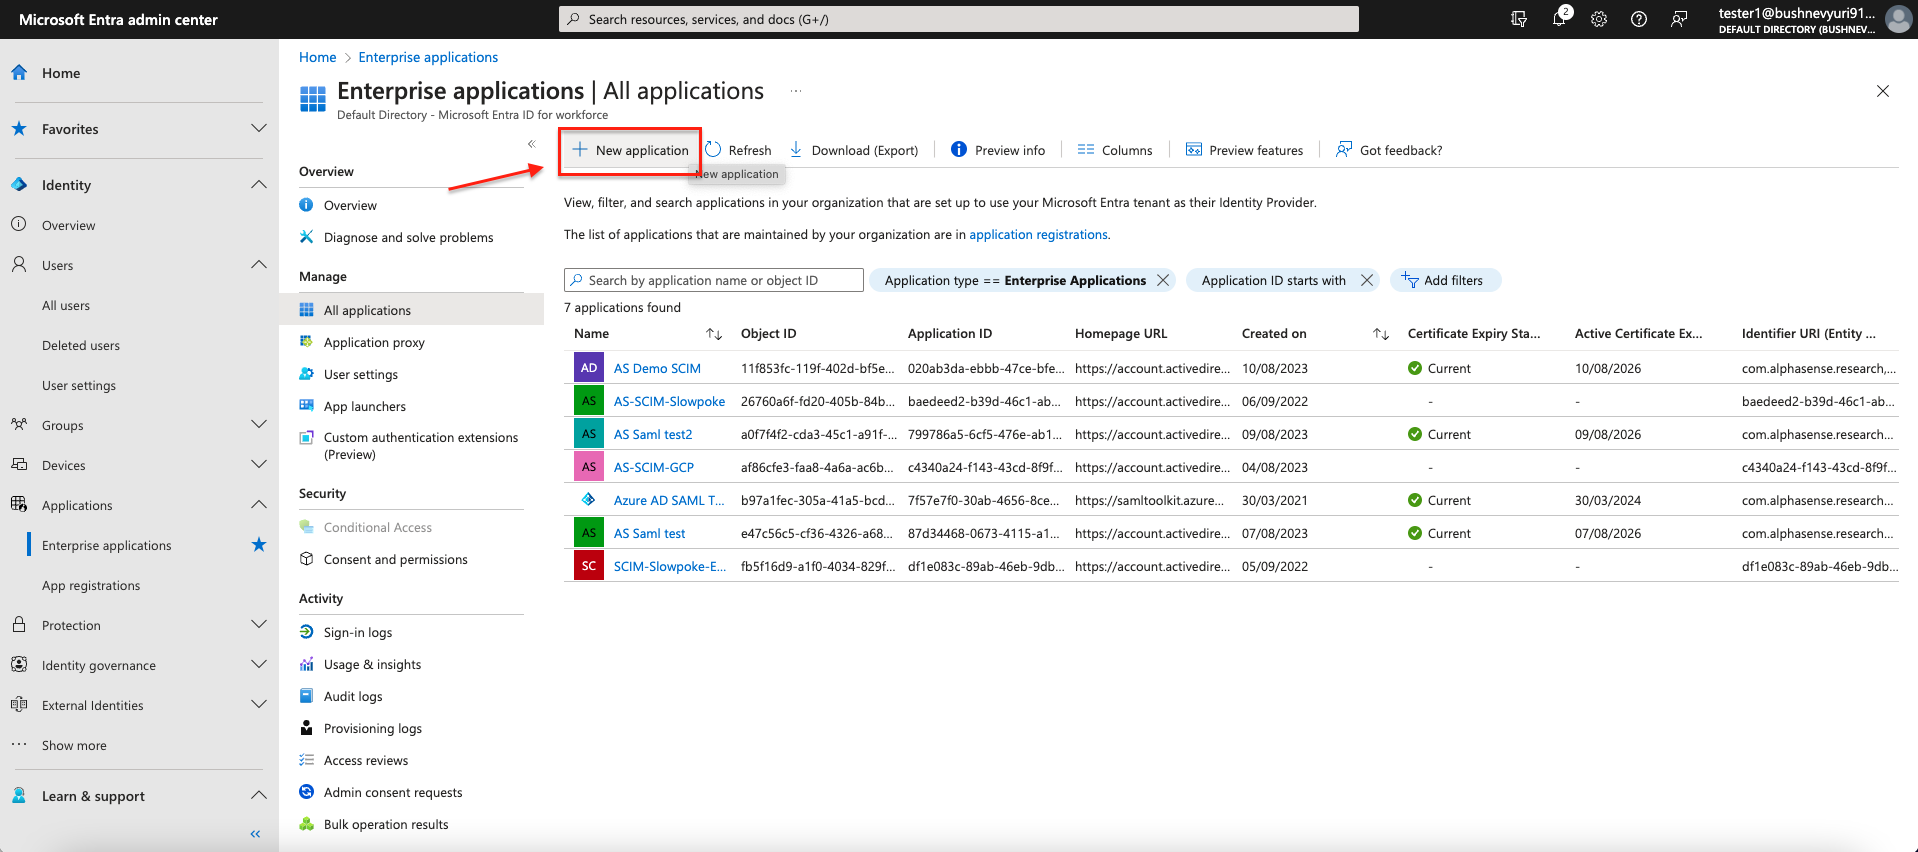
- Create new application by New application → Create your own application:
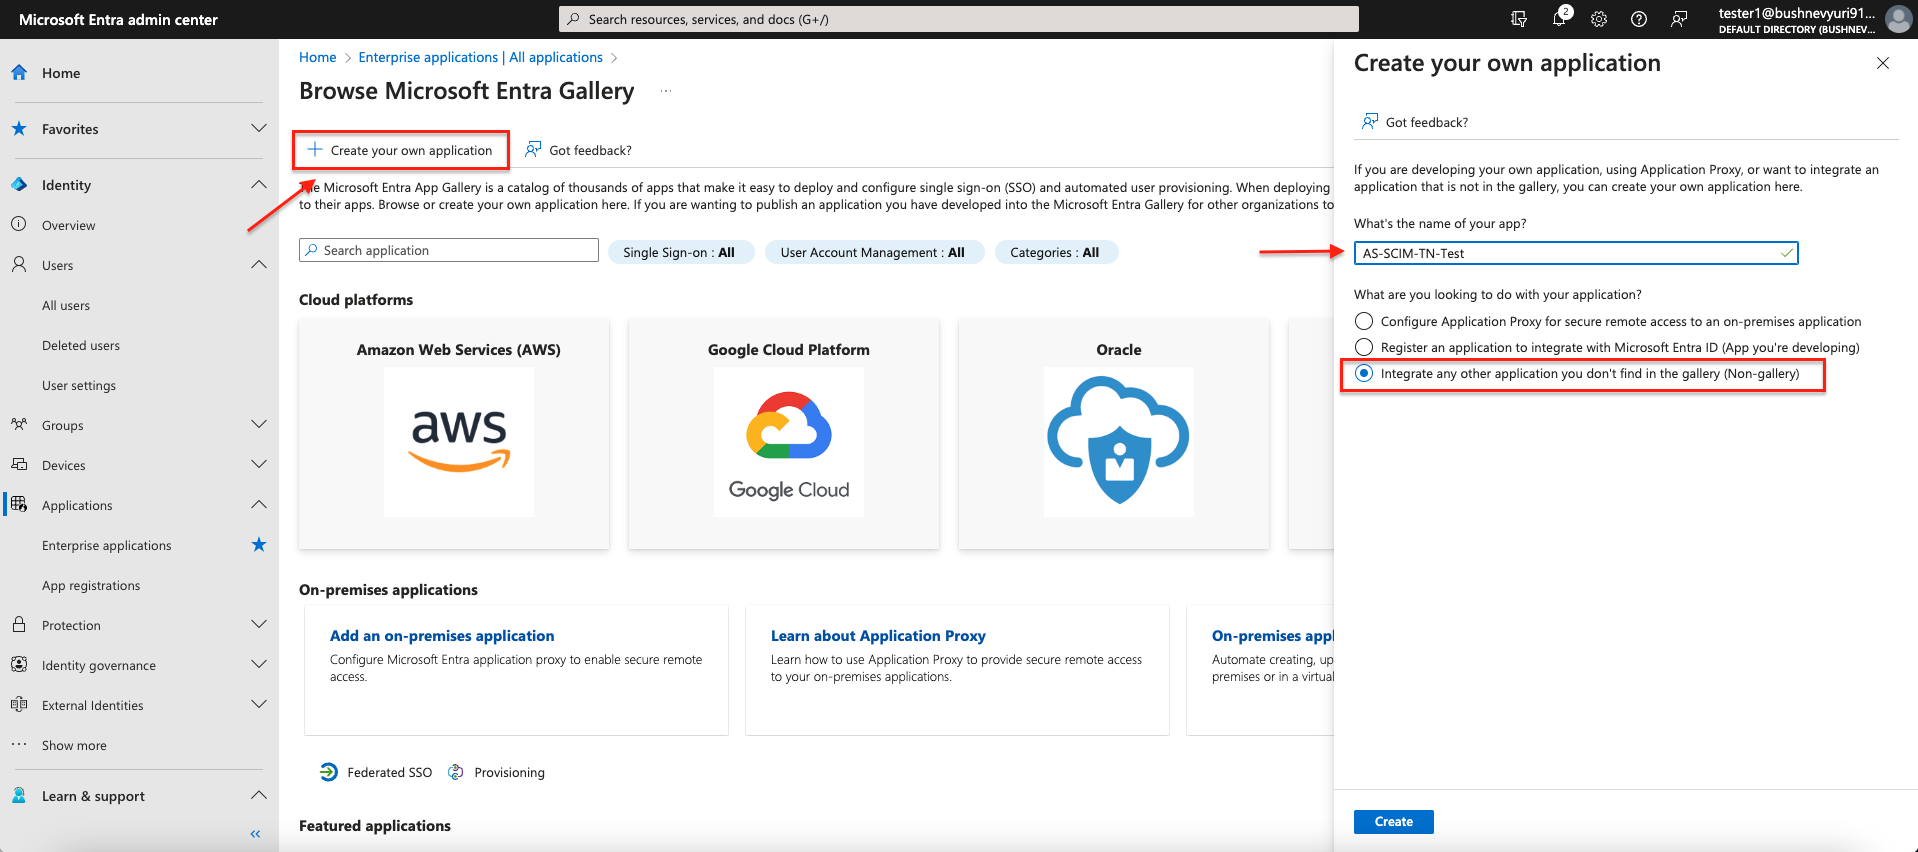
- Fill in the name and select option “ Integrate any other application you don’t find in the
gallery (Non-gallery) ":
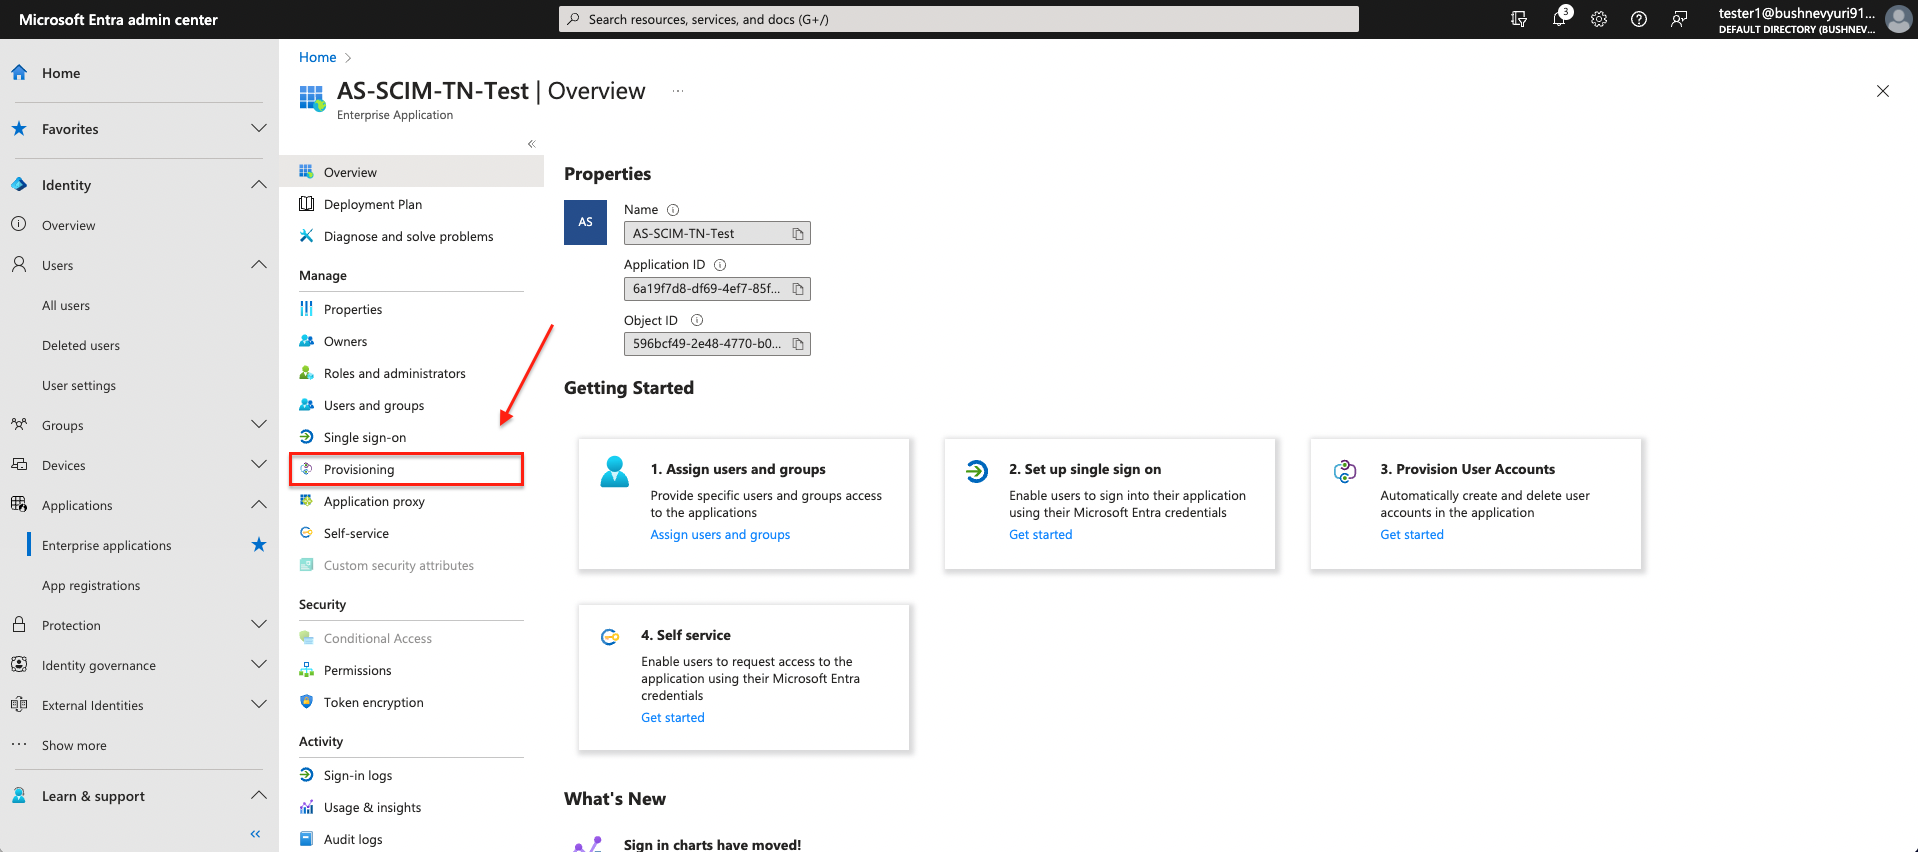
- Navigate to Provisioning of created application:
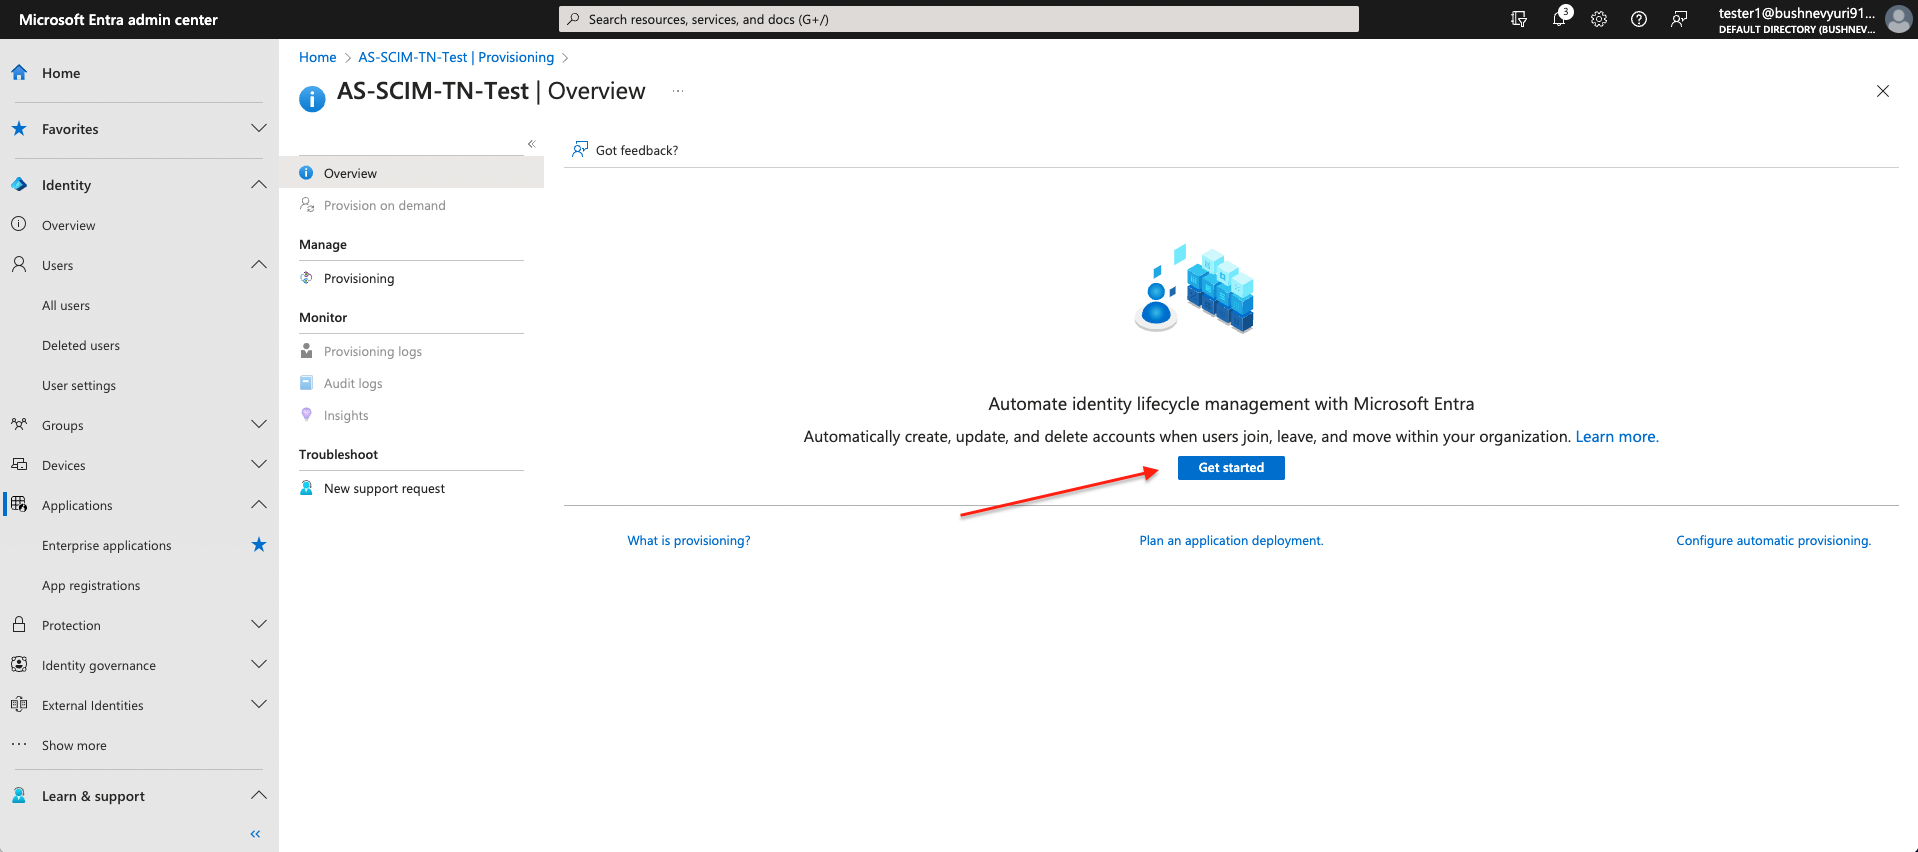
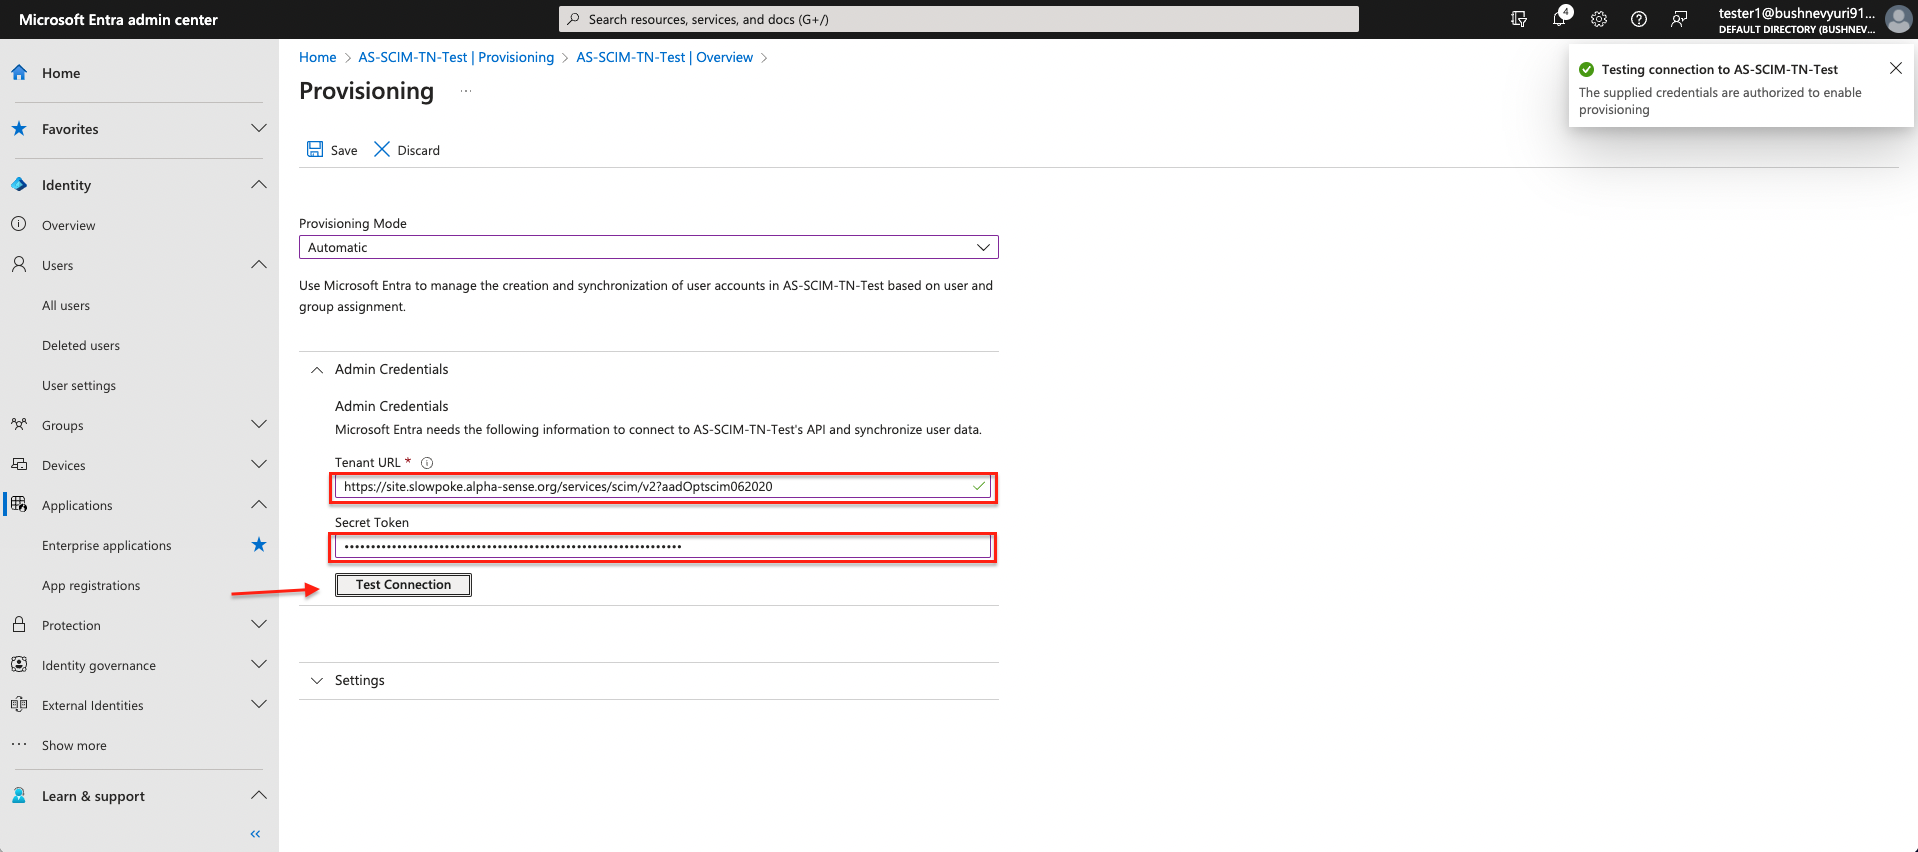
- Config provisioning and test connection:
- Provisioning Mode: Automatic.
- Tenant URL: exposed URL to SCIM service (below example is SCIM url of AlphaSense test
environment):
- i. Format: {domain name}/services/scim/v2
- Secret Token: API key of SCIM service: Retrieve Your SCIM API Key
- Click on Test Connection to test connection to service.
3. Create new user
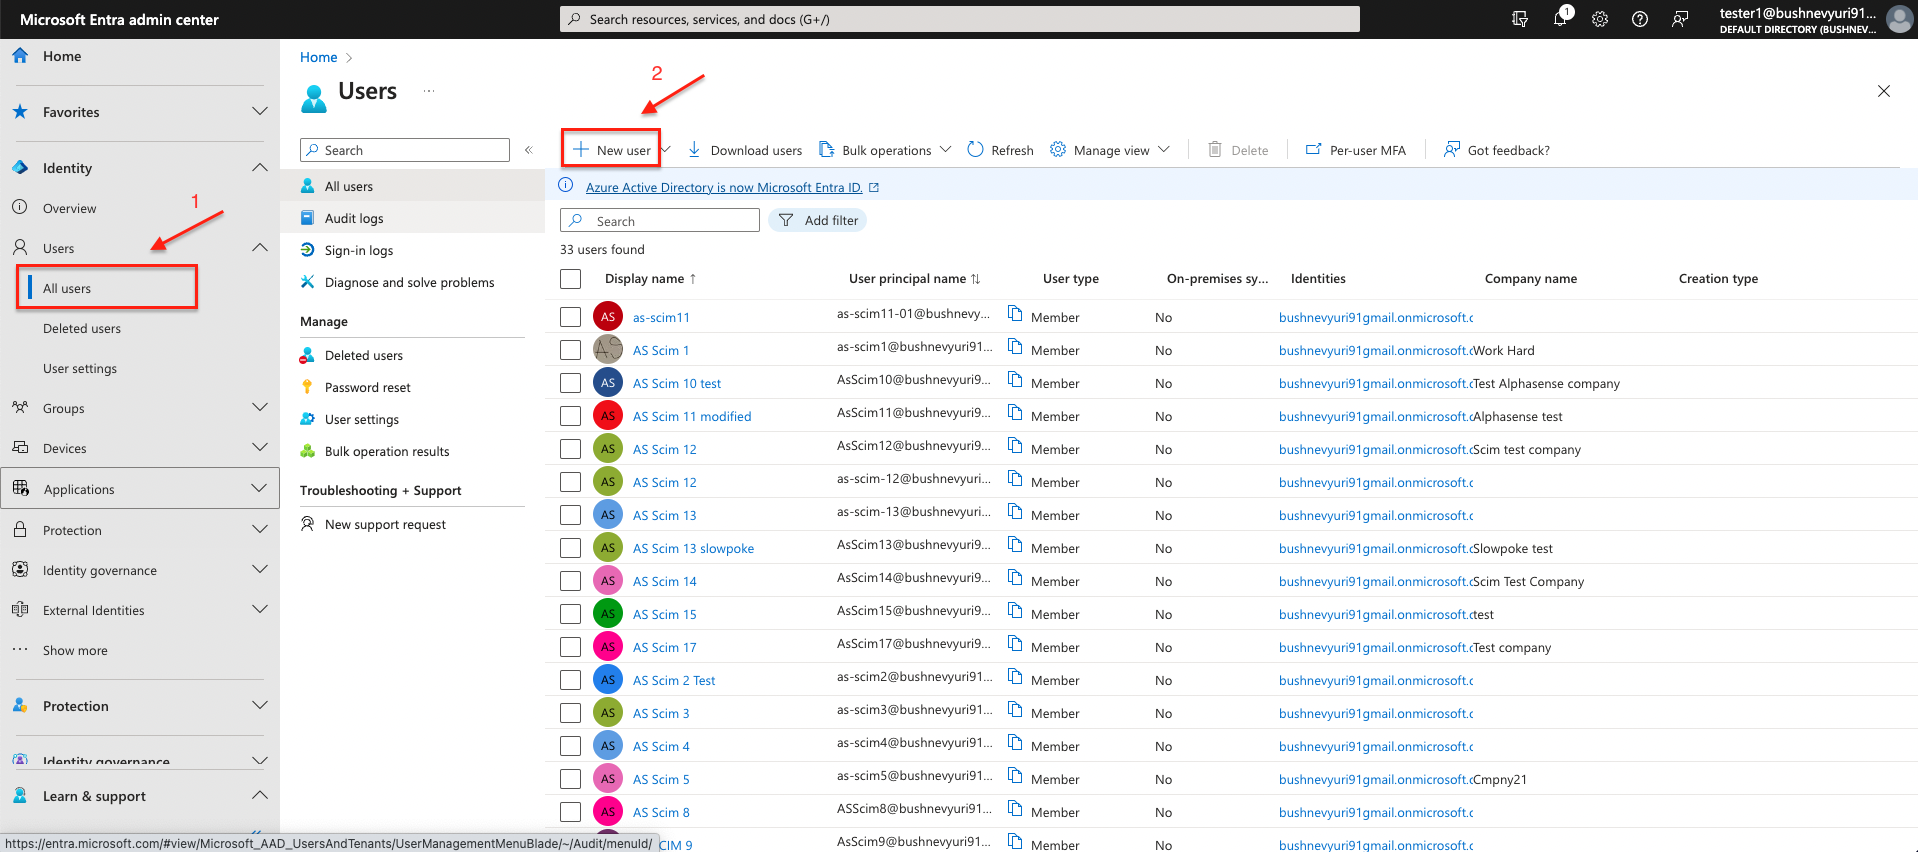
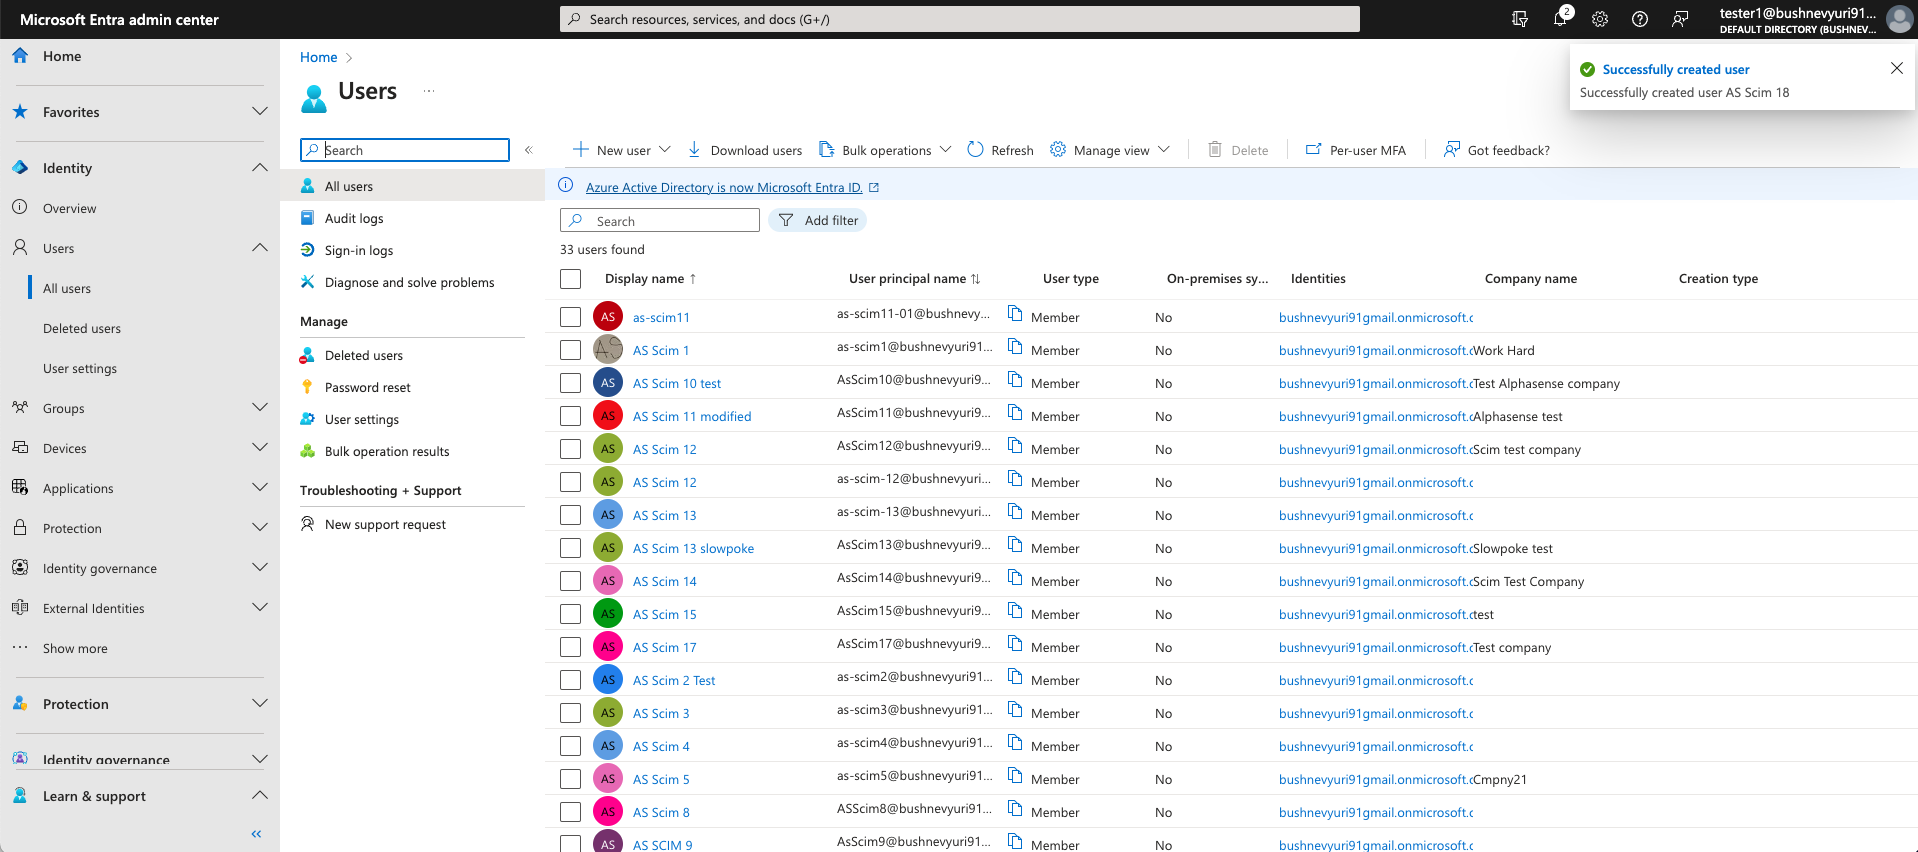
- Go to Users → All users to see all available users and click on New user → Create
new user:
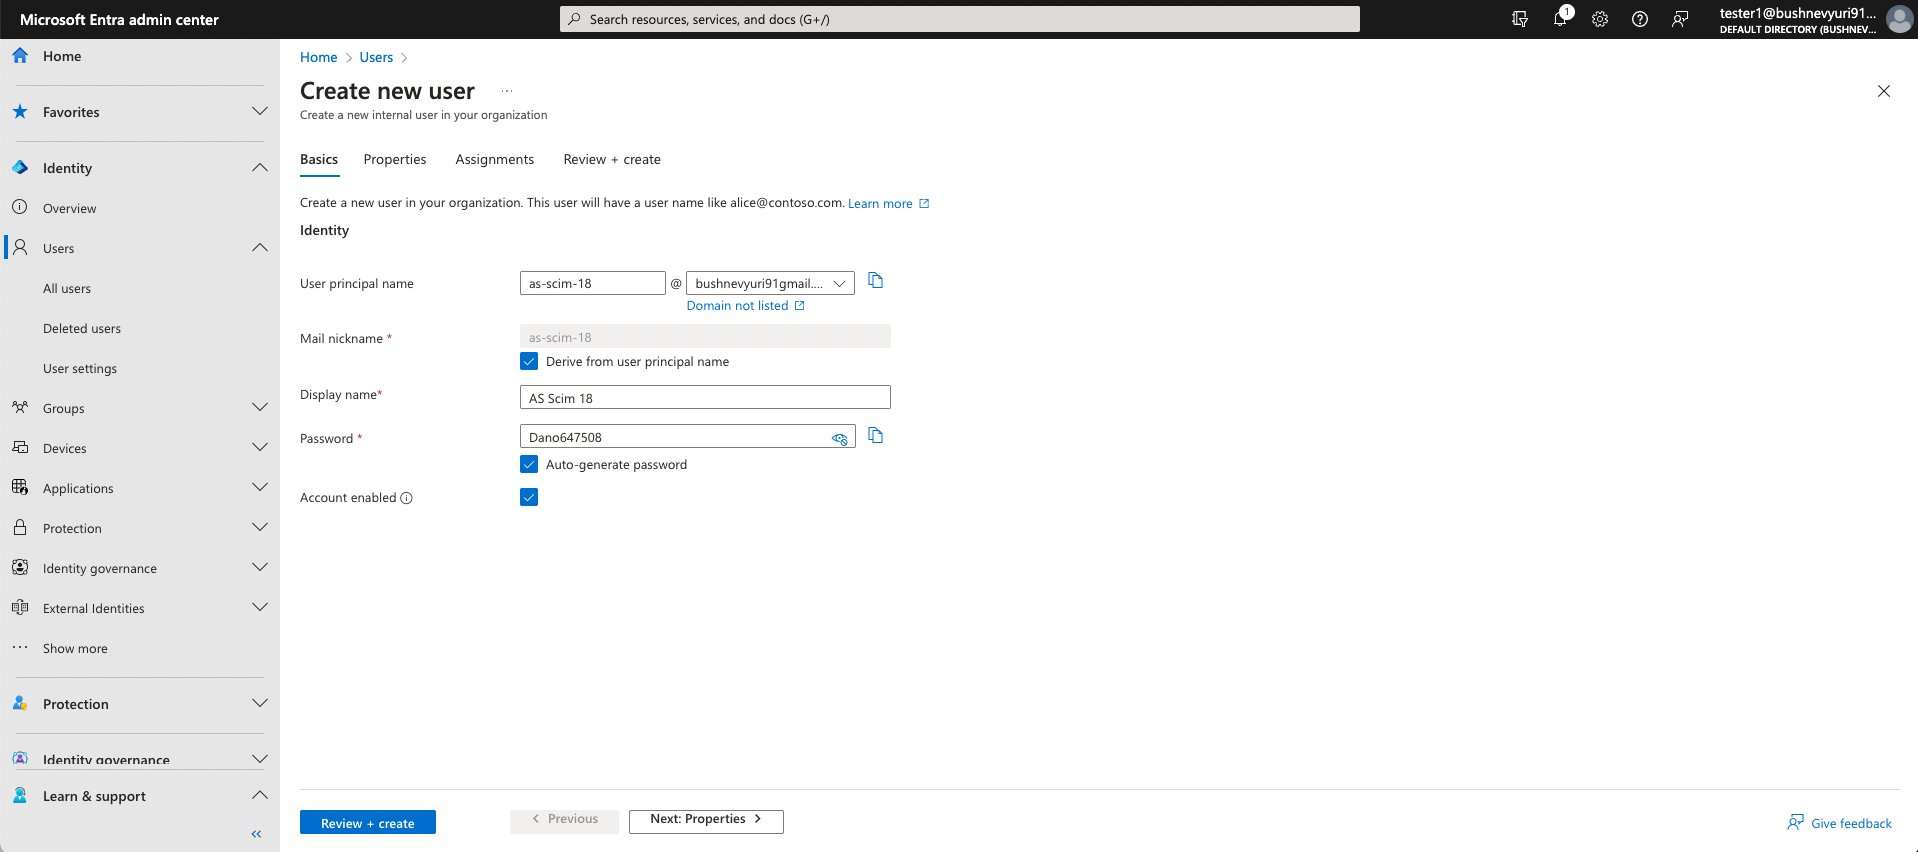
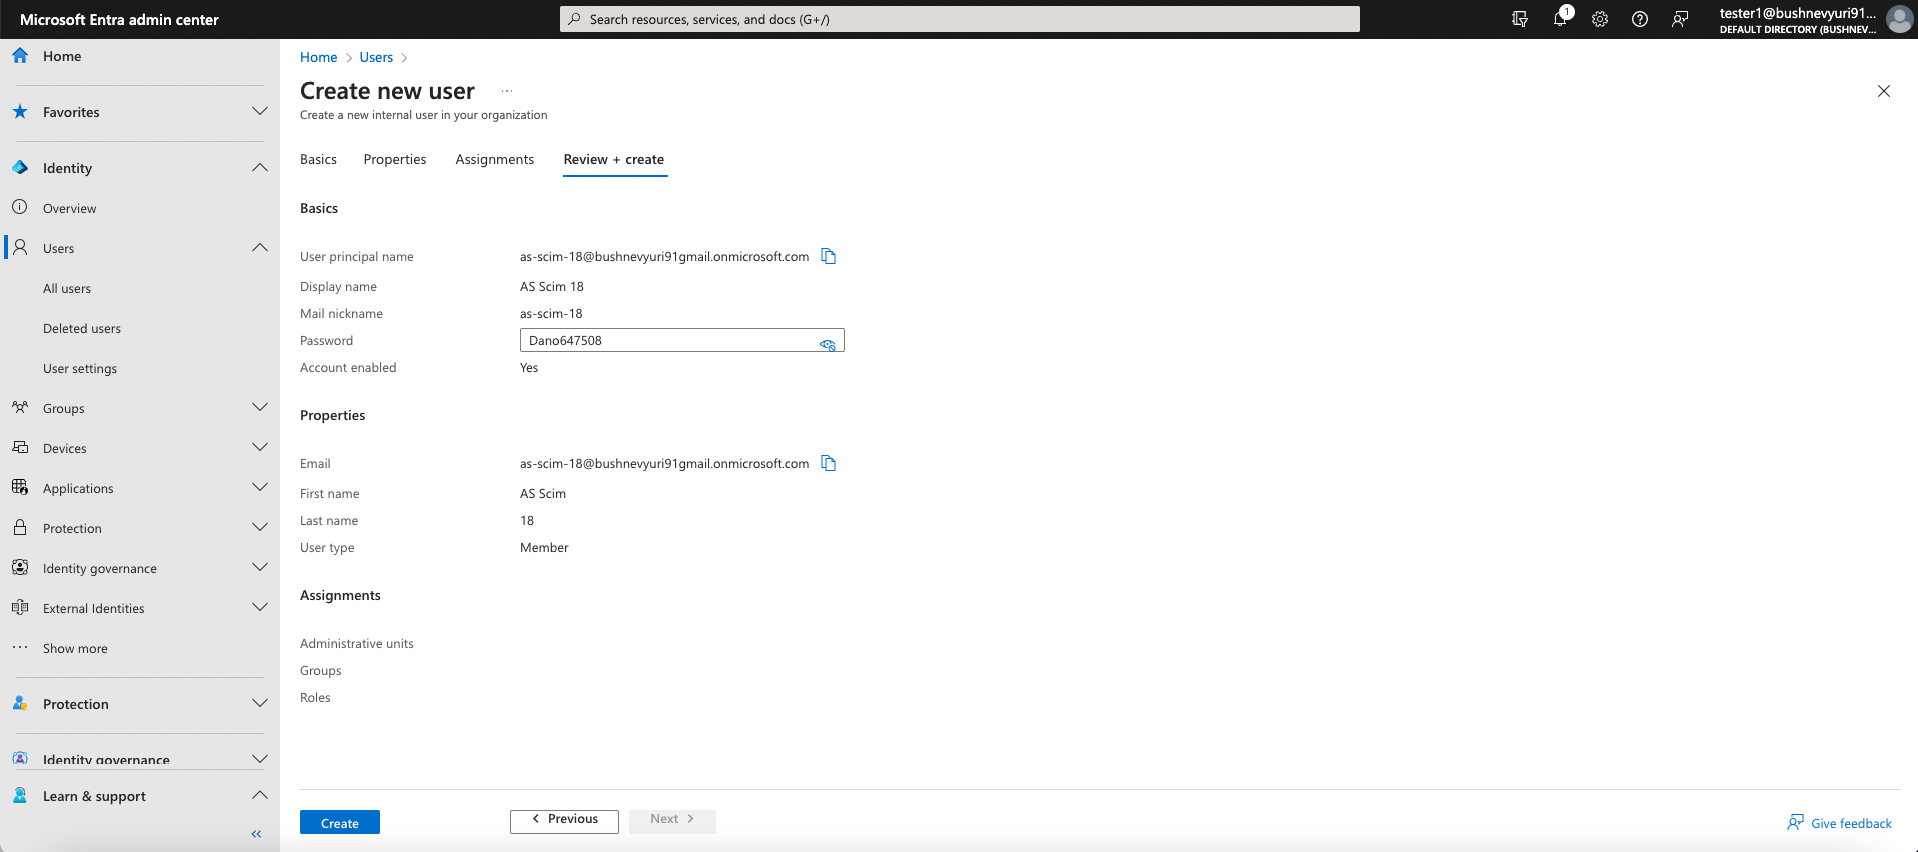
- Create new user - Basics:
- Principal name: should be unique within the system. This will be used as user id to log into your deployed AlphaSense system.
- Mail nickname: can derive it from user principal name.
- Display name: the name displayed in Microsoft Entra.
- Password: optionally check Auto-generate password for random password provided.
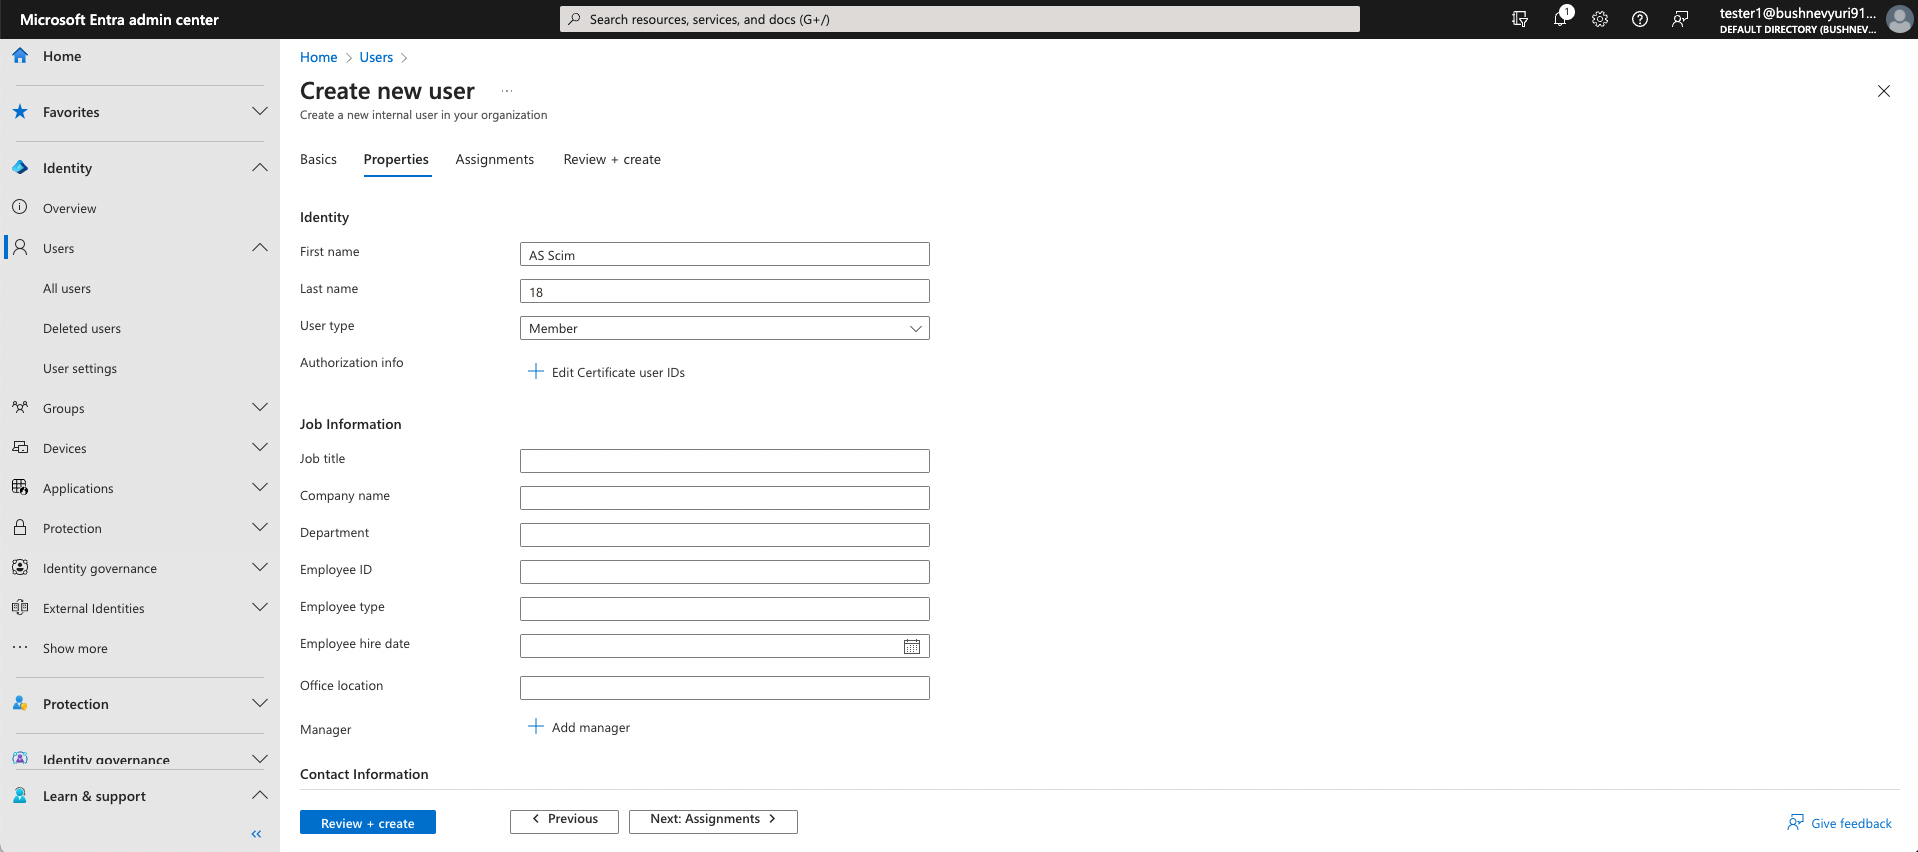
- Create new user - Properties: a. Fill in any details that needed for your system that will be
synced to your deployed application. b. In below screenshots, First name, Last name,
Email are provided for example.
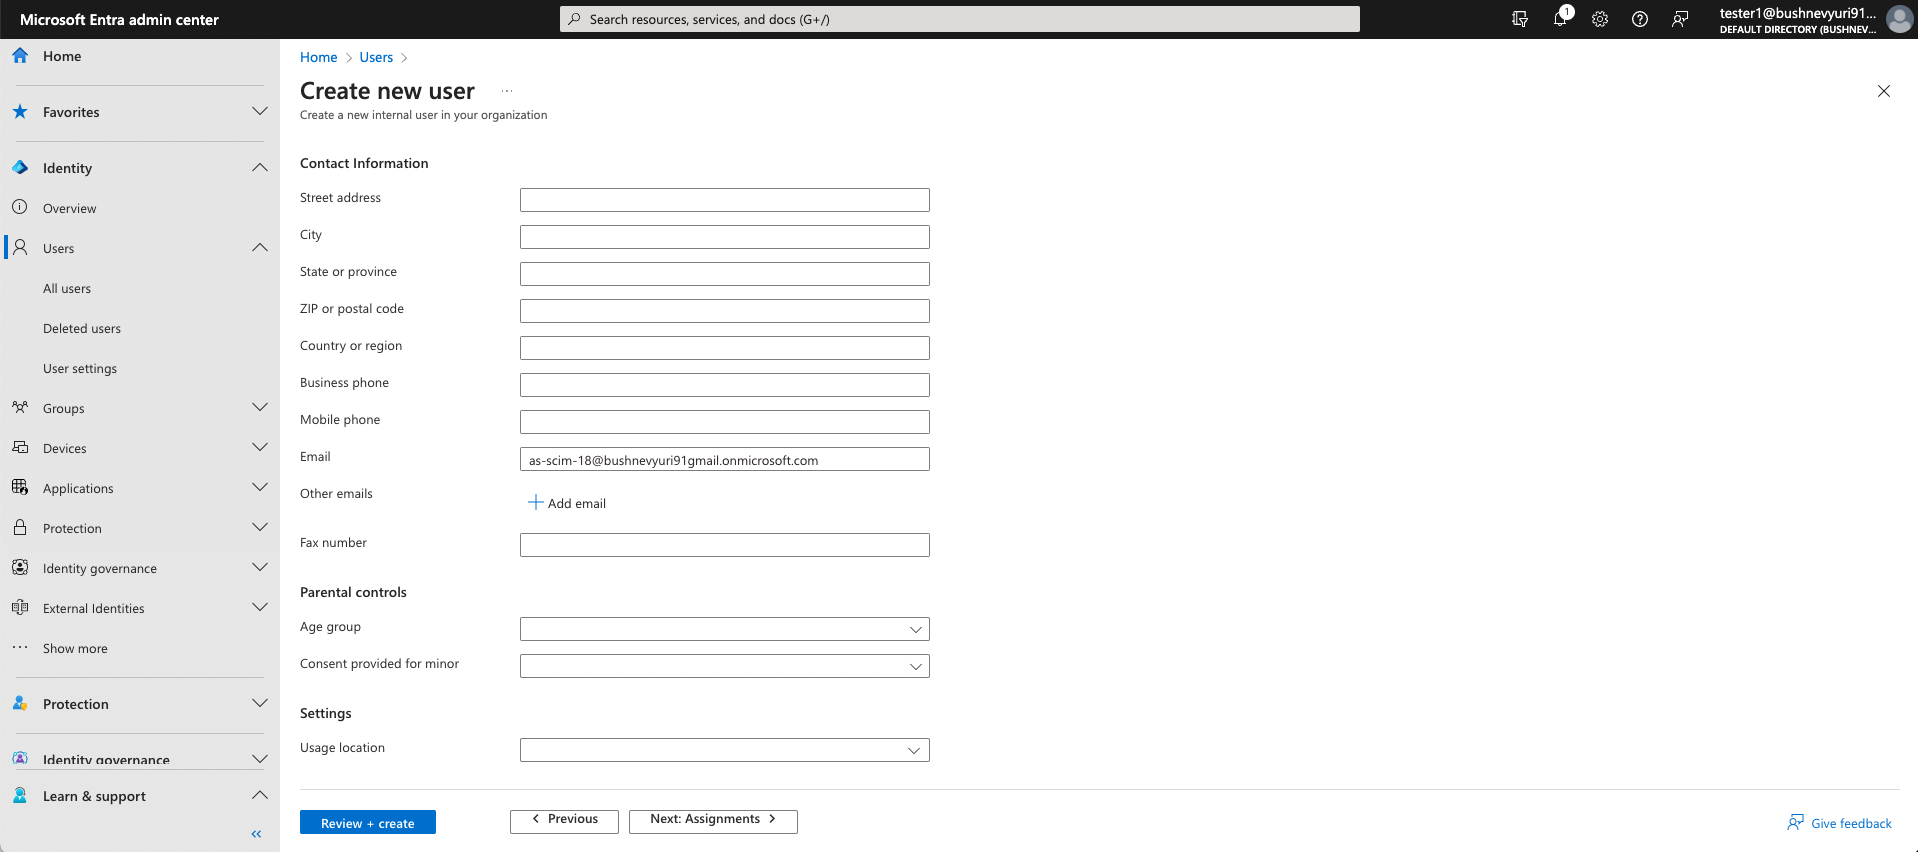
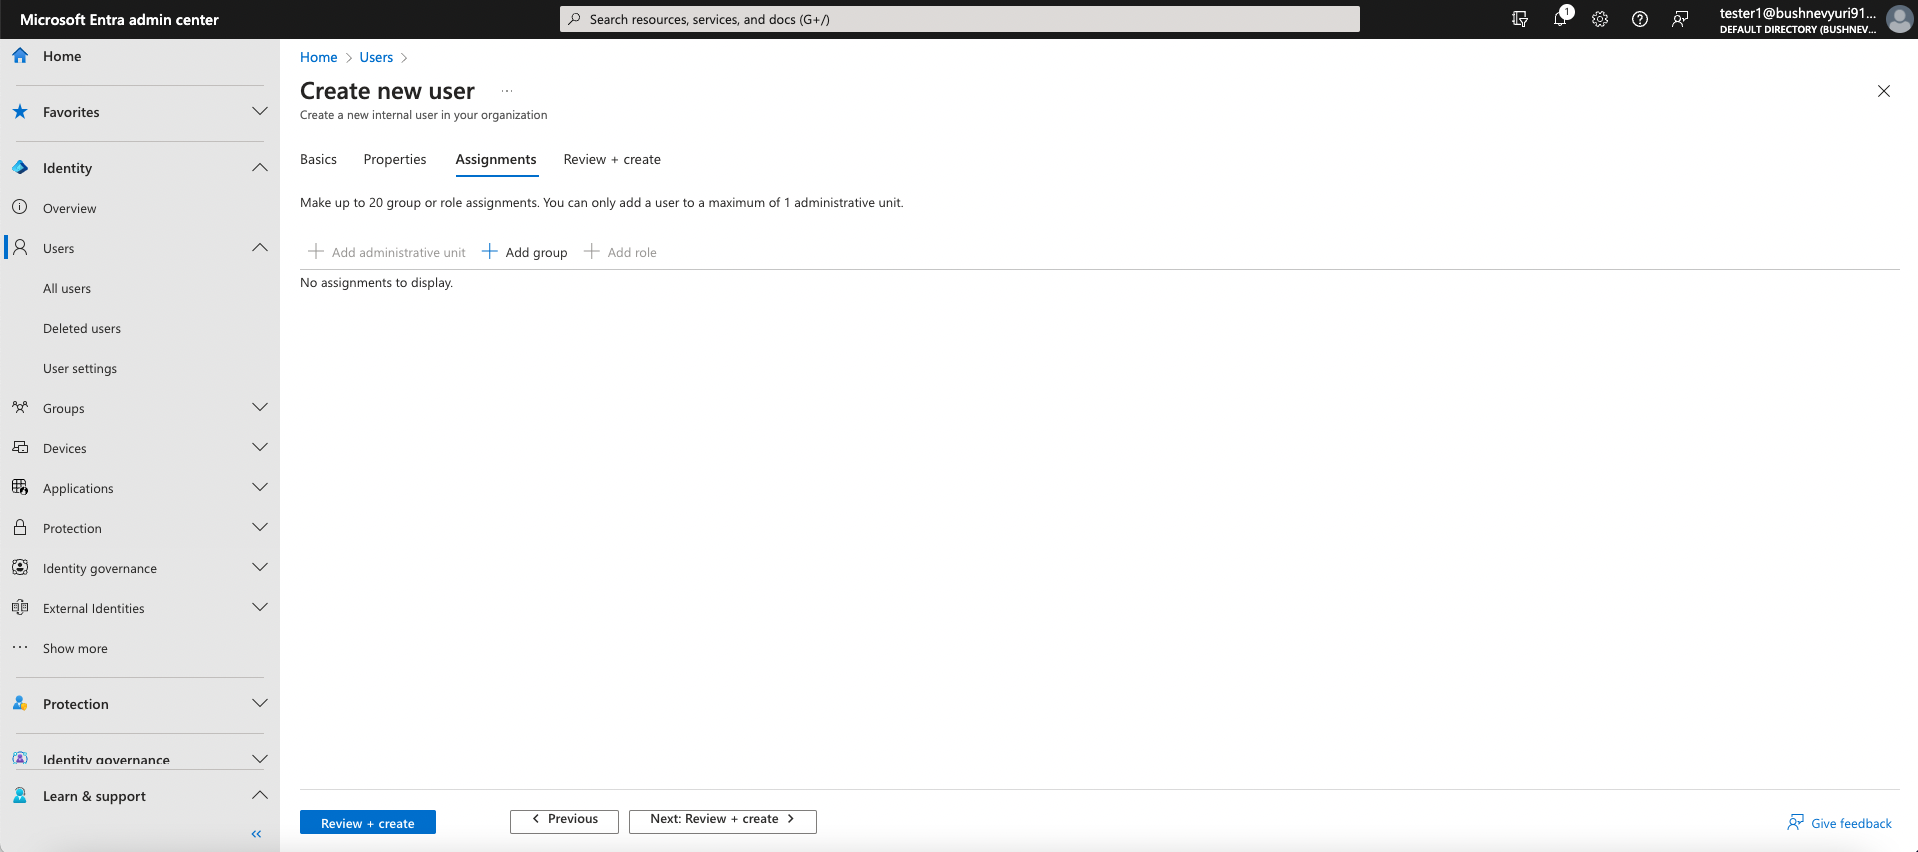
- Create new user - Assignments:
- Create new user - Review + create:
- User created successfully and will be listed in All users:
4. Assign user to you desired application
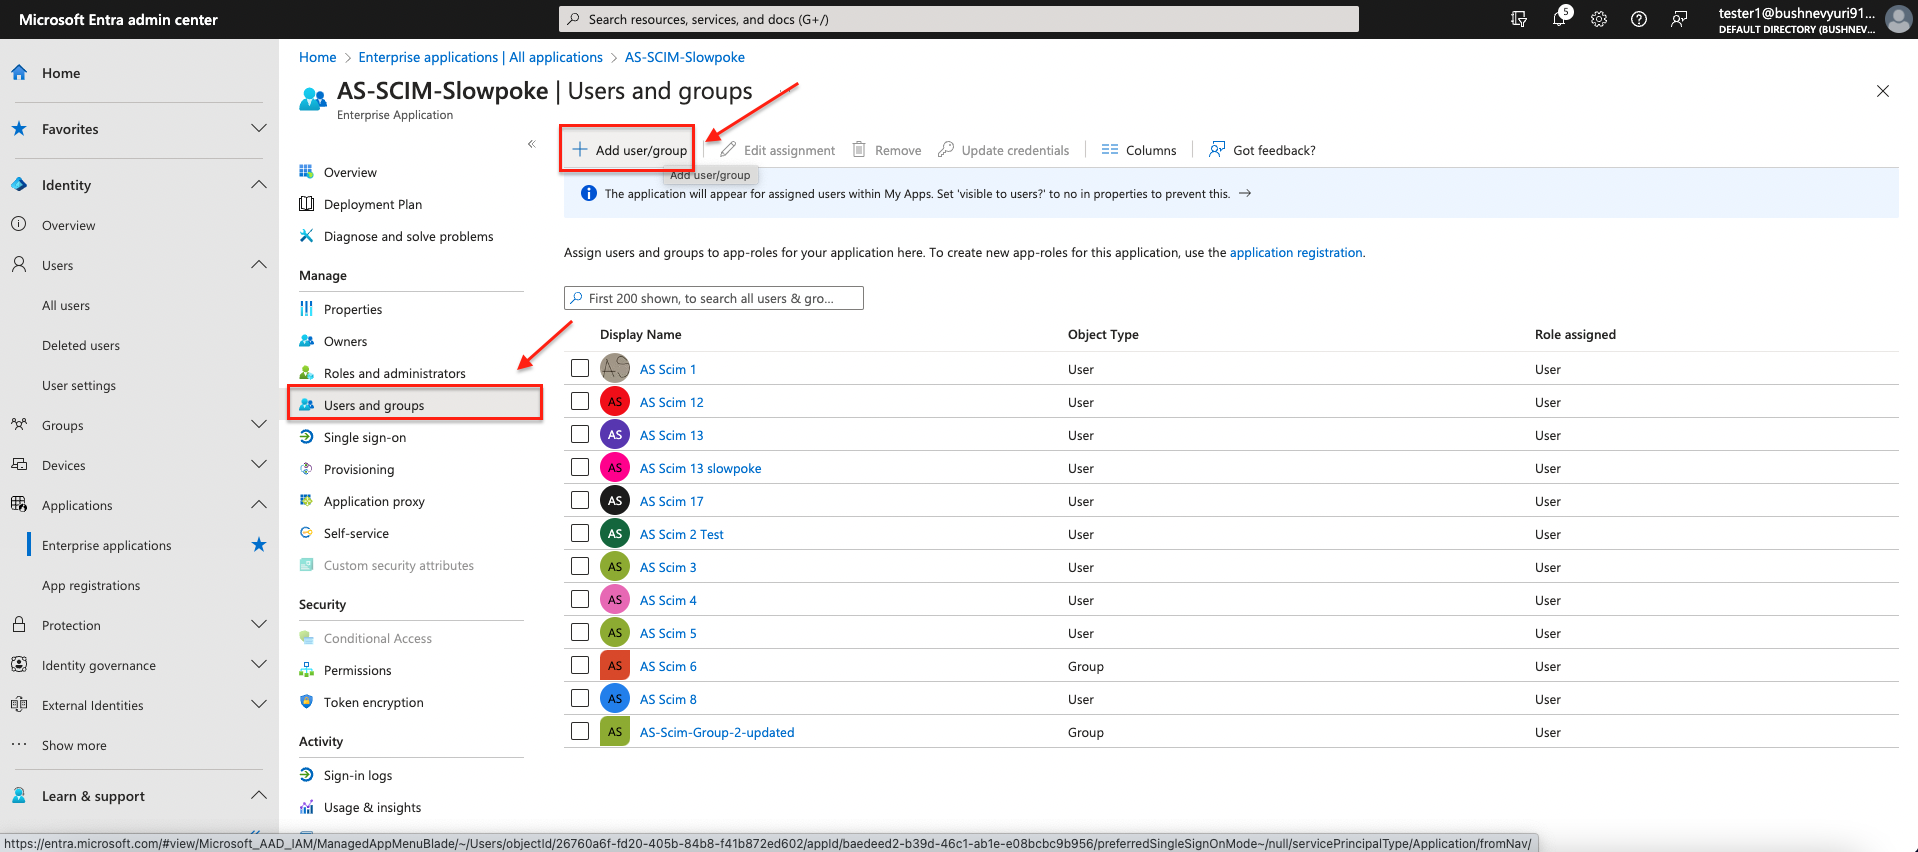
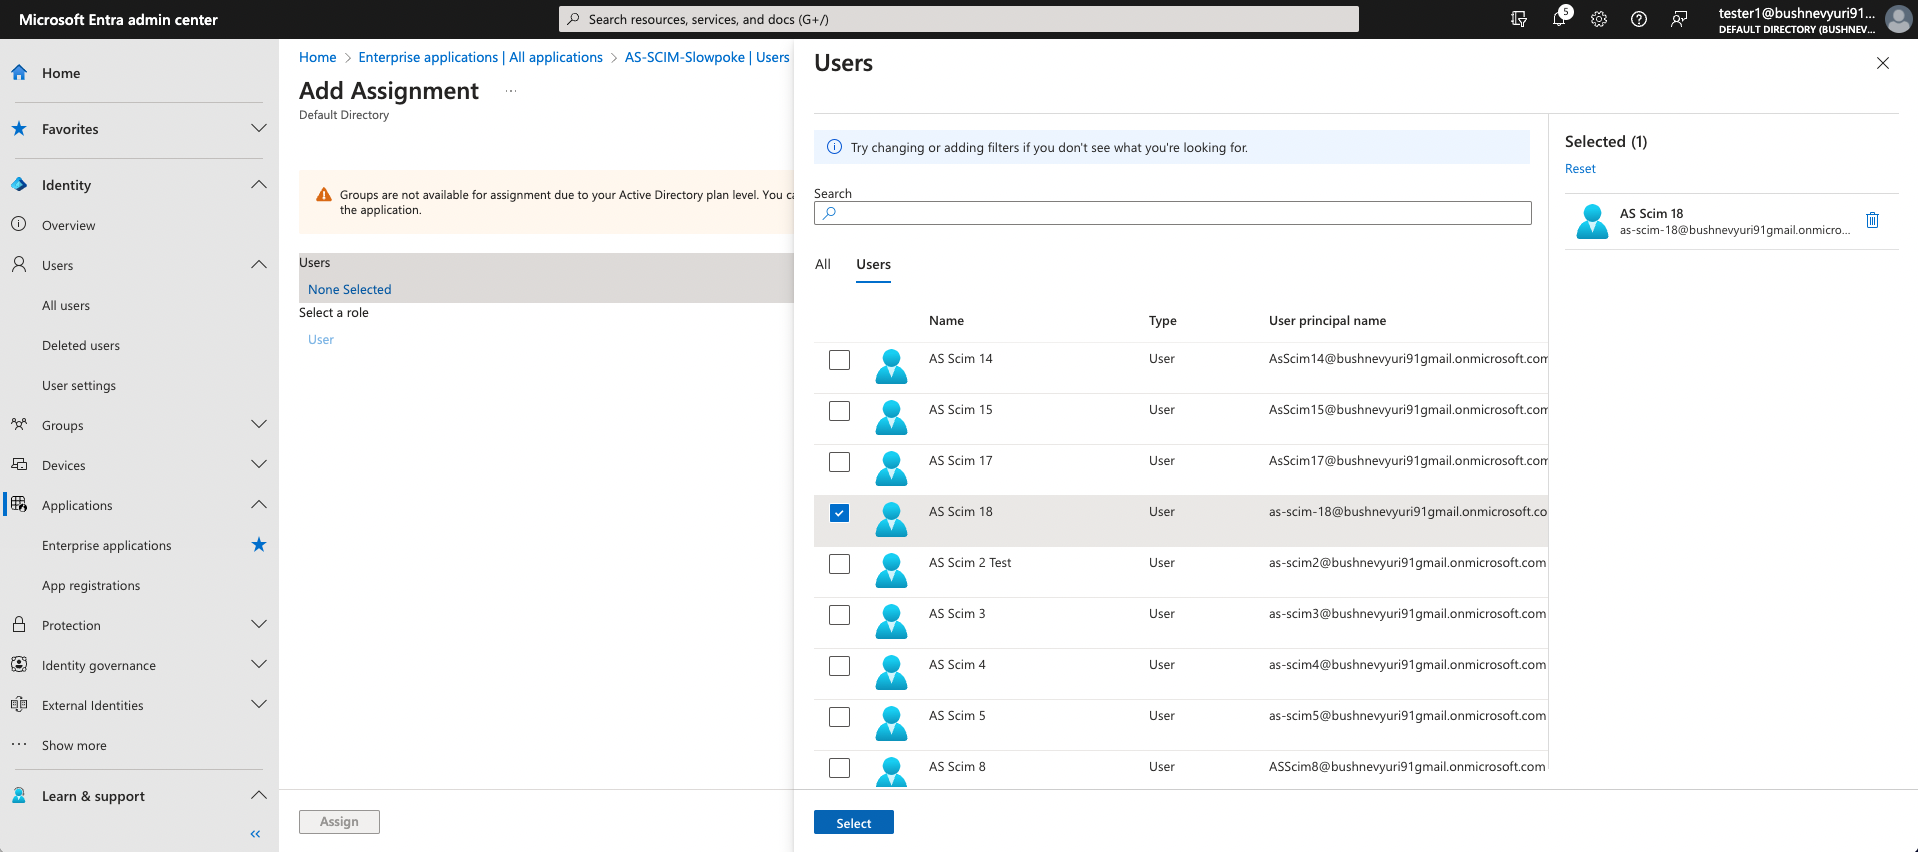
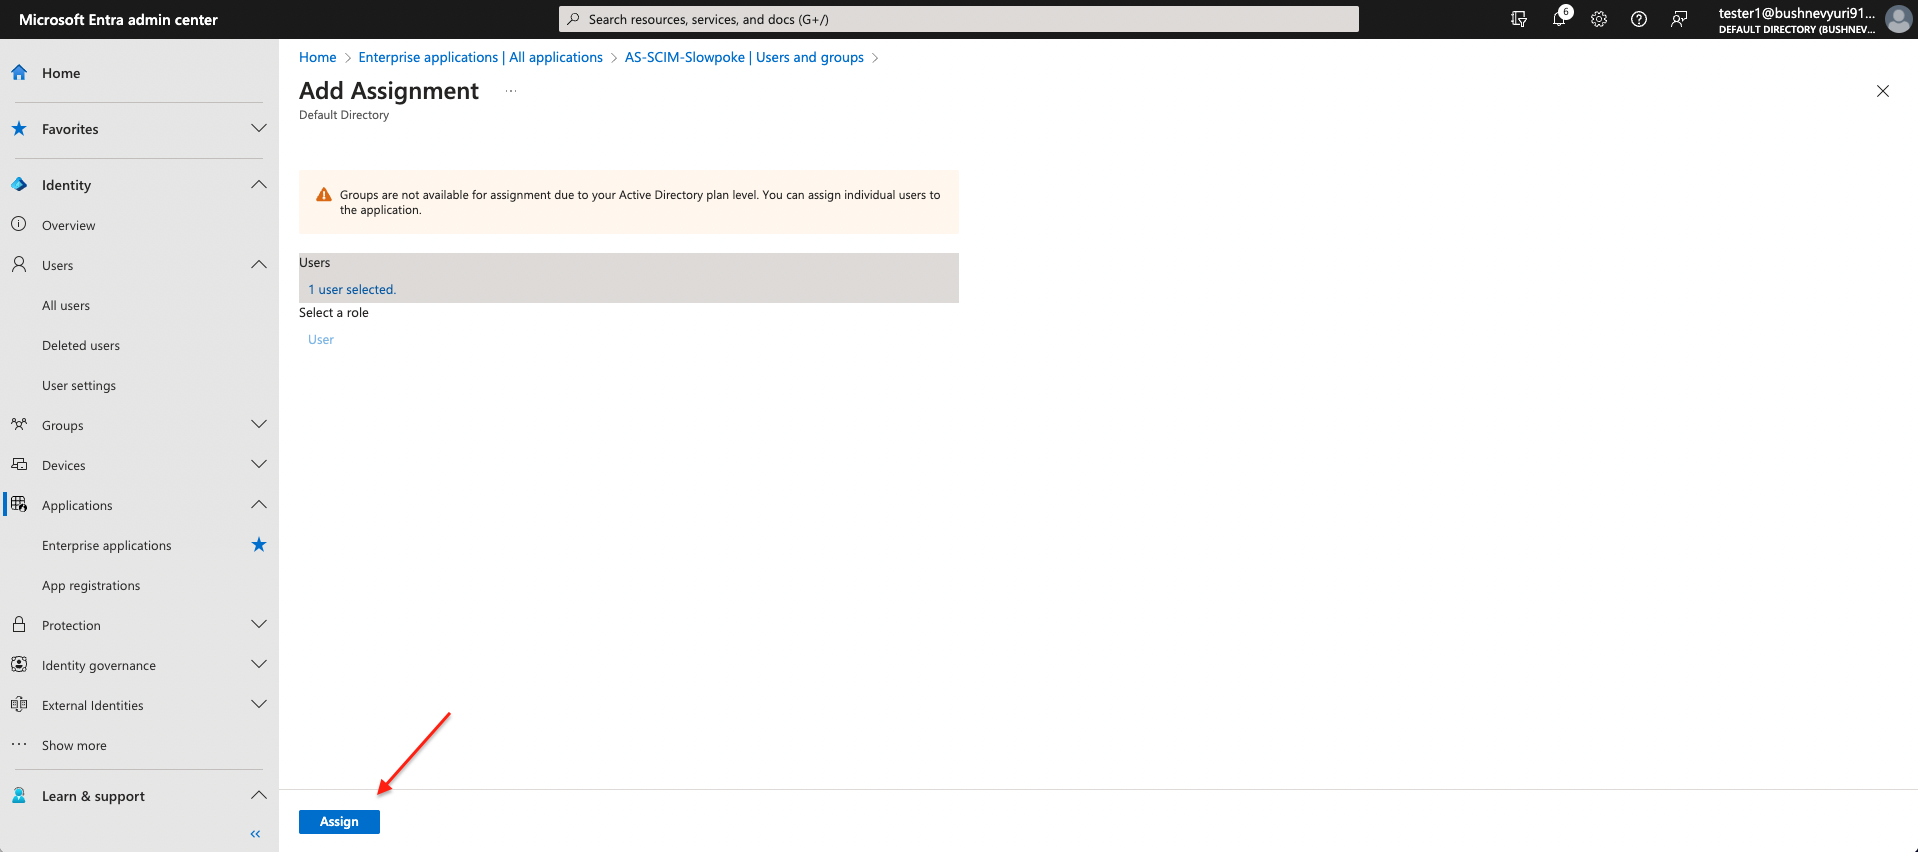
- Click on Add User/Group and select the created users:
- Now user is assigned but not yet synced to the target system (your deployed application):
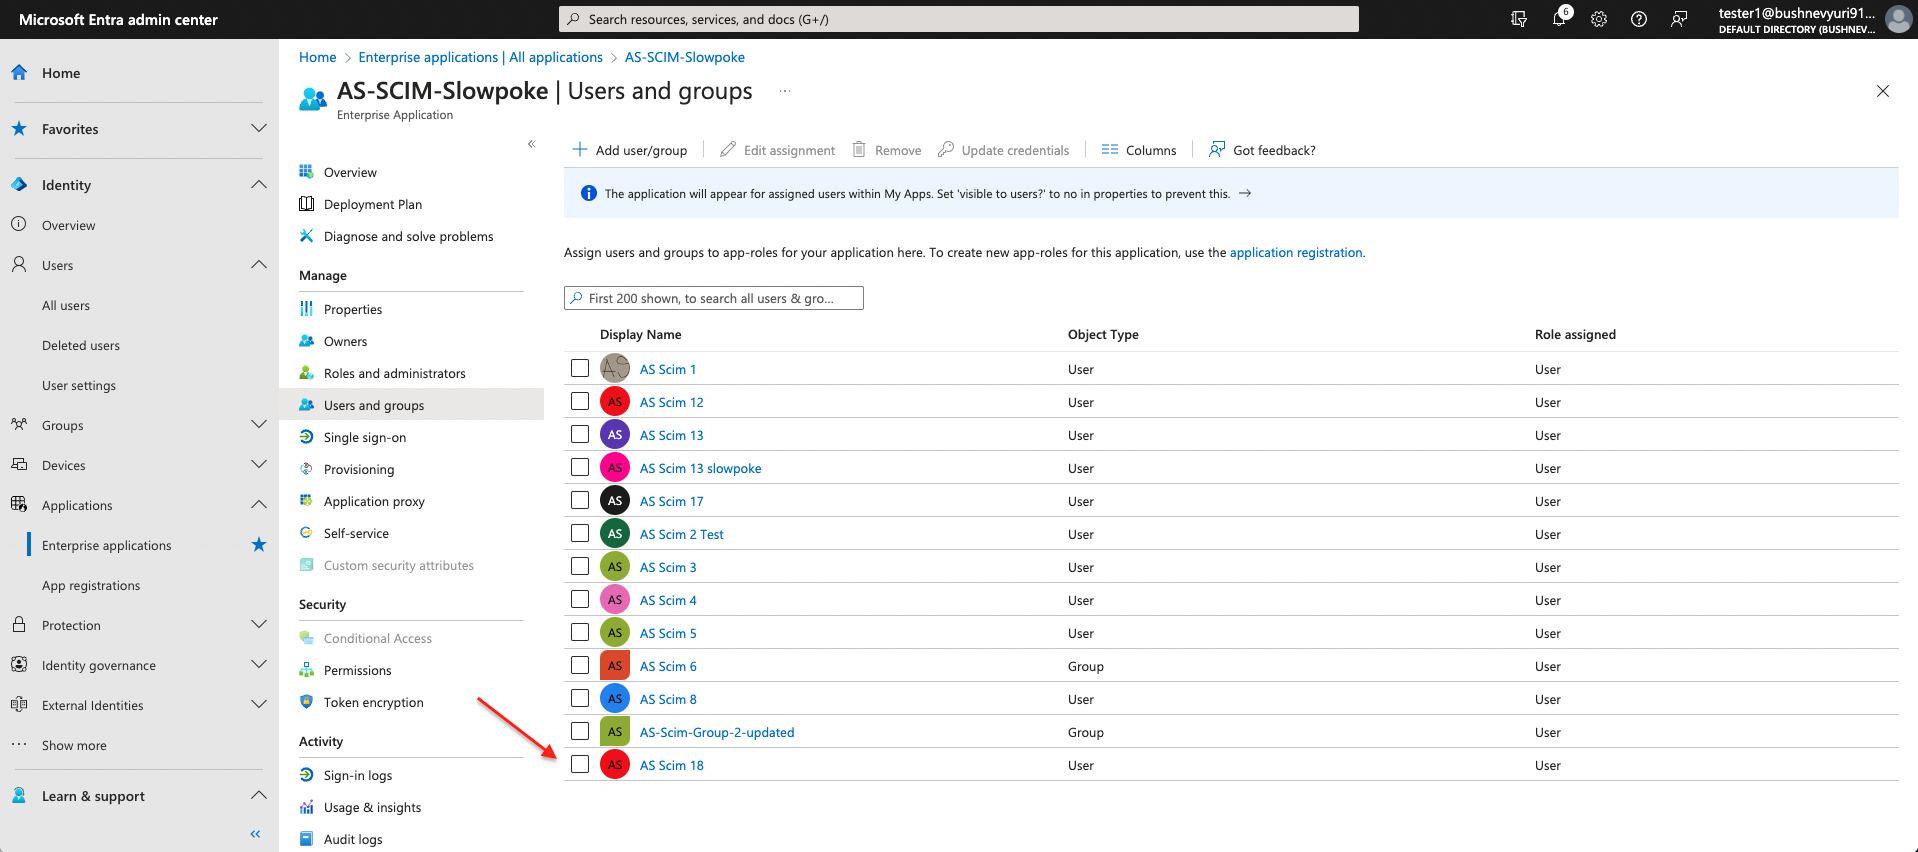
- By default, the sync will be periodically triggered every 4 hour.
5. (Optional) Manually trigger the sync for specific users
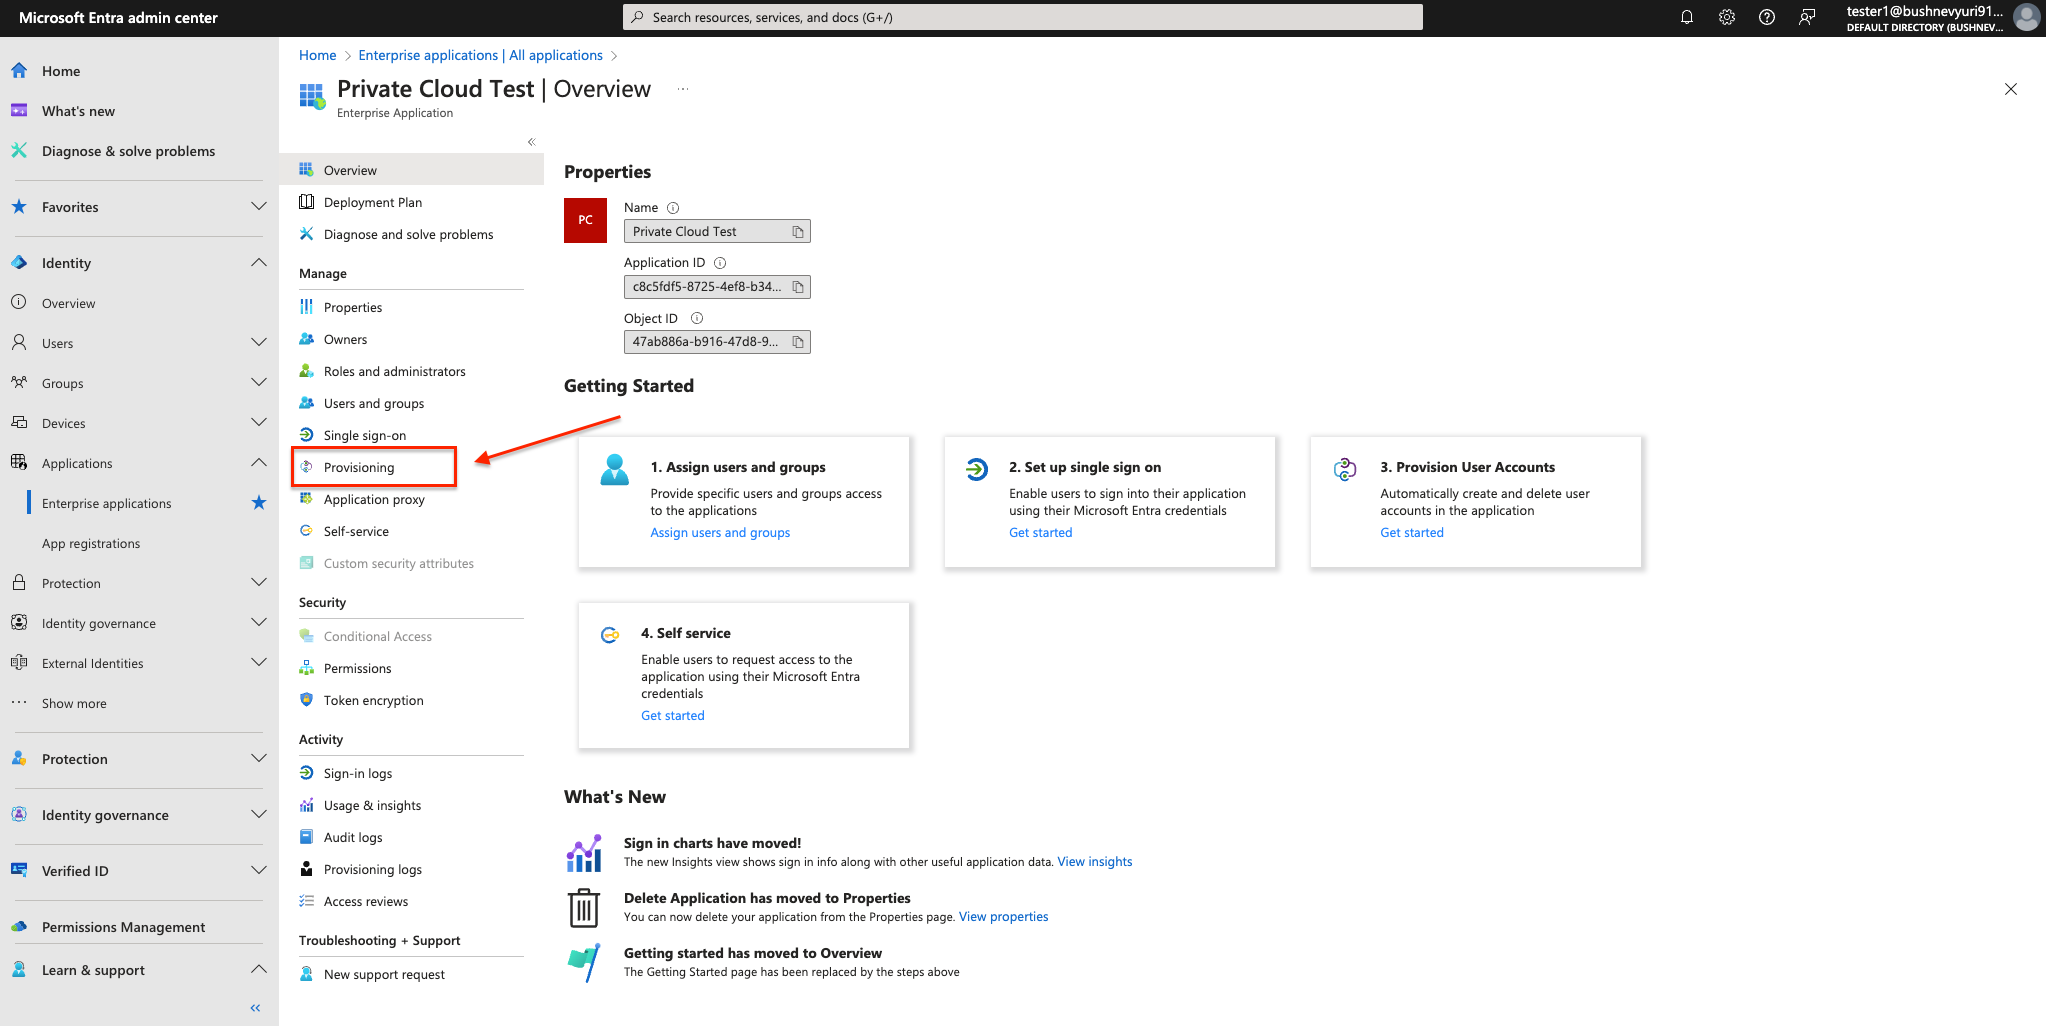
- Navigating to Provisioning section of your application:
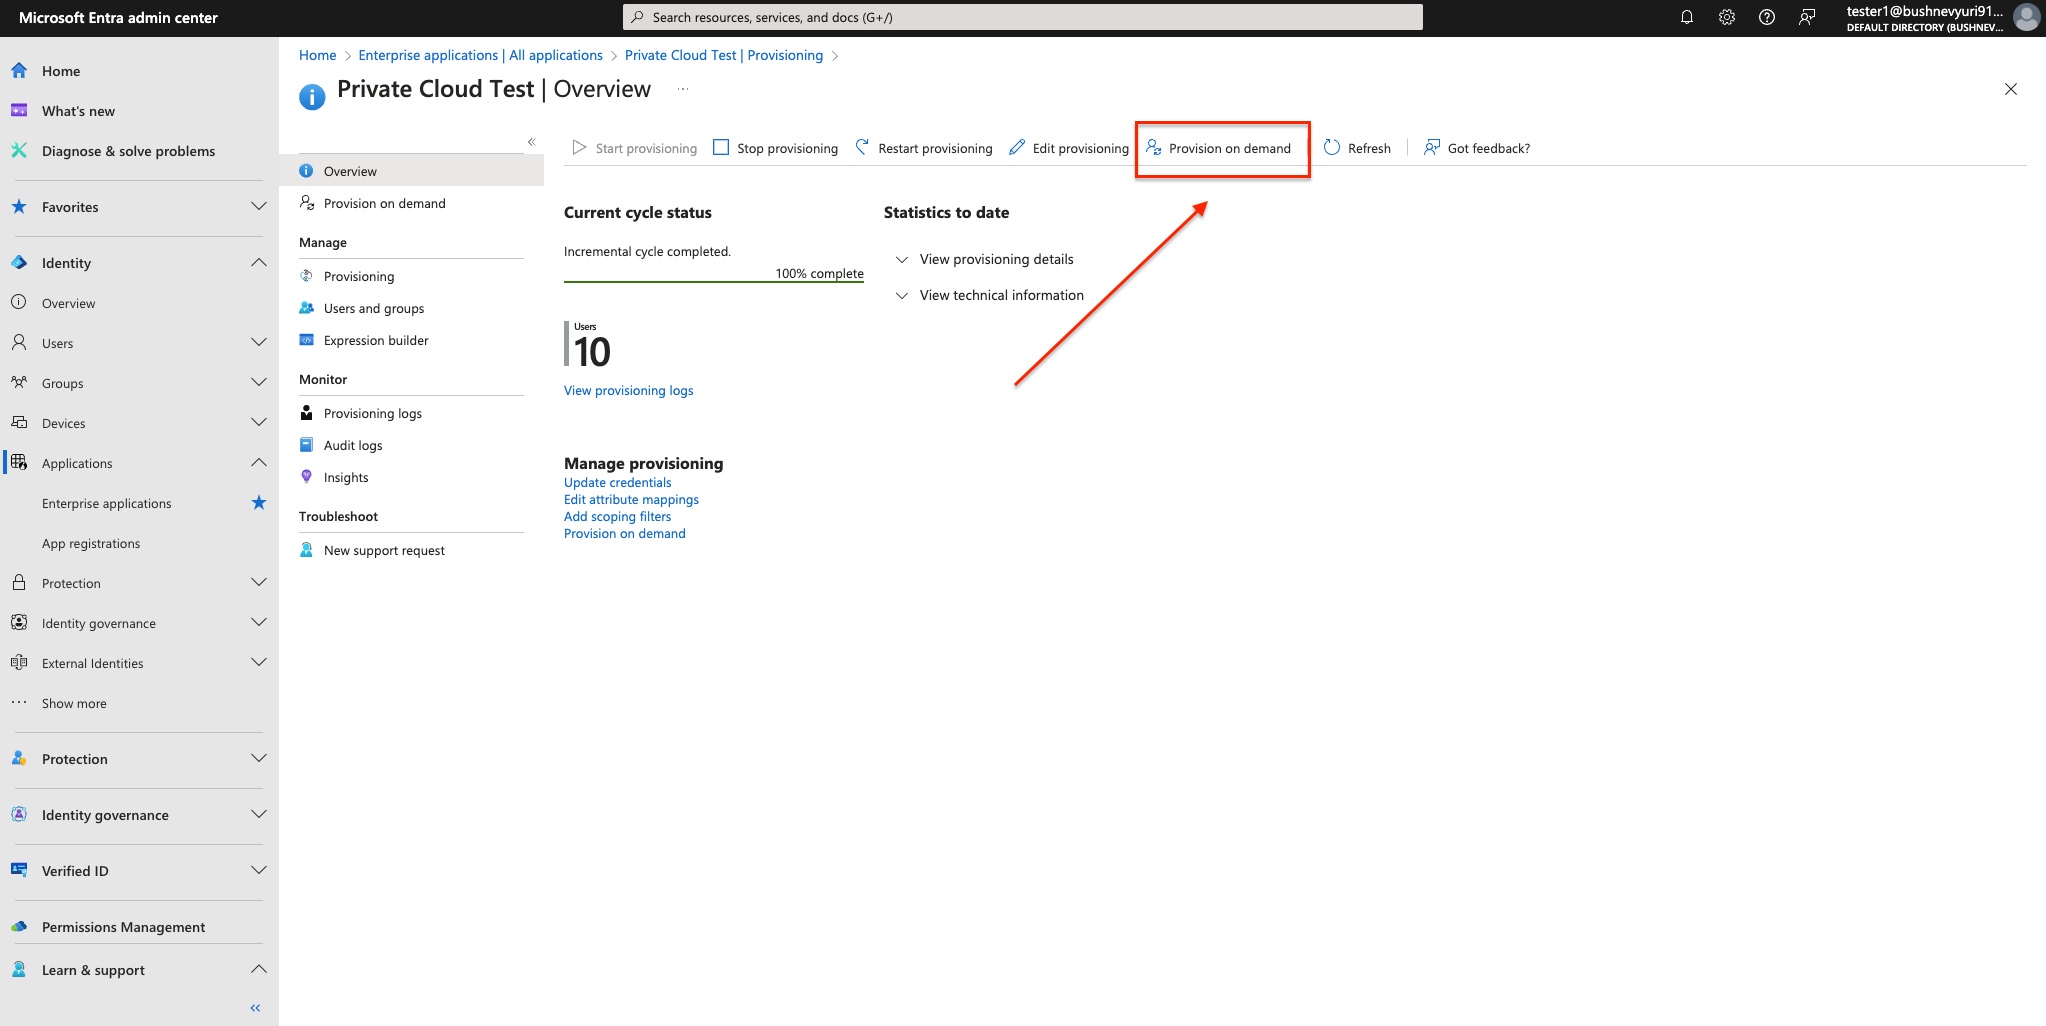
- Select Provision on demand:
- Search for your desired user and click Provision to start the process:
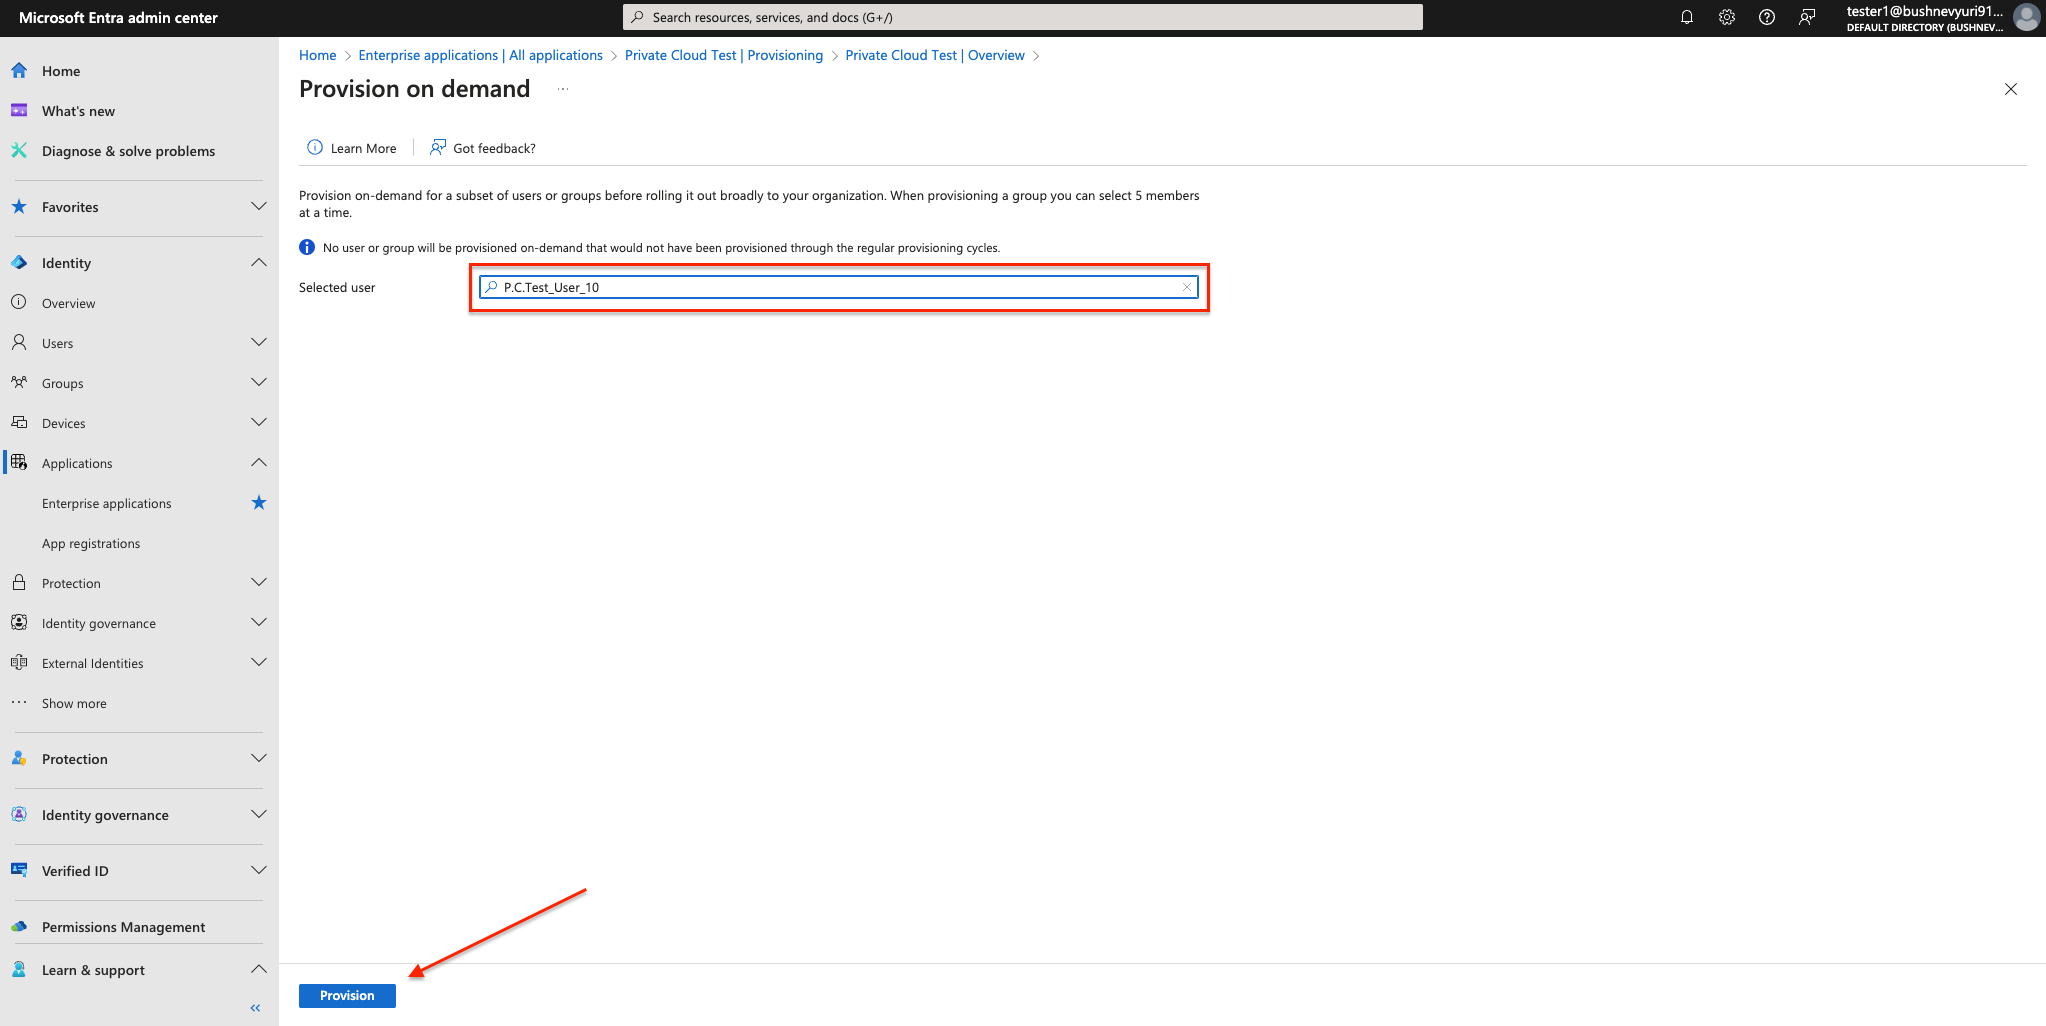
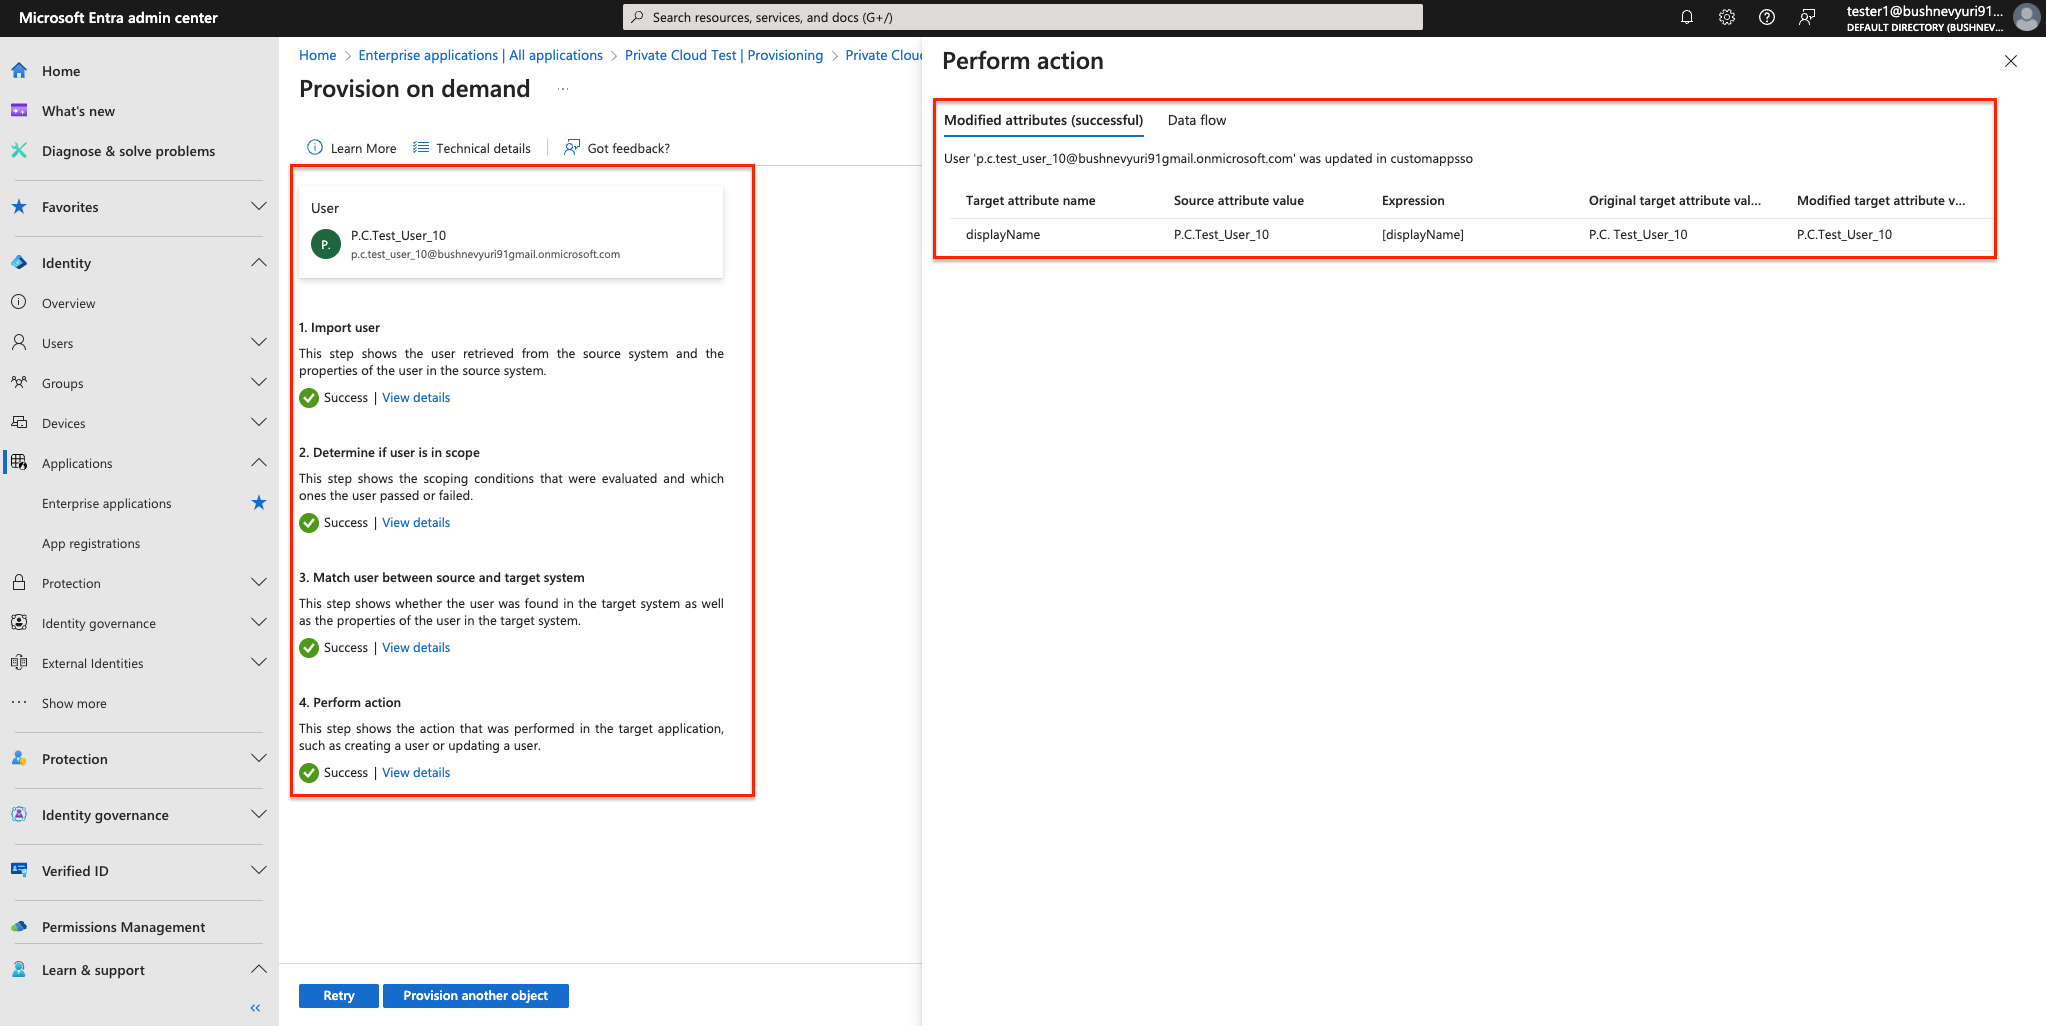
- The validation and provisioning will be triggered, then the status will be shown on the left, and
the information popup on the right will list all the changes that has been made on that user
since the last sync:
