SCIM with Okta
1. Prerequisite
- Admin account with permission to create new application in Okta.
warning
Due to some restrictions in creating new application that requires single sign-on, an Okta application with basic SSO configurations need to be created beforehand. Go to Create new application in Okta in Login With SSO - Set Up with Okta for detailed guidelines.
- If application is already created, you can continue with below steps.
2. Configure SCIM API for application
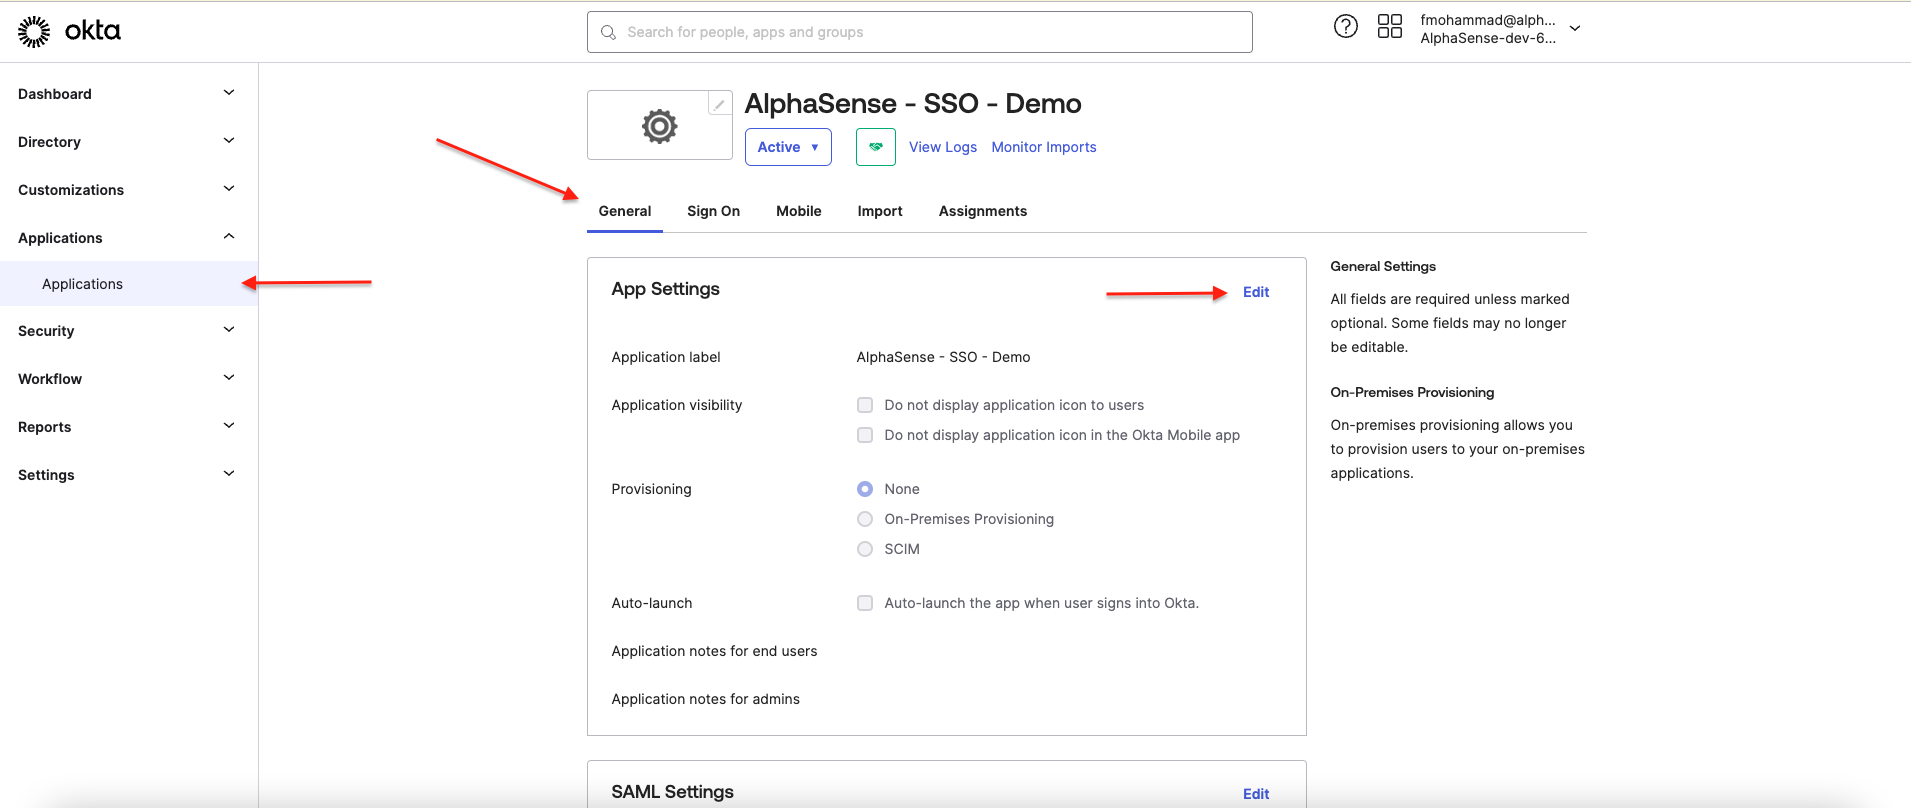
- Navigate to General tab of created application:
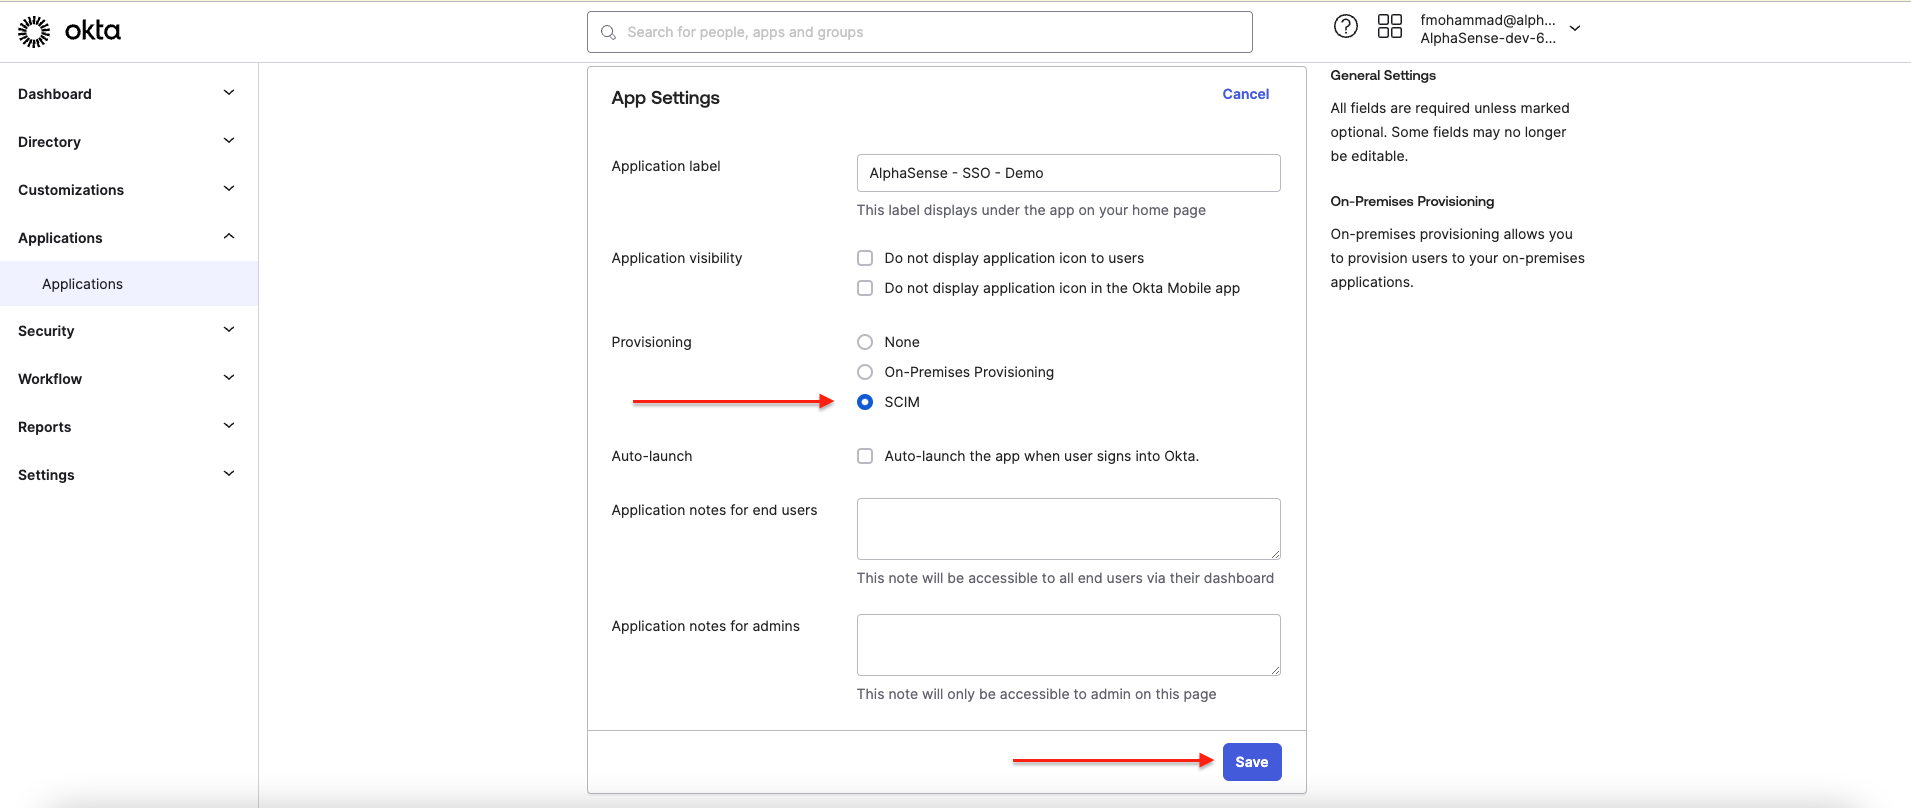
- Click on Edit, then check SCIM in Provisioning. Click Save to apply the changes:
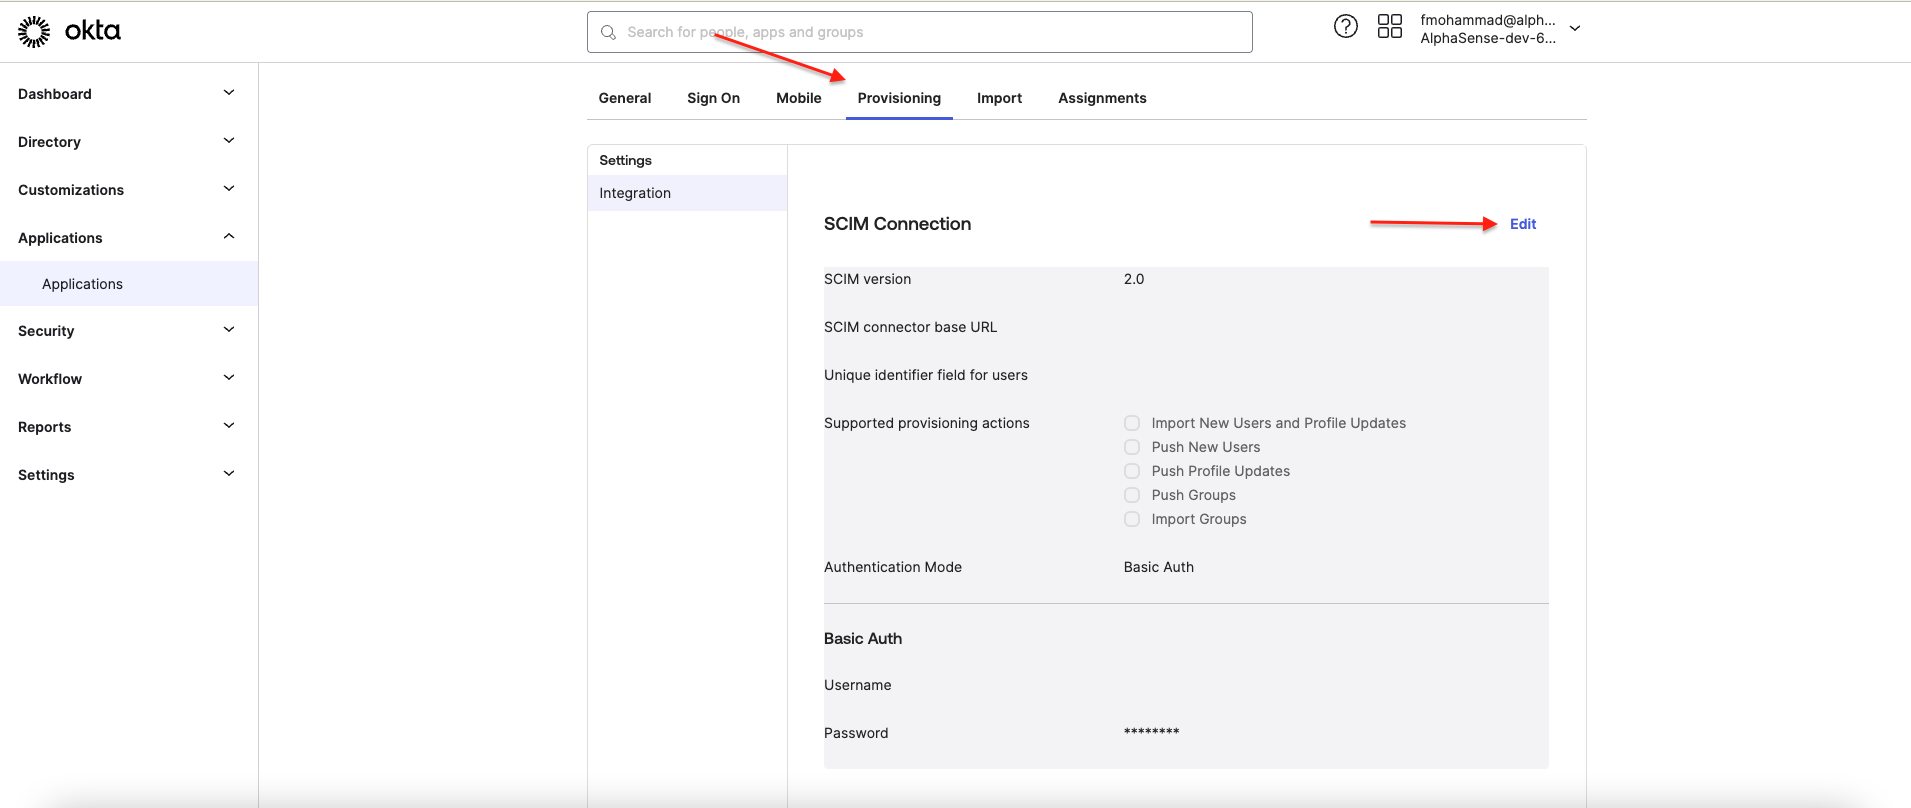
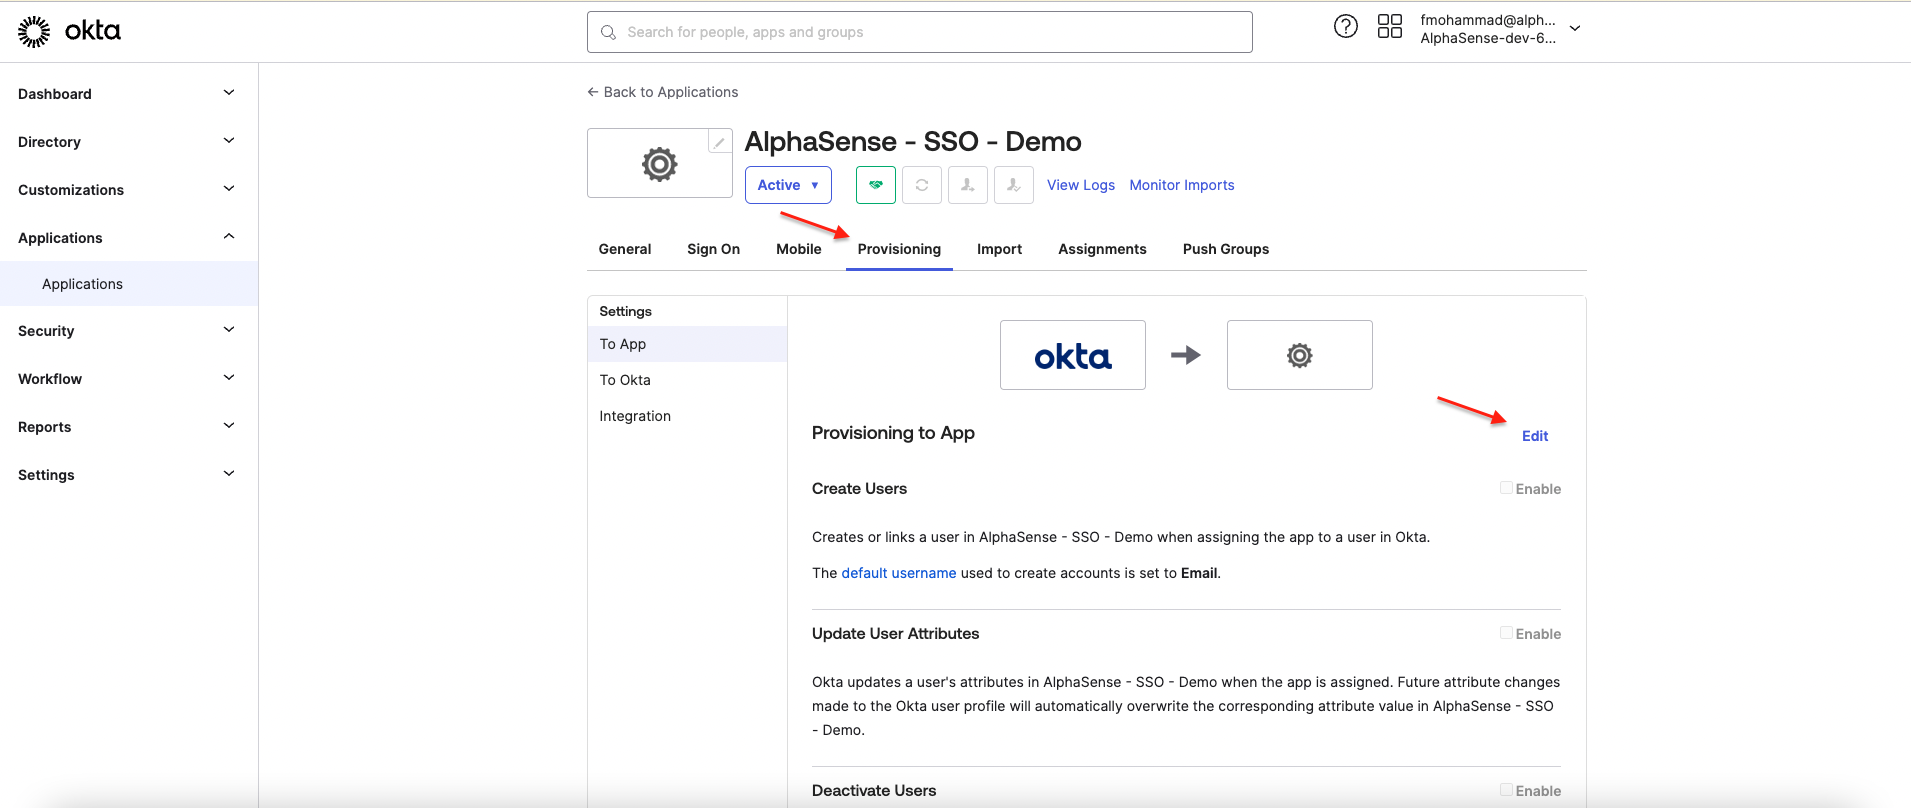
- Navigate to Provisioning tab, click on Edit:
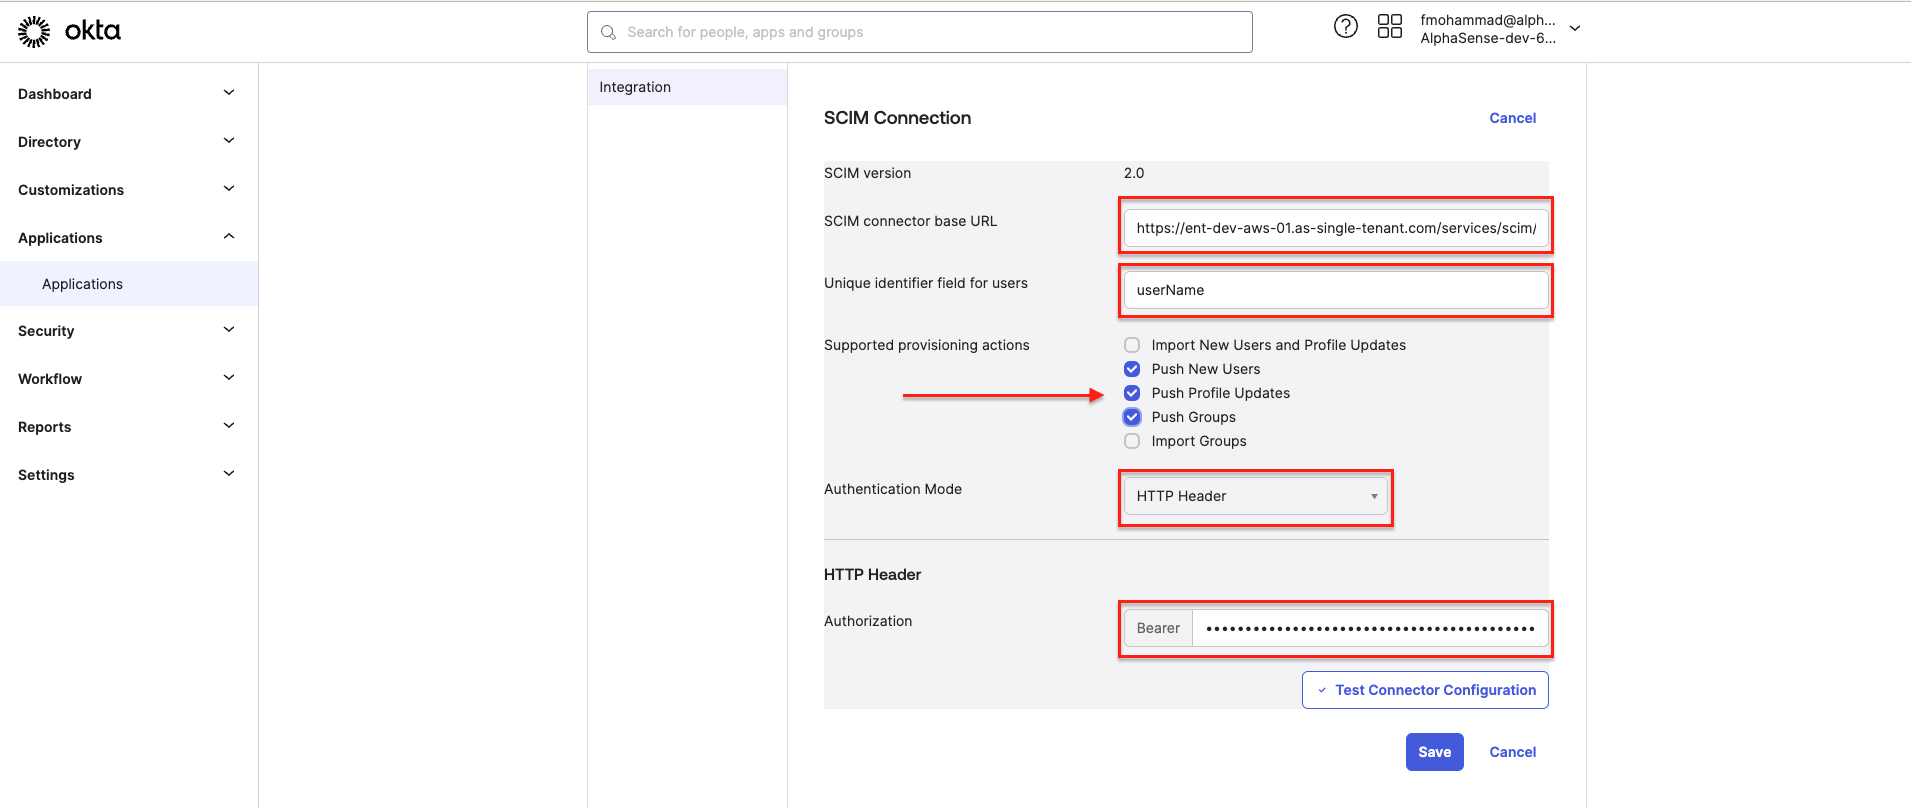
- Fill in info for configuration:
- SCIM connector base URL:
- Format: {domain name}/services/scim/v2
- Unique identifier field for users: userName.
- Supported provisioning actions: select Push New users, Push Profile Updates, Push Groups.
- Authentication Mode: select HTTP Header for authentication through Bearer Token.
- Authorization: API key of SCIM service:
Retrieve Your SCIM API Key
- SCIM connector base URL:
- Click Test Connector Configuration for diagnosing of SCIM feature enablements:
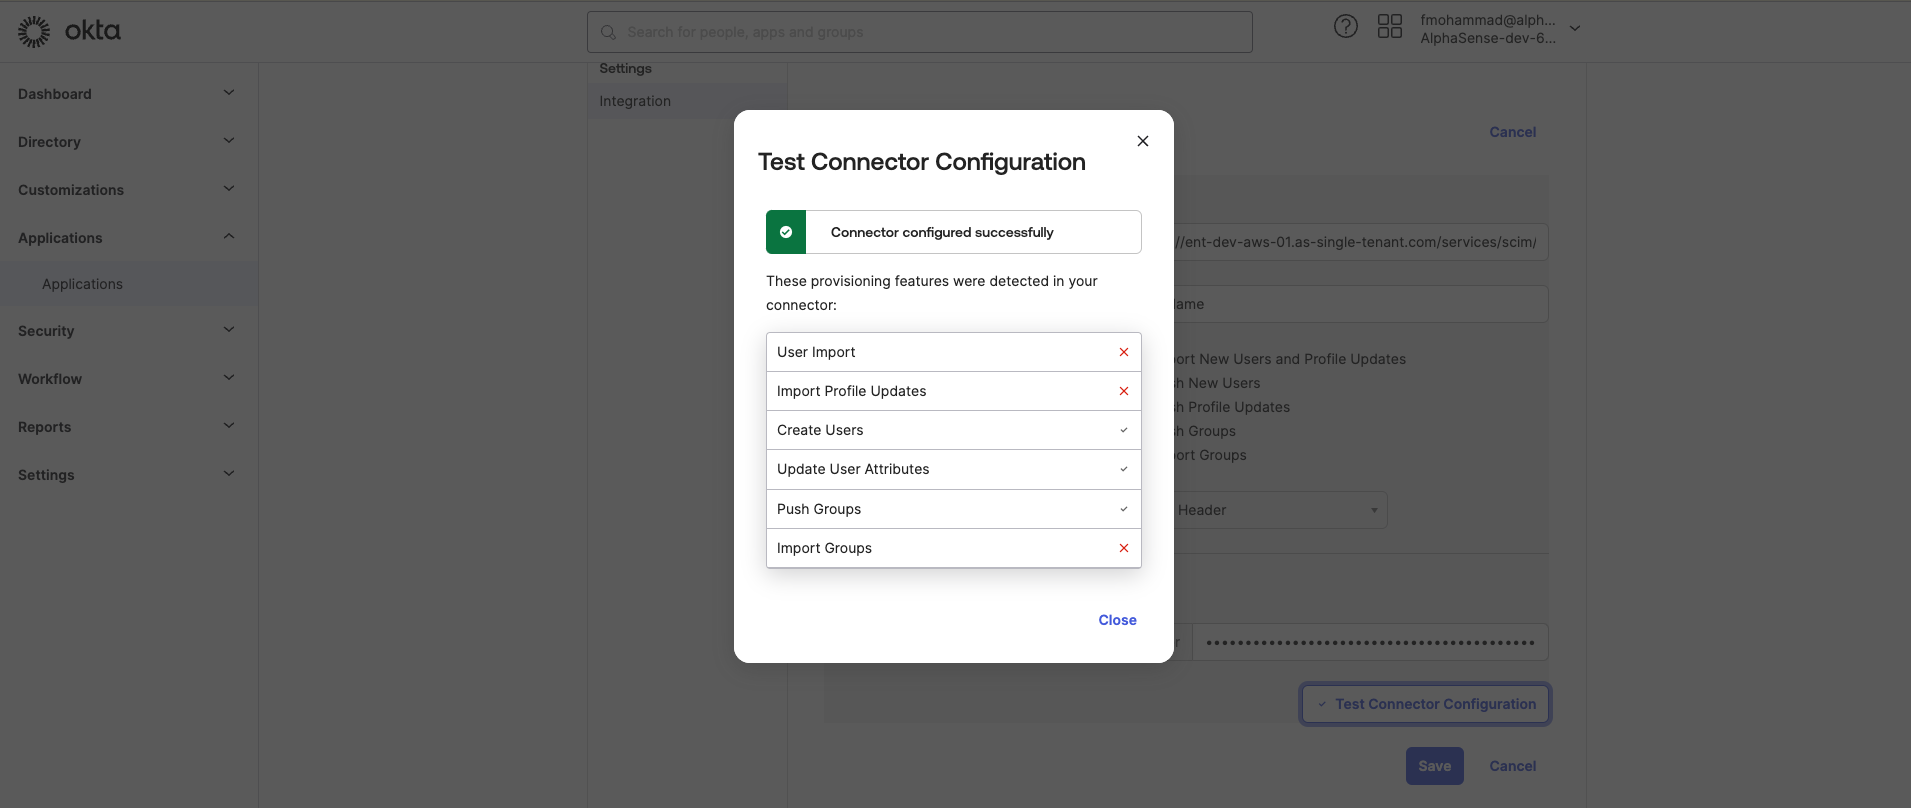
- Then click Save for applying changes.
3. Enable SCIM API features
- Navigate to Provisioning tab of application and select Edit:
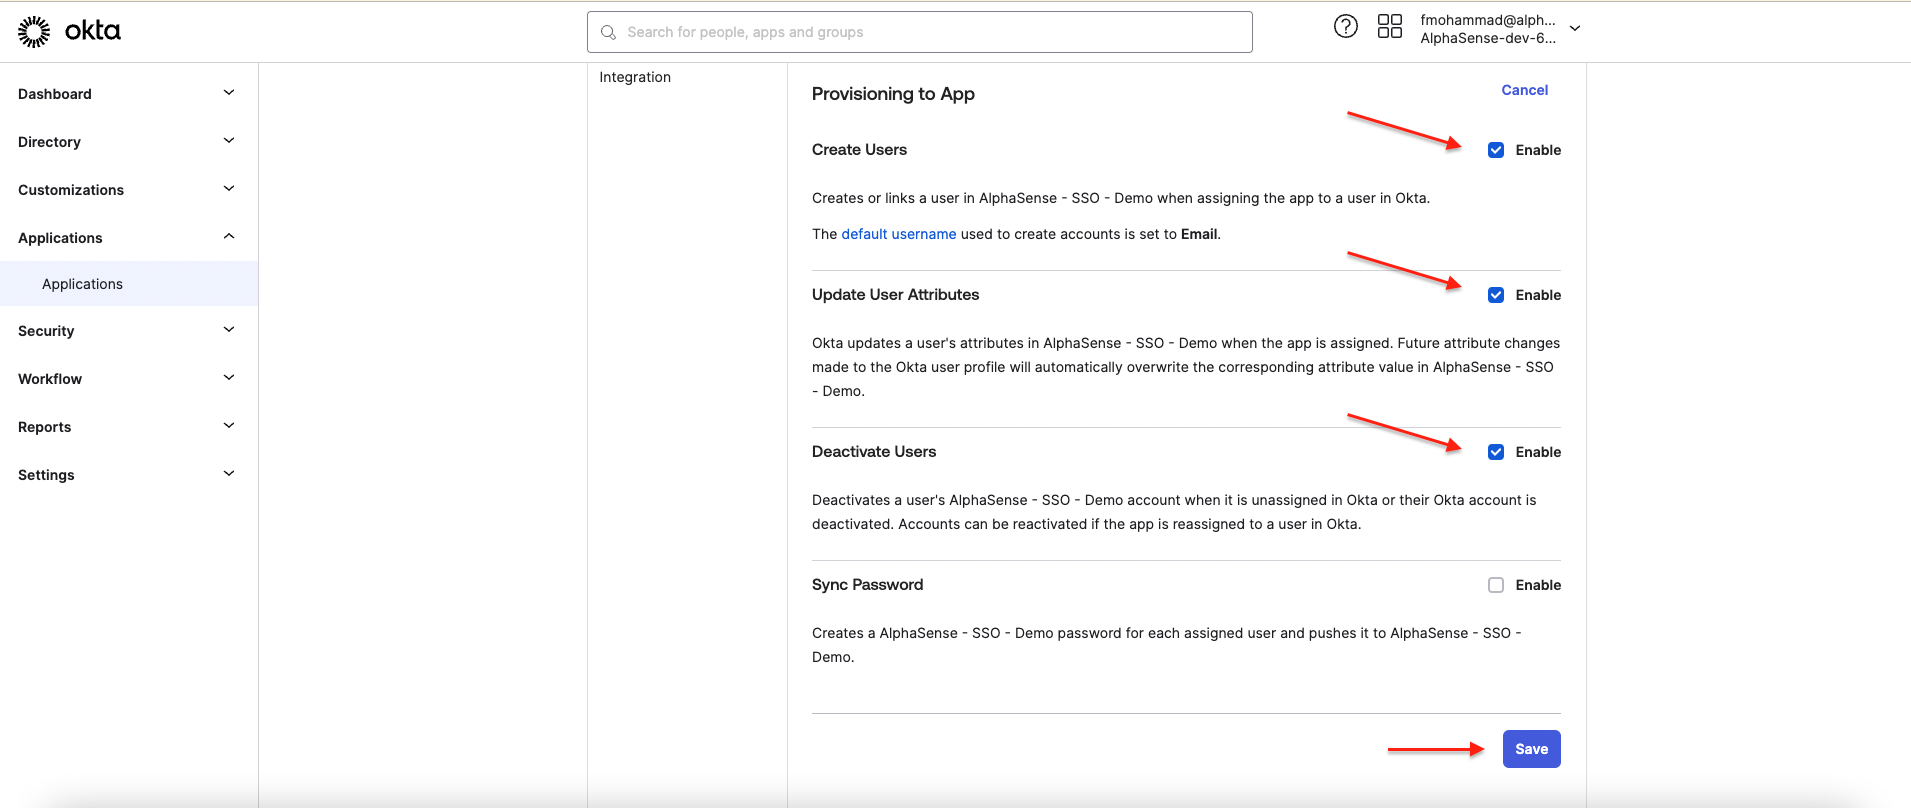
- Check on Enable for Create Users, Update User Attributes and Deactivate Users.
Then click Save to apply changes:
4. Assign new user and test SCIM sync
- Navigate to Assignments tab of application and select Assign to People:
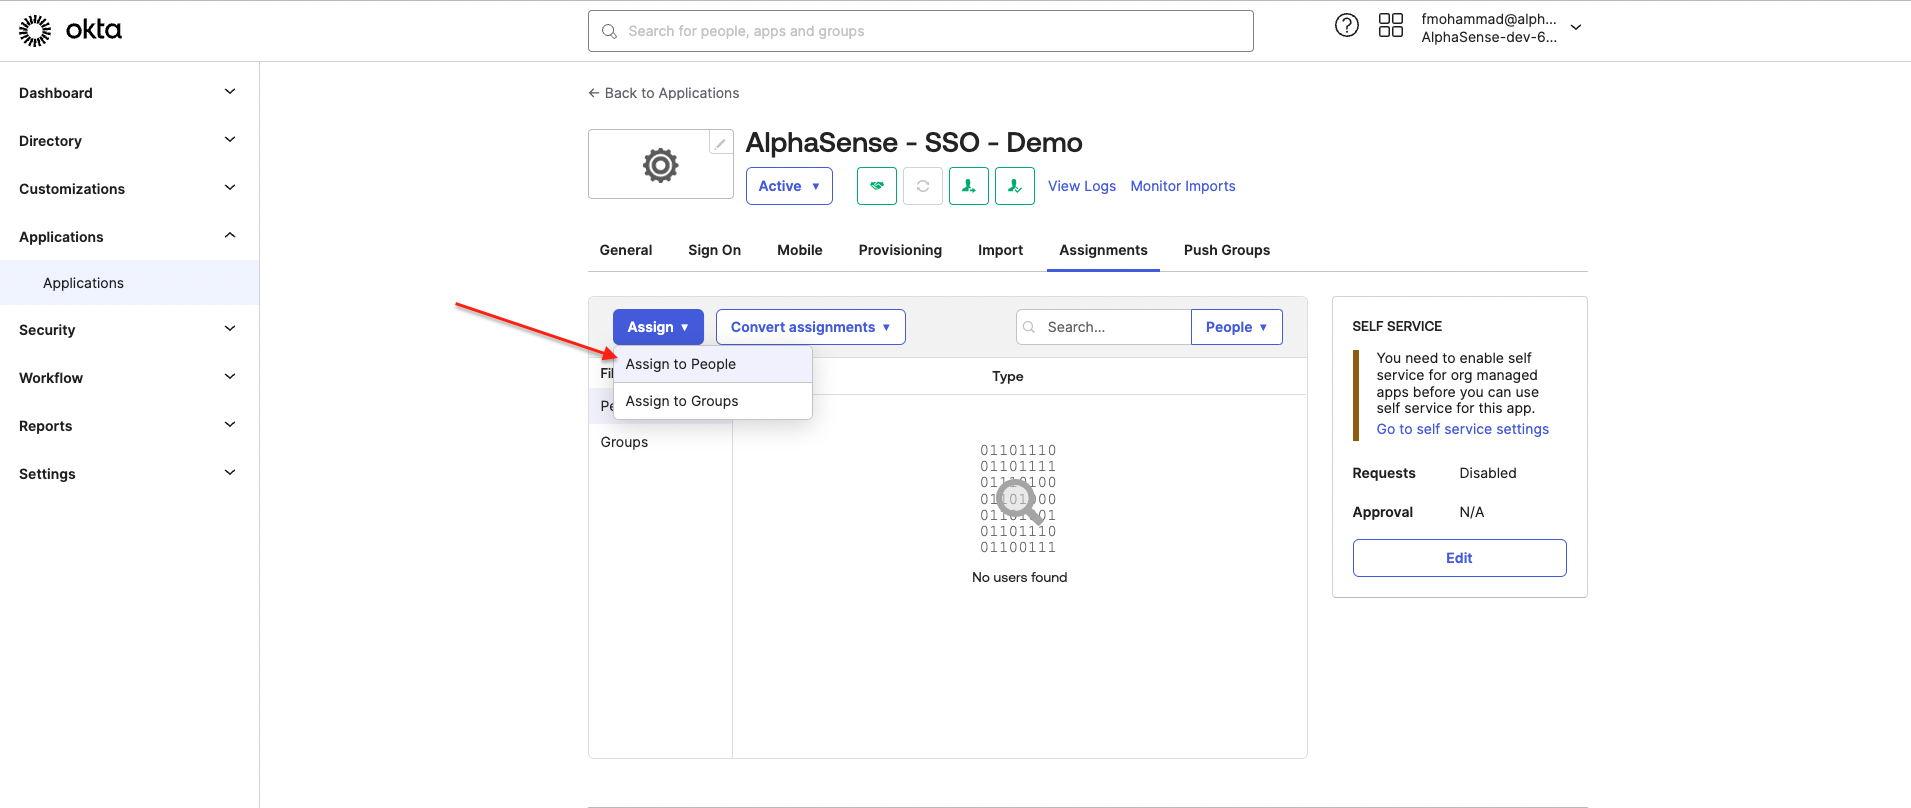
- Select your user and select Assign, then Done to complete:
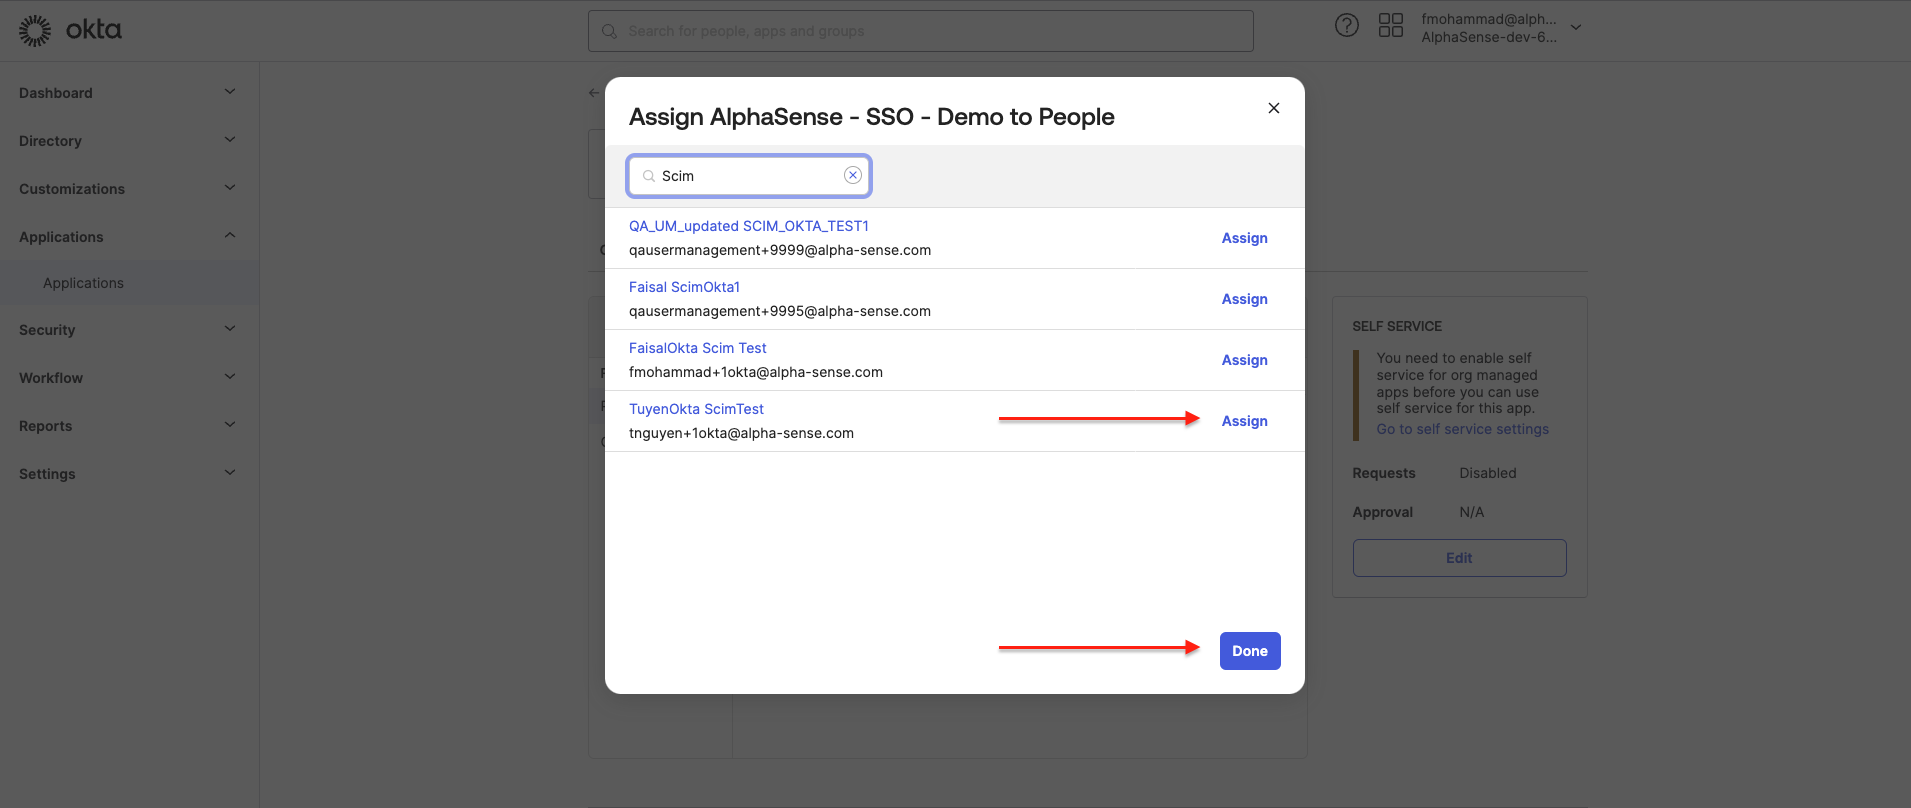
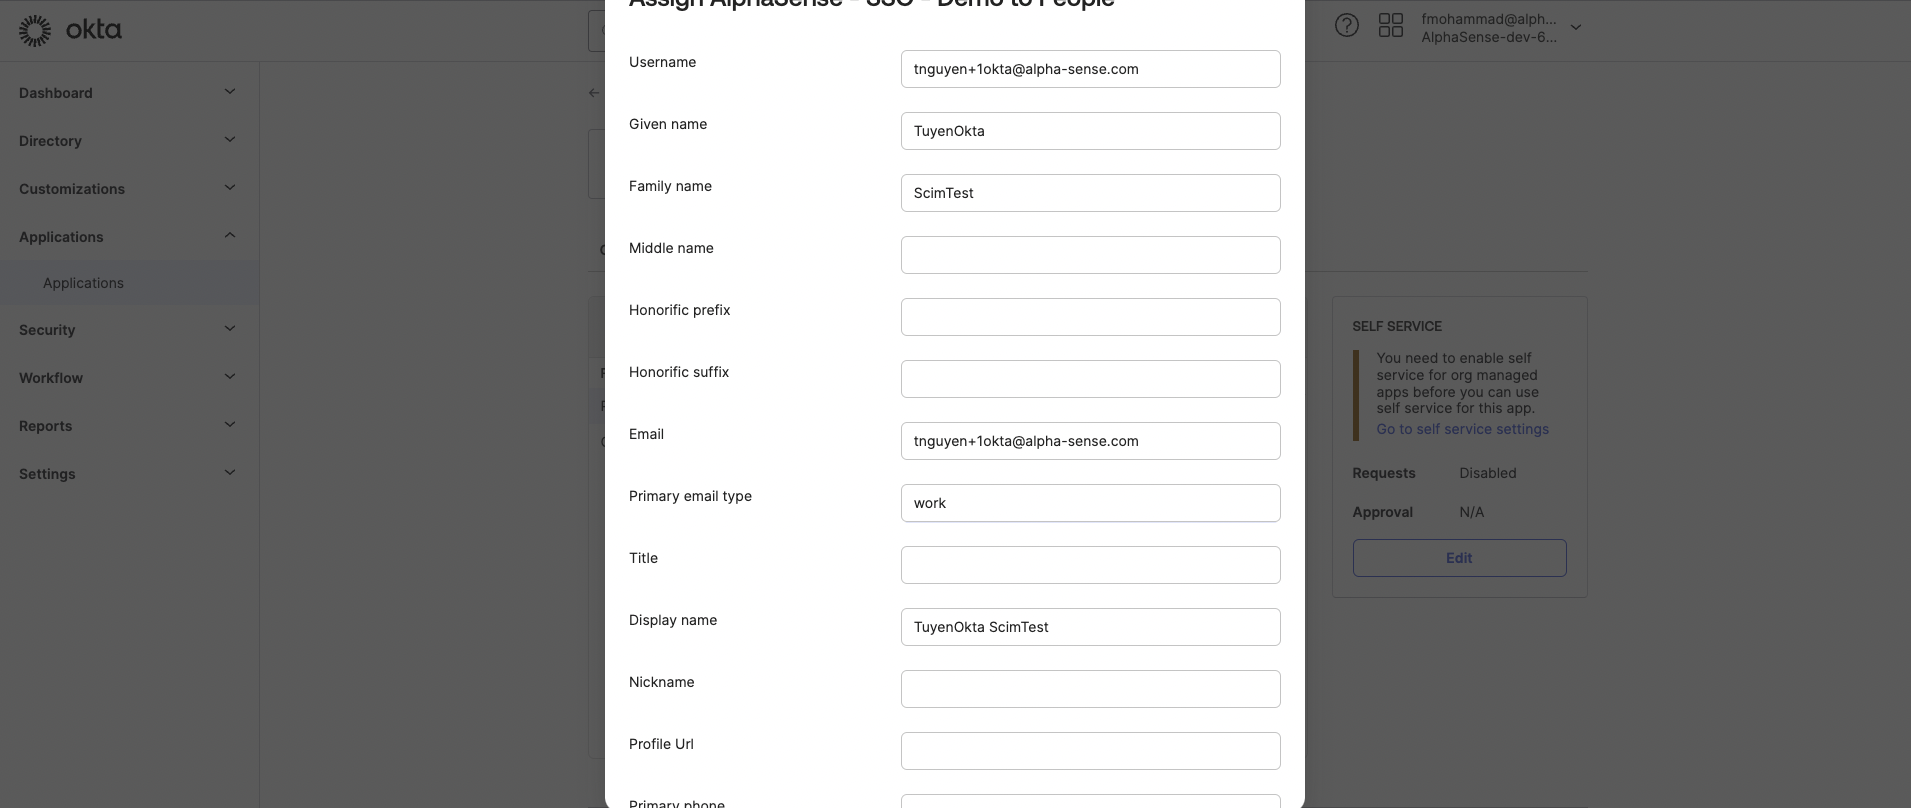
- If there is additional dialog to review user attributes, you can review then Save and Go
Back:
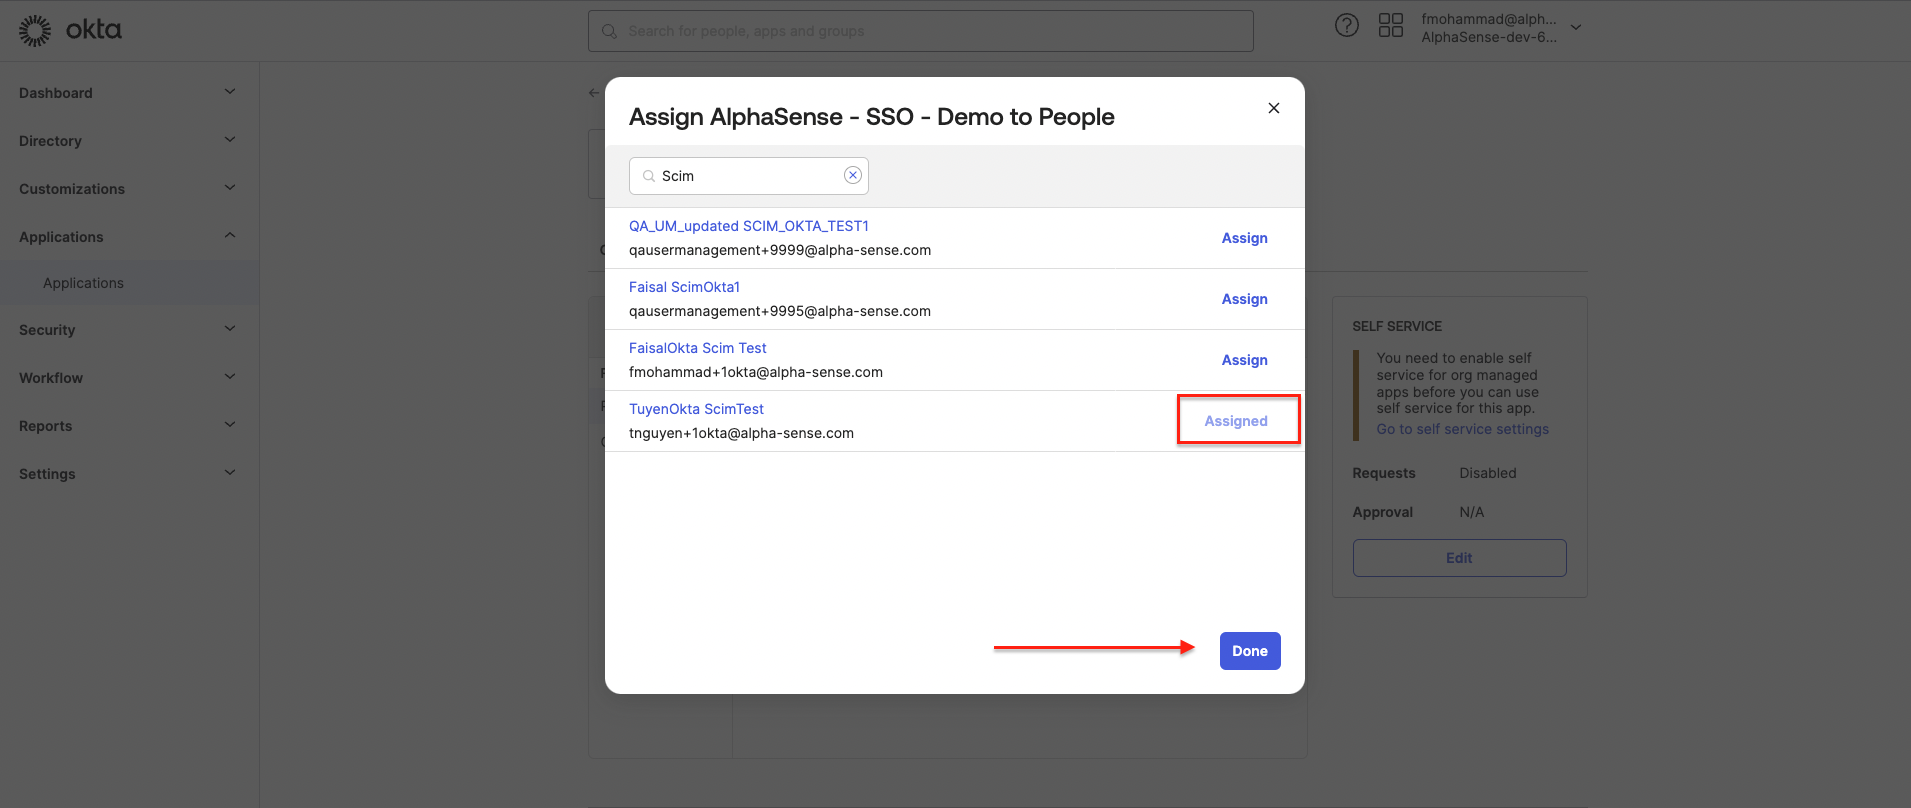
- User now is assigned, then Done to complete:
5. Verify user is created in AlphaSense
Navigate to Additional Guides and follow the guide to check: Verify User is Created in AlphaSense