SCIM with PingIdentity
1. Prerequisite
- PingIdentity account created with sufficient subscription: Ping Identity
2. Create a connection
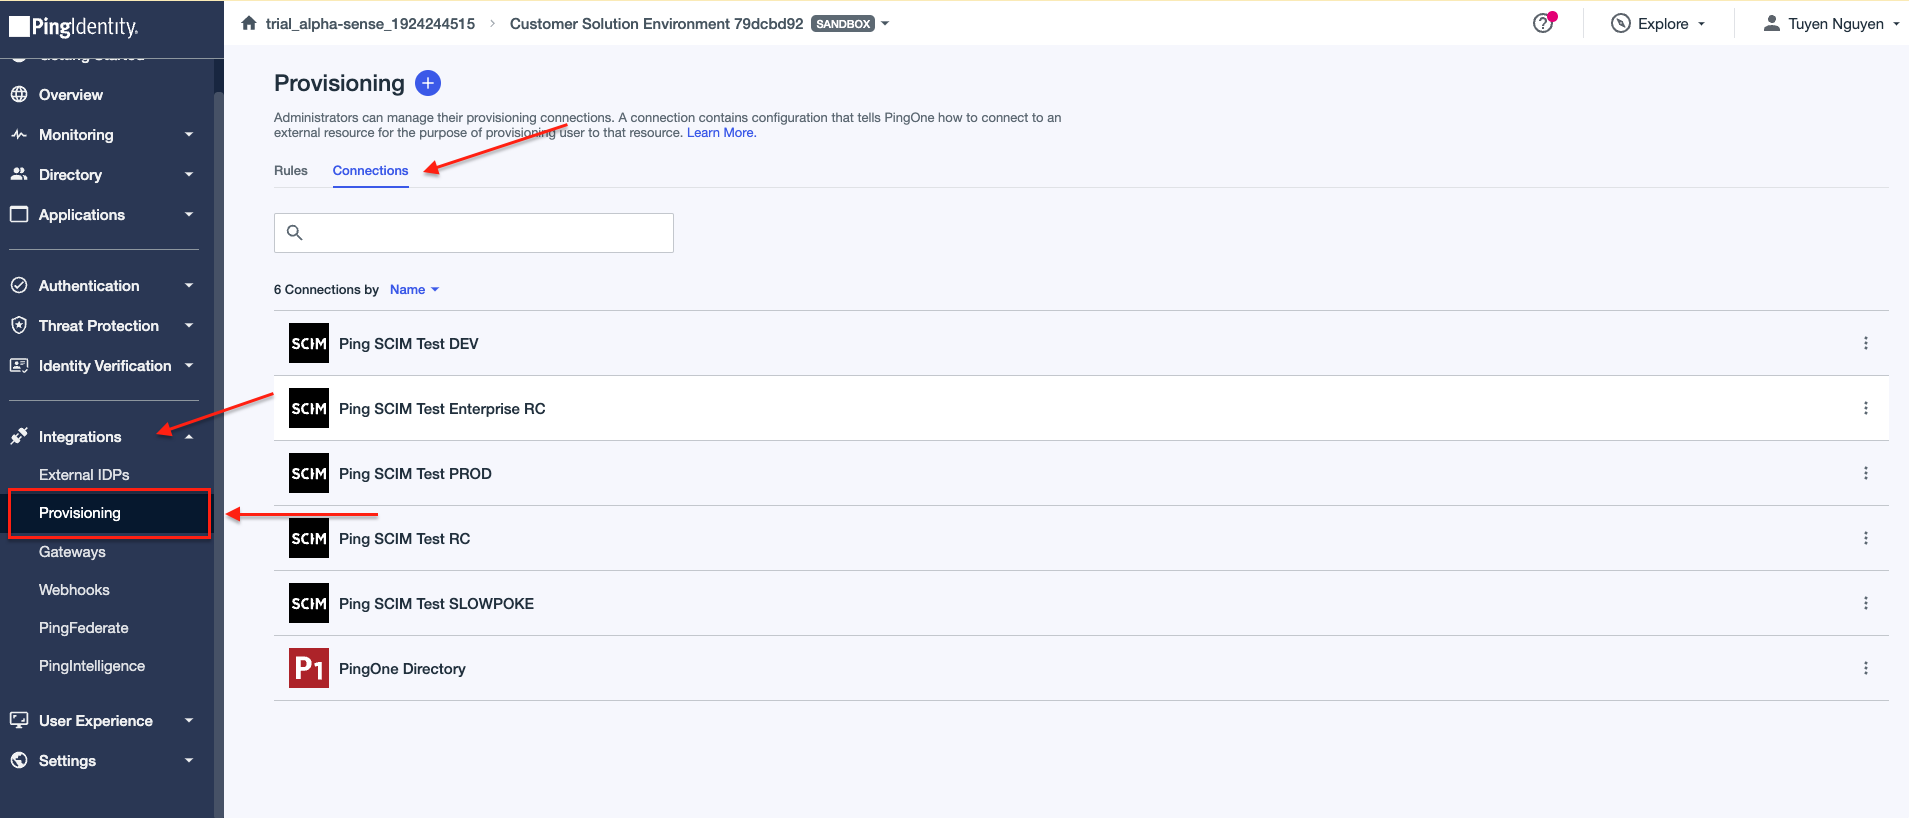
- Navigate to Provisioning section under Integrations, then select Connections tab:
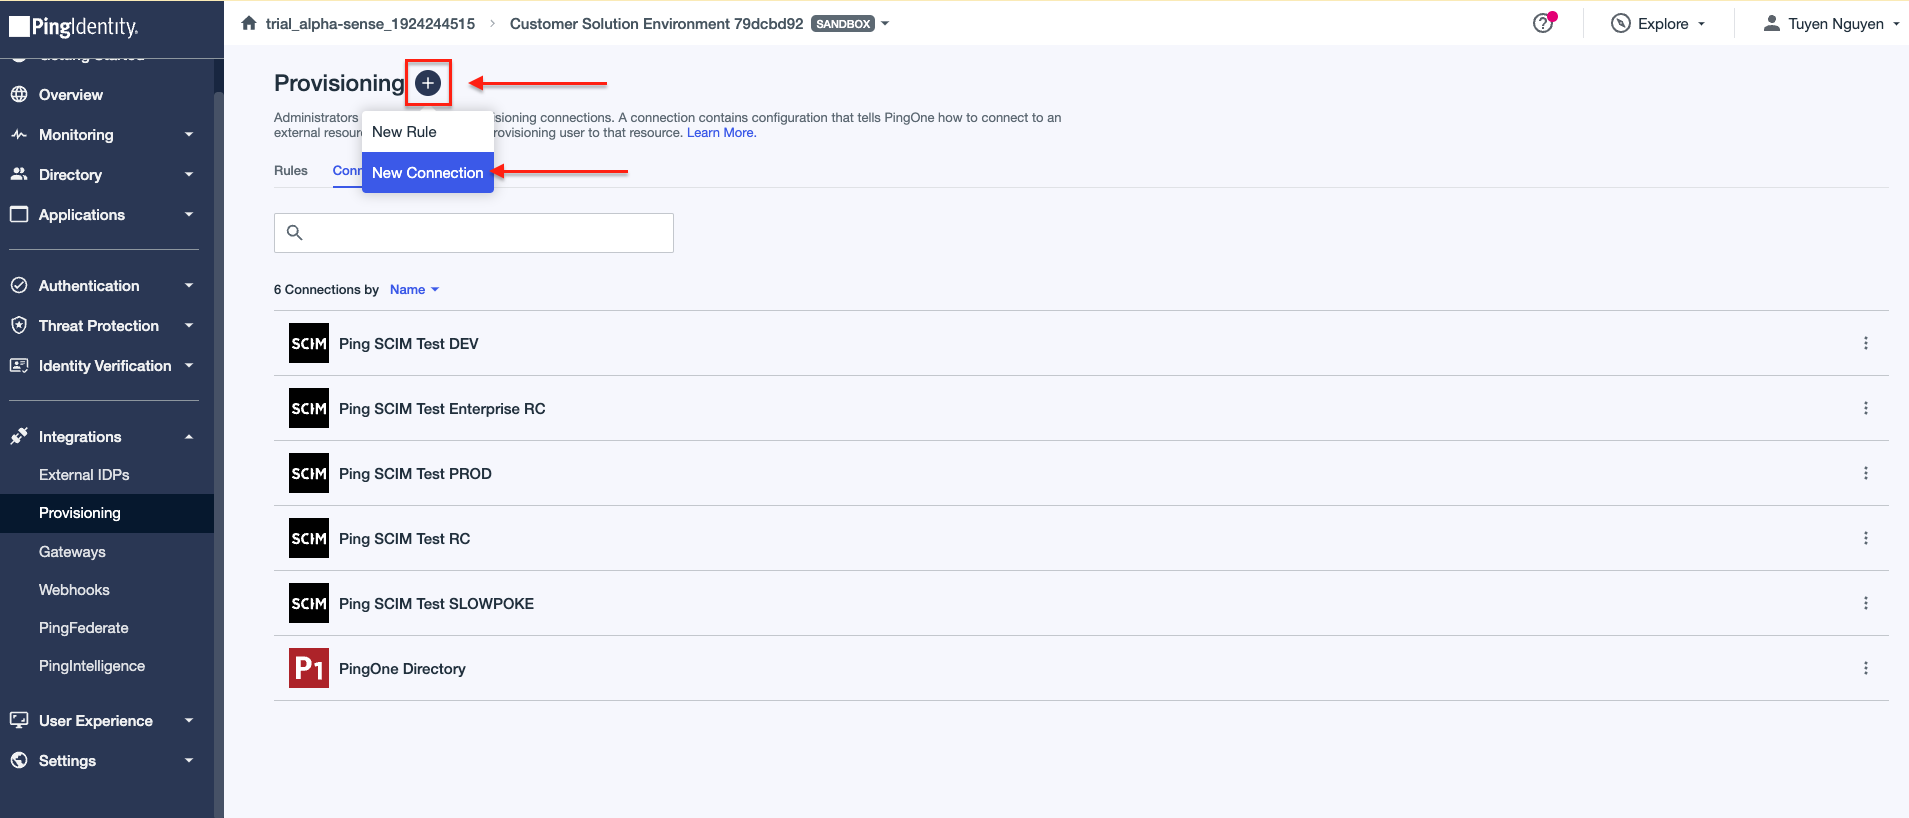
- Click on plus icon and select New Connection:
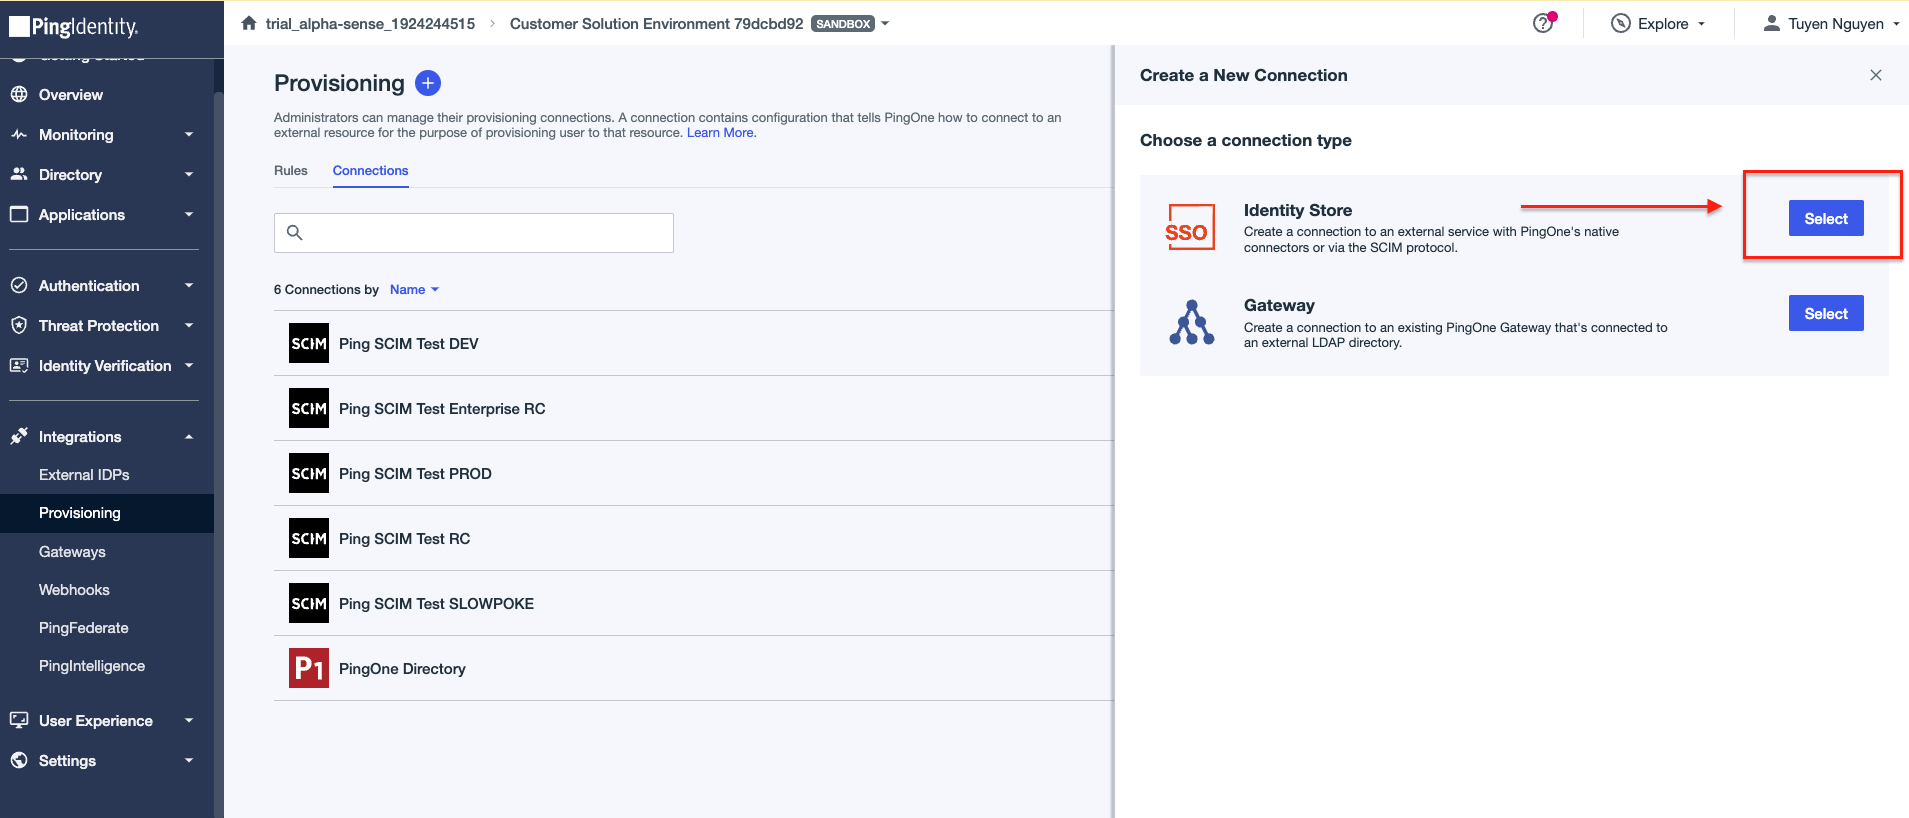
- Select Identity Store:
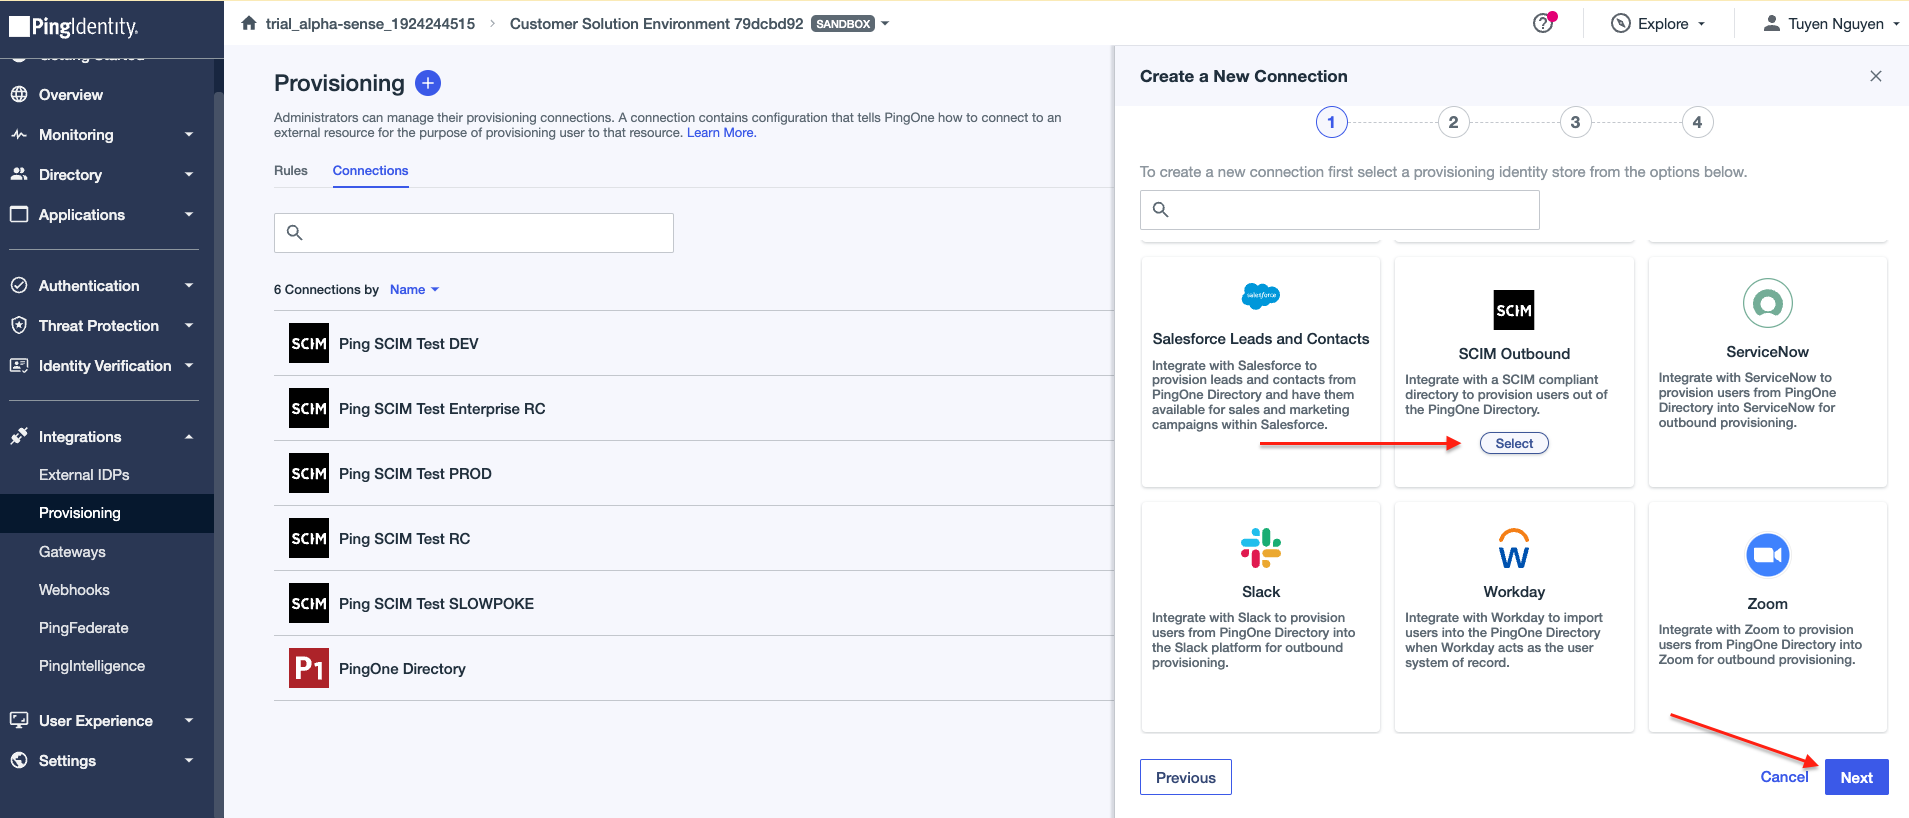
- Select SCIM Outbound then click Next:
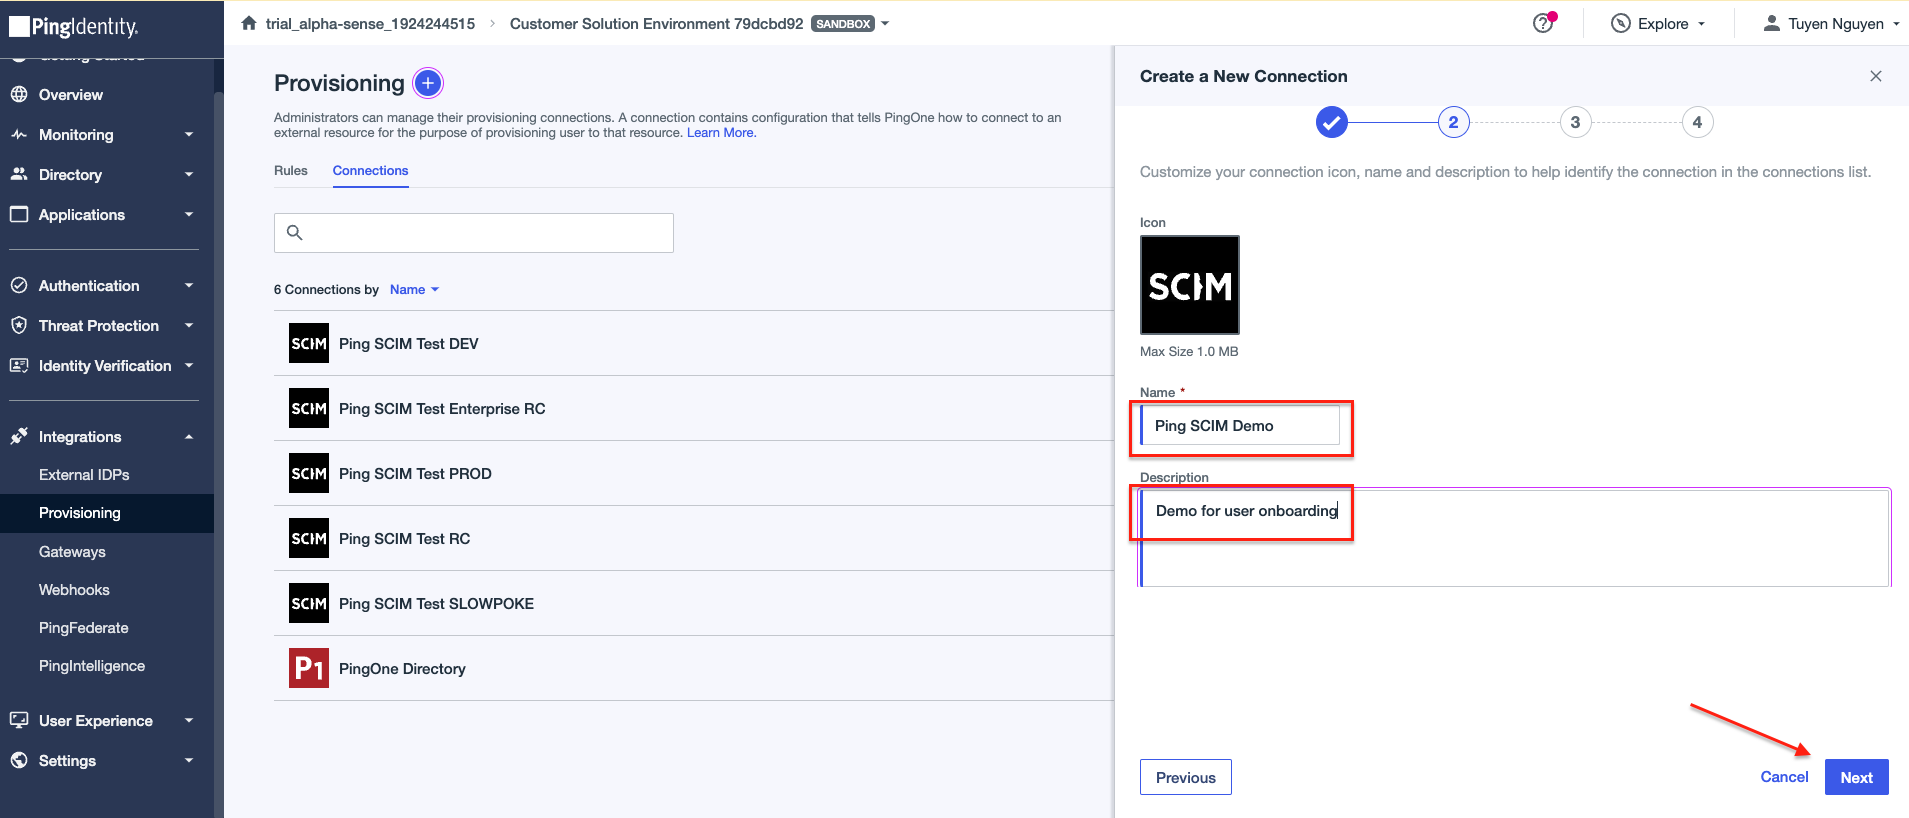
- Fill in the name (mandatory) and description if needed, then click Next:
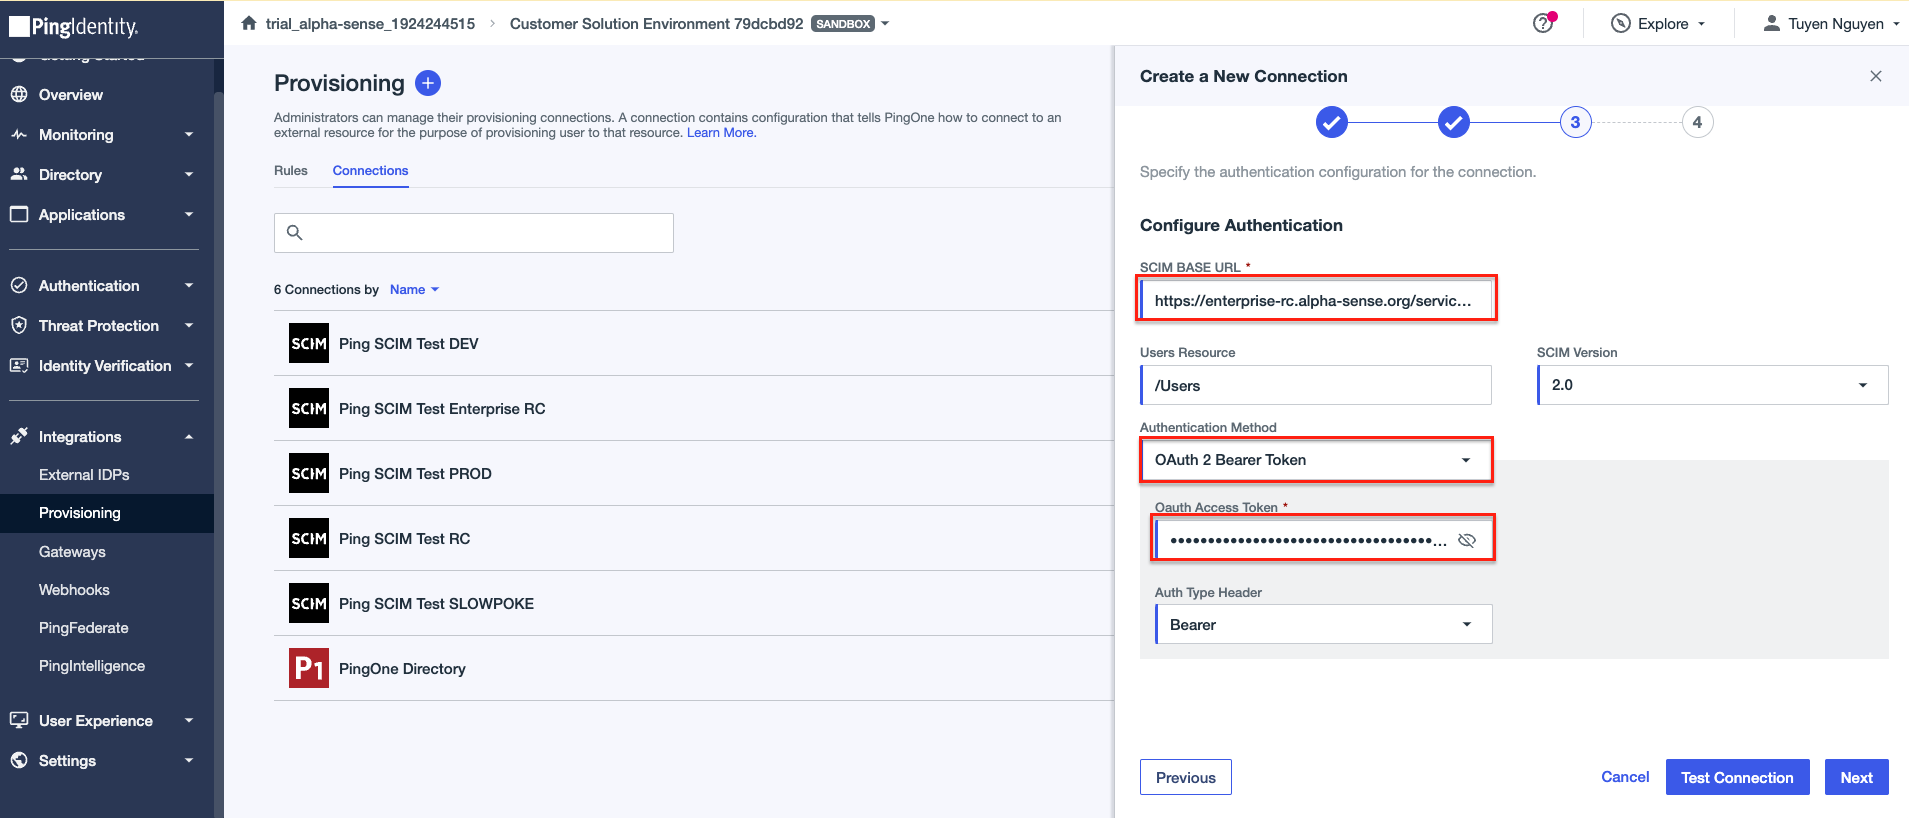
- Config authentication for connection:
- SCIM BASE URL: exposed URL to SCIM service (below example is SCIM url of AlphaSense test
environment):
- Format: {domain name}/services/scim/v2
- Authentication Method: Select OAuth 2 Bearer Token.
- Oauth Access Token: API Key of SCIM service:
Retrieve Your SCIM API Key
- SCIM BASE URL: exposed URL to SCIM service (below example is SCIM url of AlphaSense test
environment):
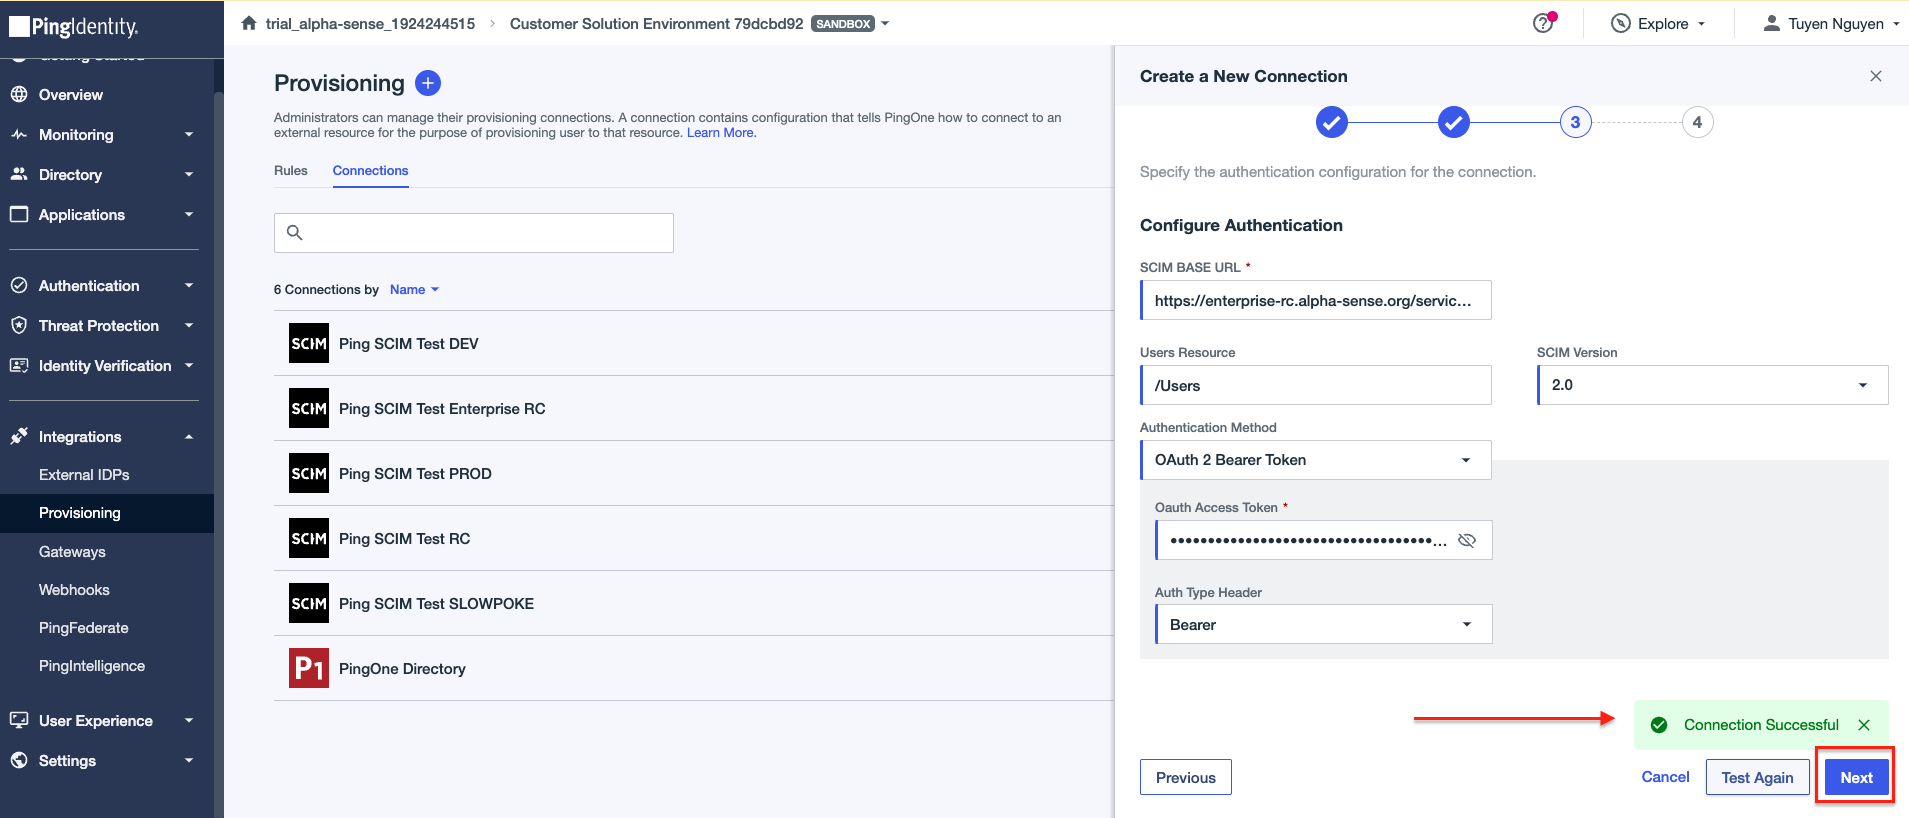
- Click Test Connection, the below popup will display once connection is established successfully.
Then click Next:
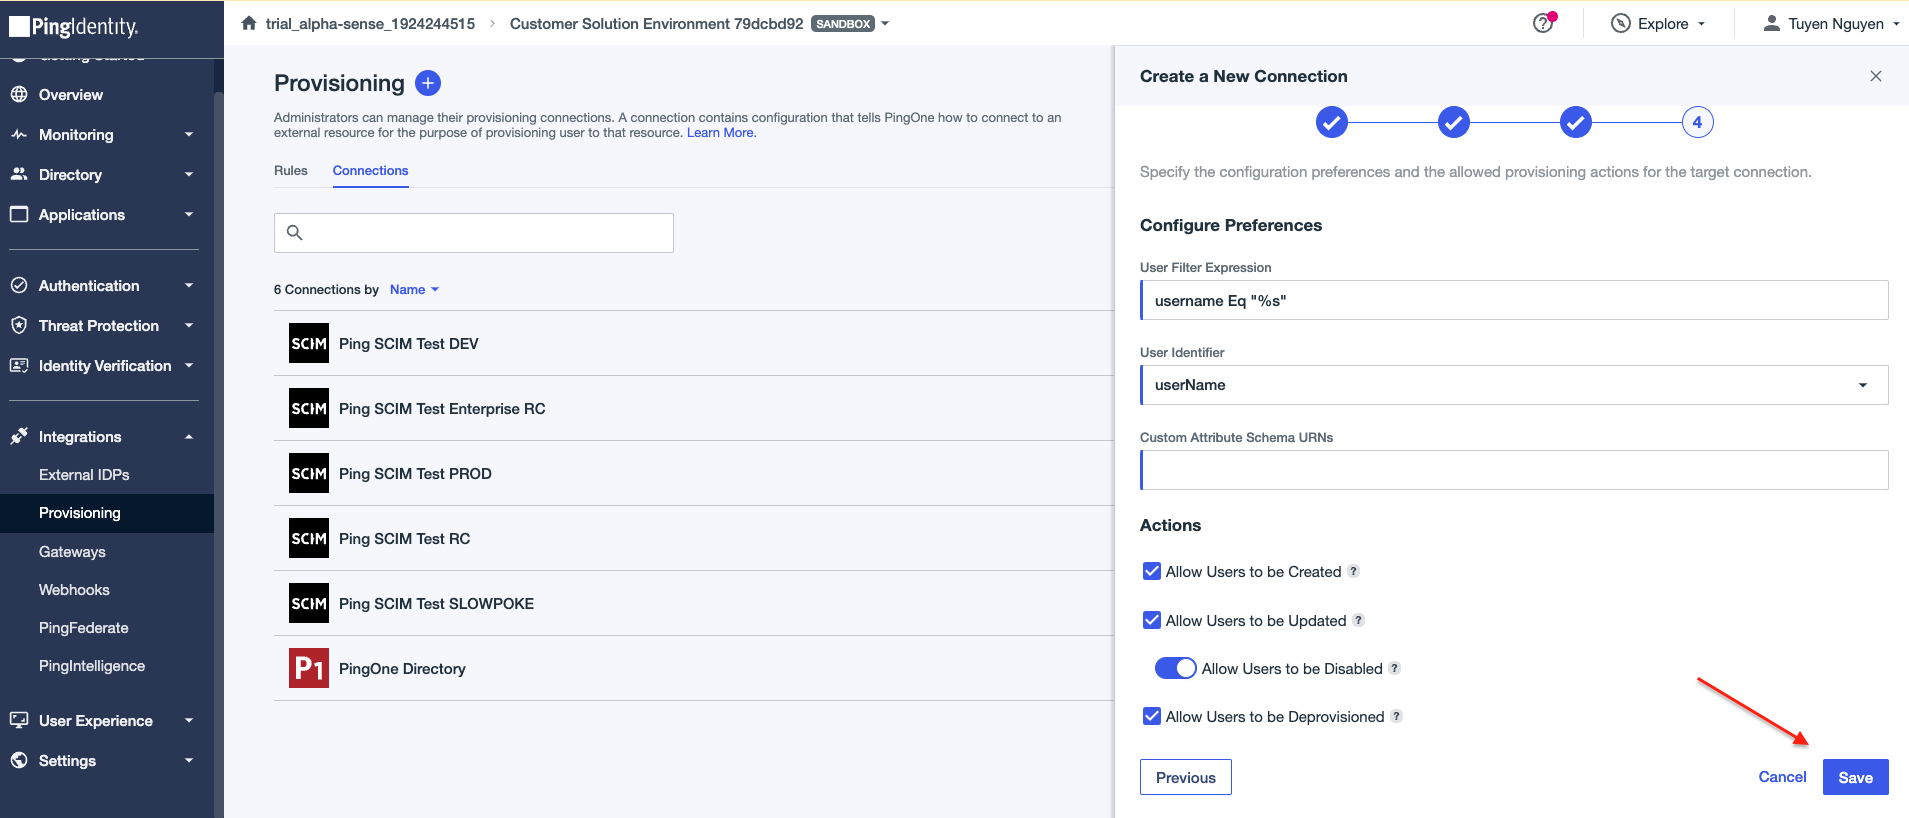
- Here you can set up preferences, let’s keep it as default and click Save:
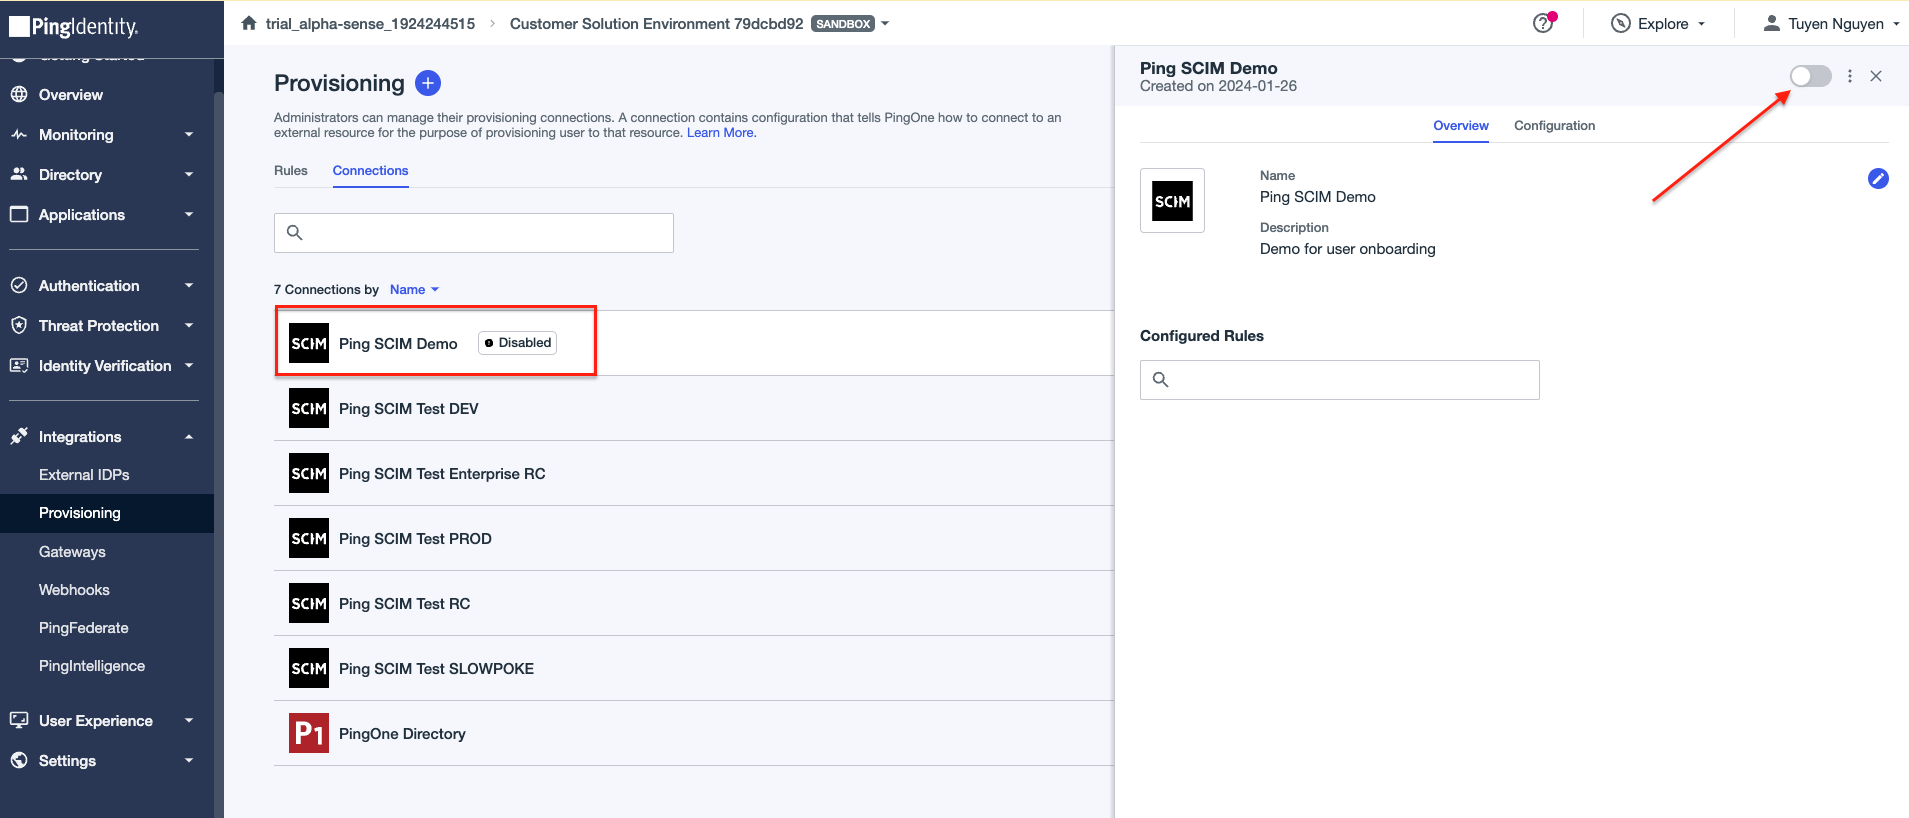
- The connection is created but in Disabled mode, enable it by clicking the toggle switch:
3. Create a rule
A rule can be established to define additional configurations between the created connection and PingIdentity. This rule instructs PingIdentity on user provisioning criteria and the mapping of attributes between PingIdentity and external resources.
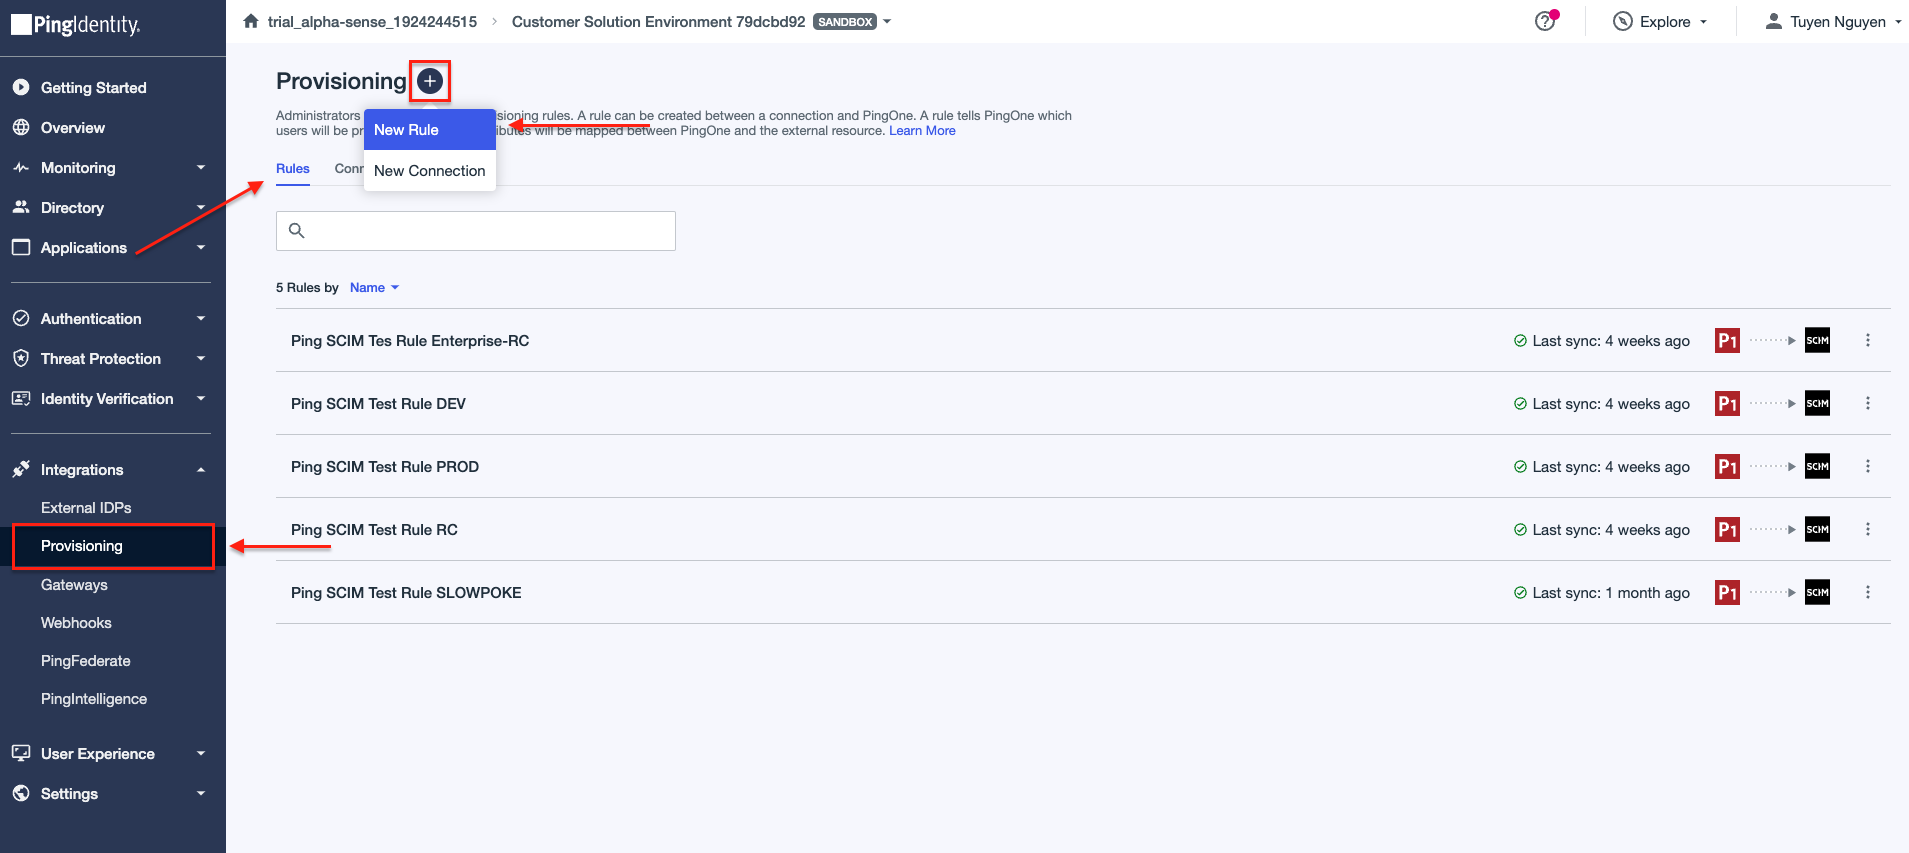
- Navigating to Rules tab, click on plus icon and select New Rule:
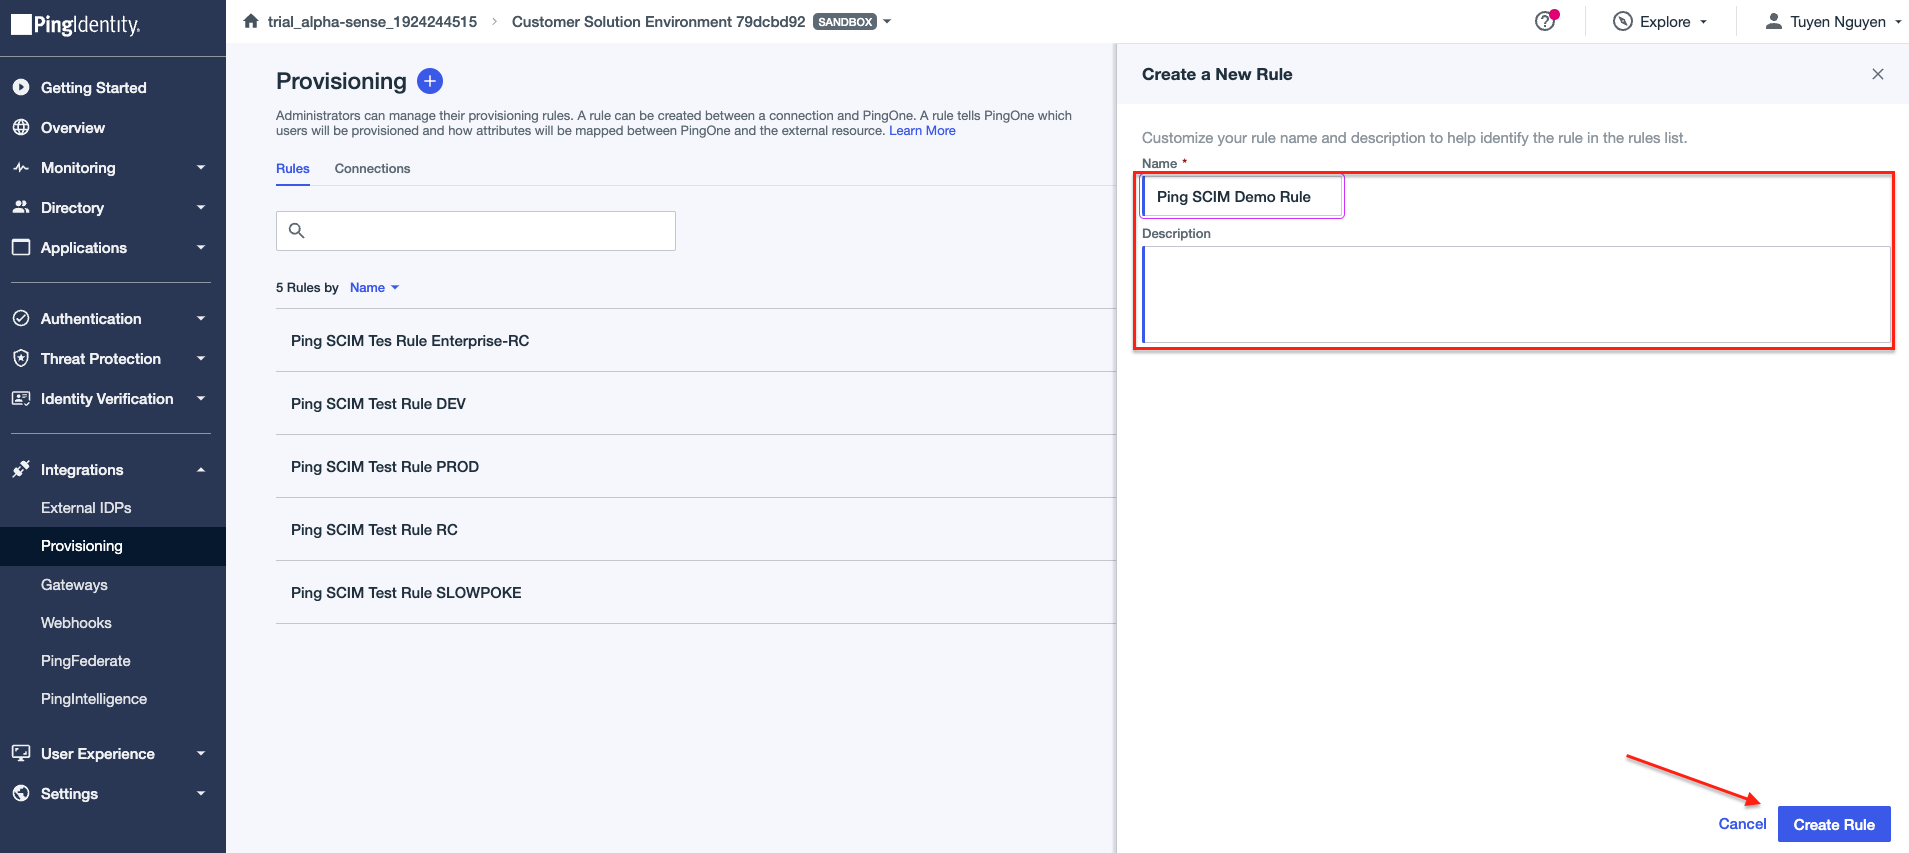
- Fill in rule Name and click Create Rule to continue:
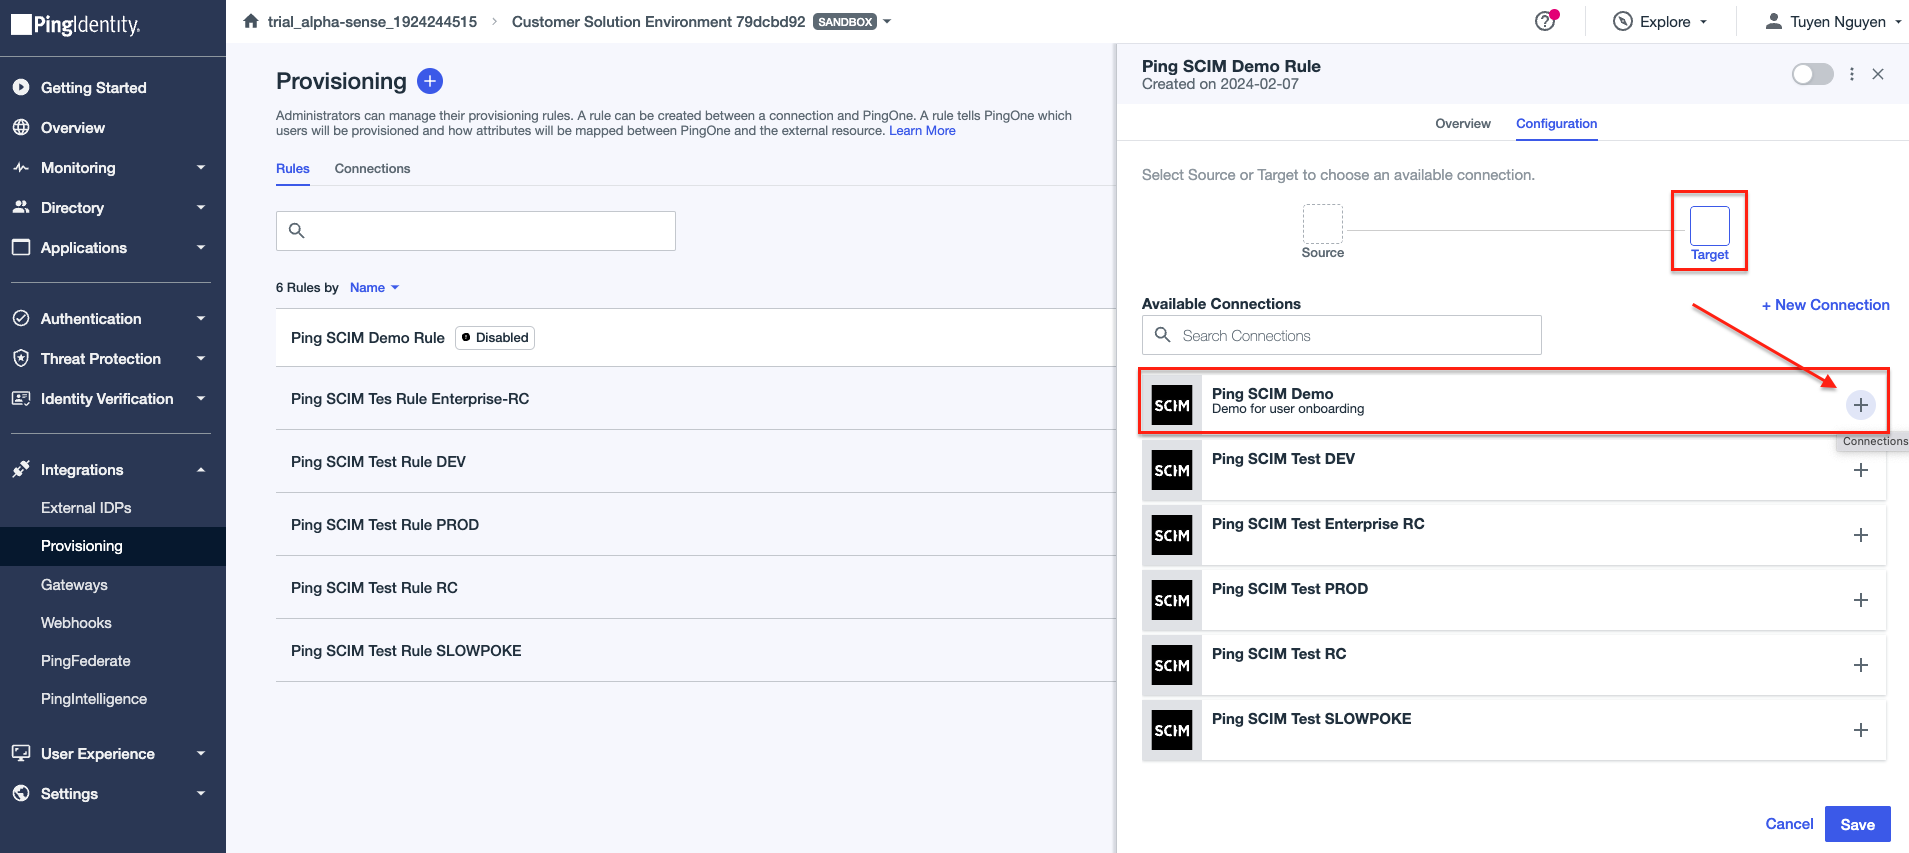
- Select your created connection as Target, and Ping as Source, then Save to
continue:
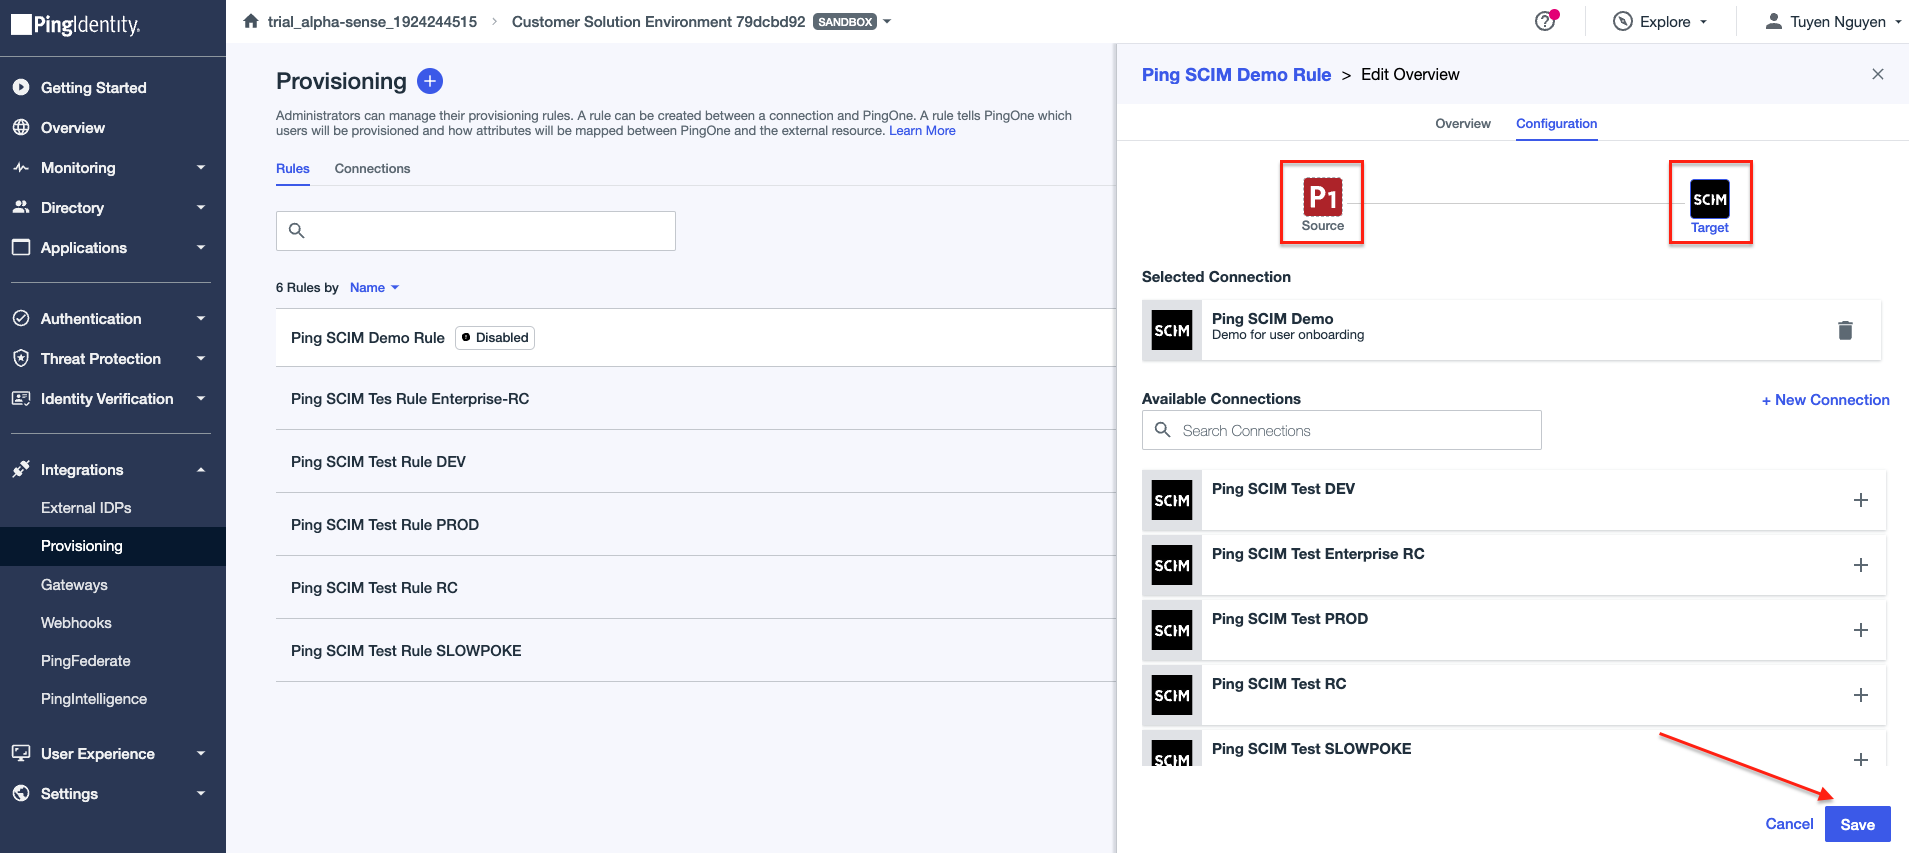
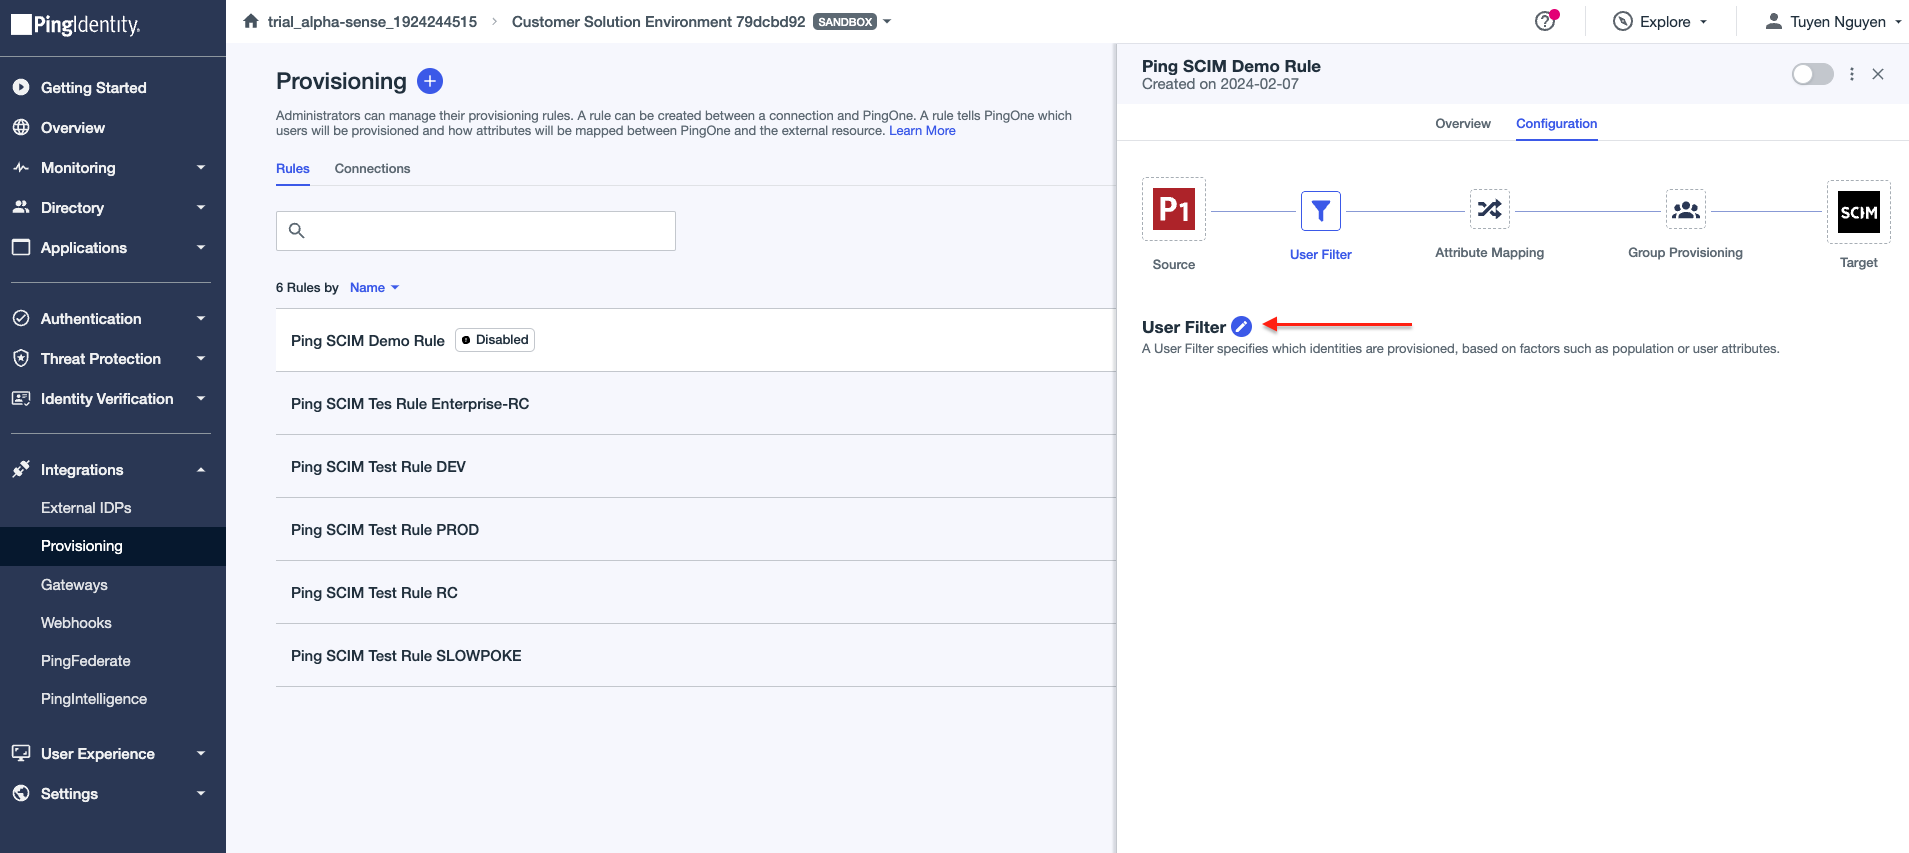
- Click on pencil icon under User Filter to specify which identities are provisioned:
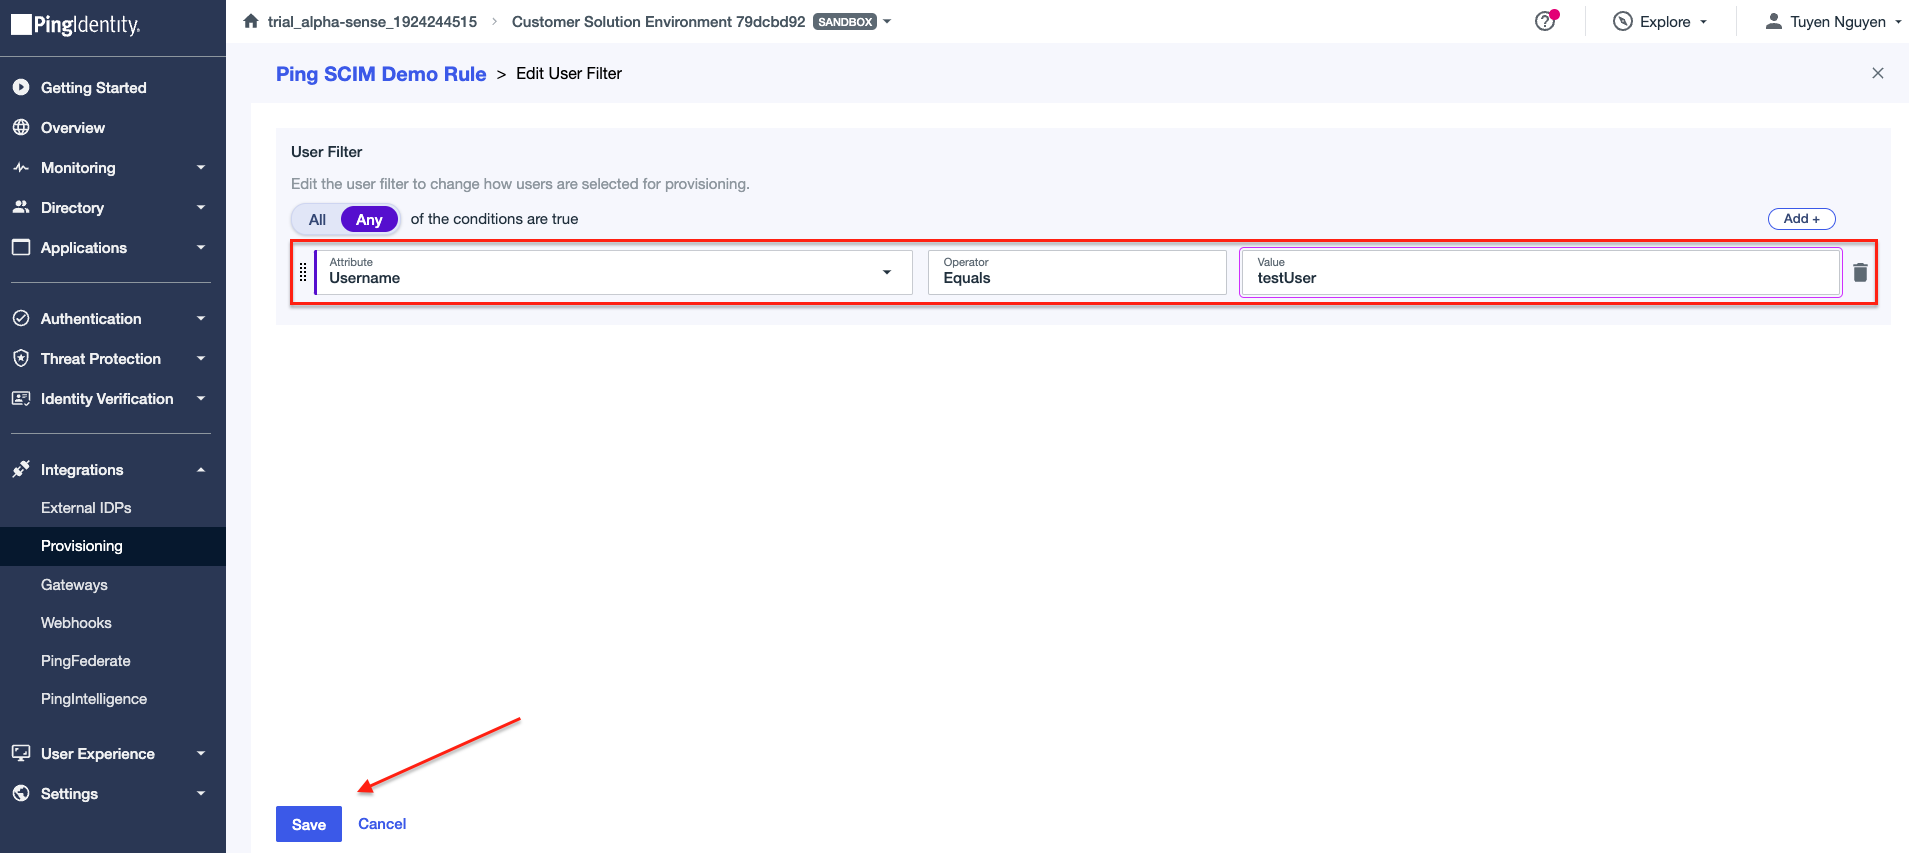
- Select attribute Username, operator Equals, value testUser. In this example, this
means any user has Username equals to testUser will be selected for provisioning. Wide rage of
attributes and operators are provided by PingIdentity for you to combine as needed. Select
Save to continue:
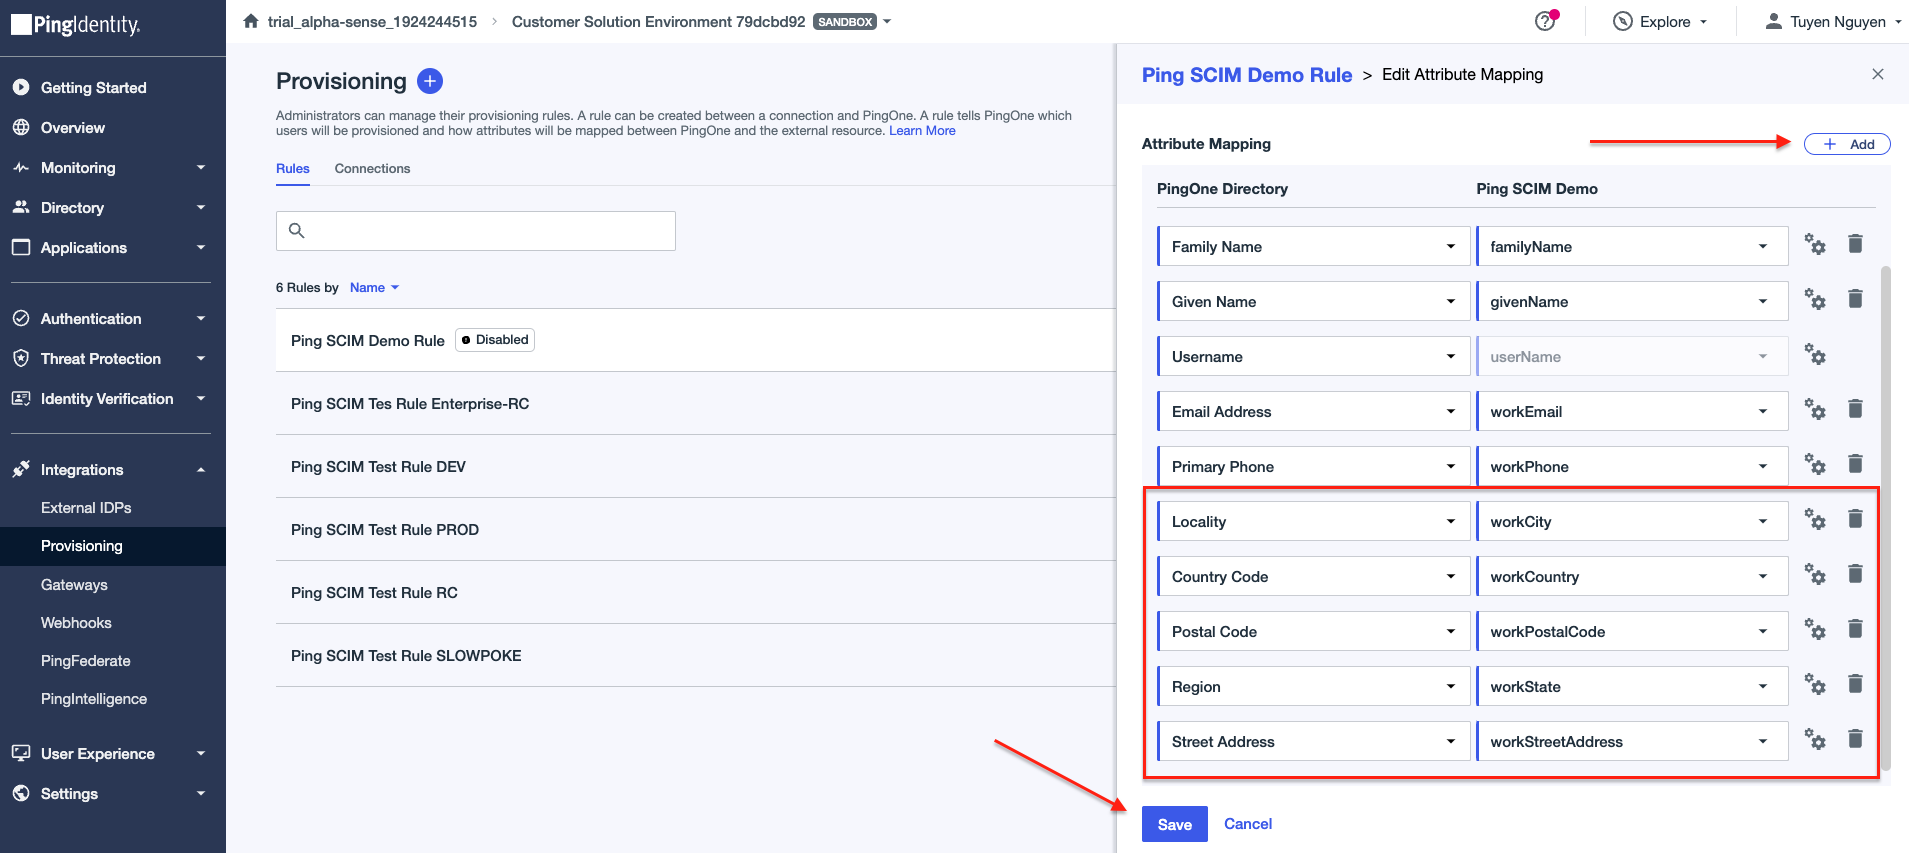
- Under Attribute Mapping, select pencil icon to add more fields to be provisioned:
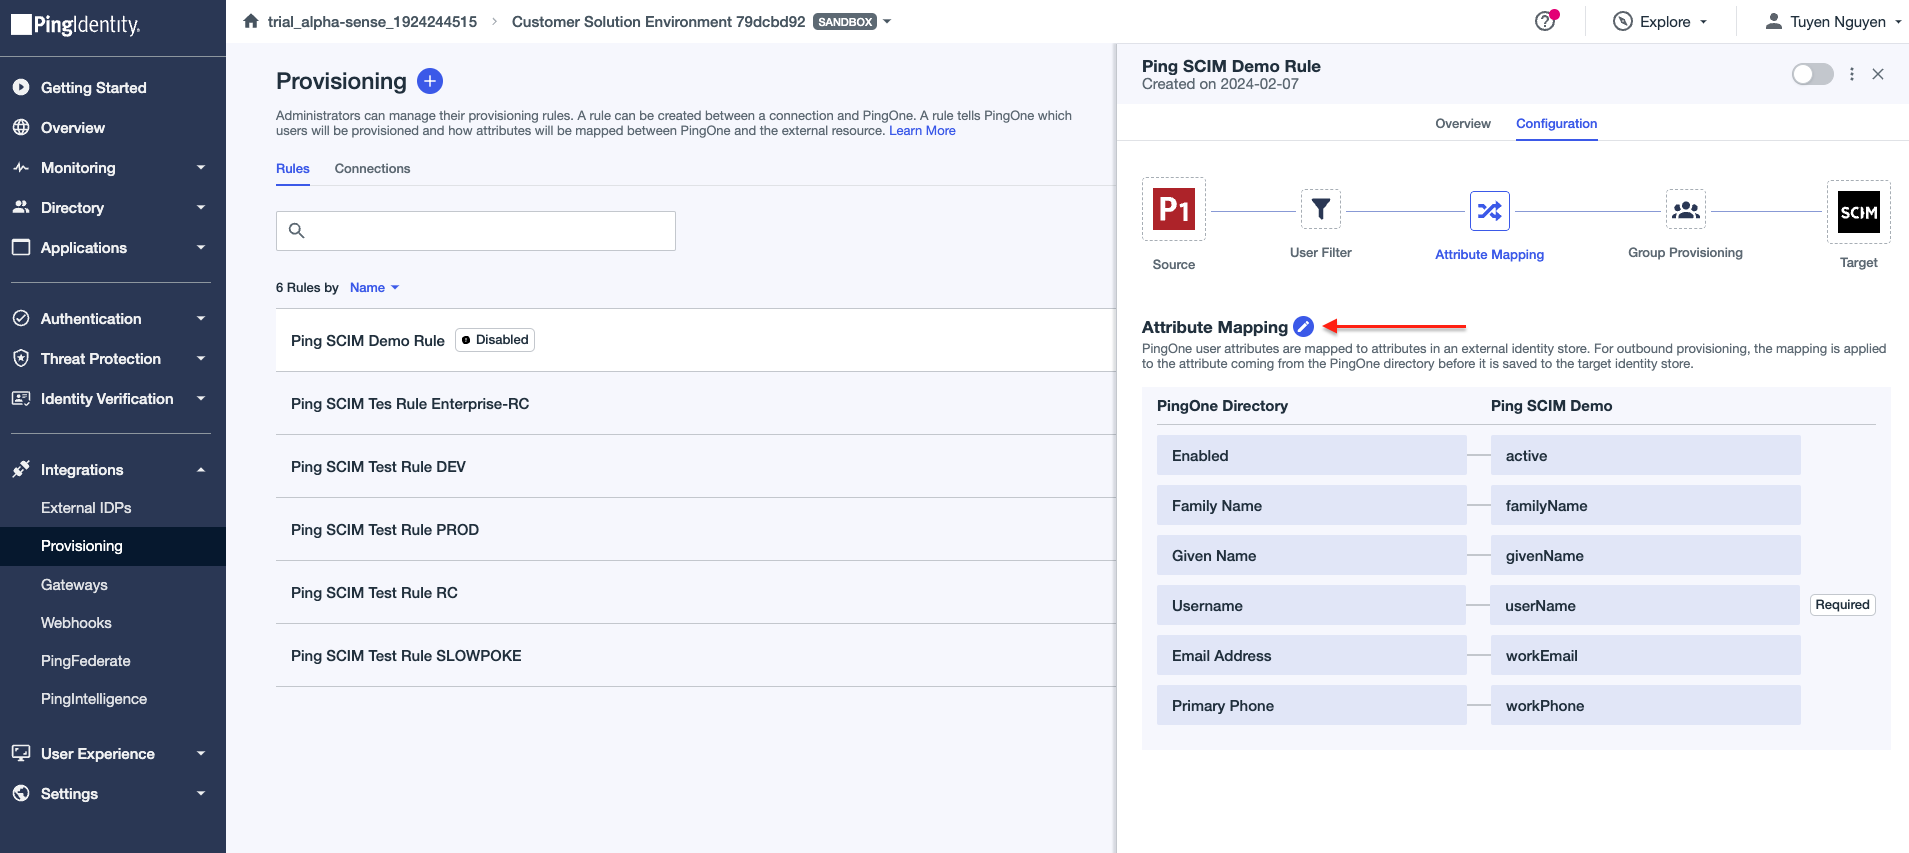
- There are some default mappings, but you can add more fields by clicking on Add and select
value to be mapped. Then Save to continue:
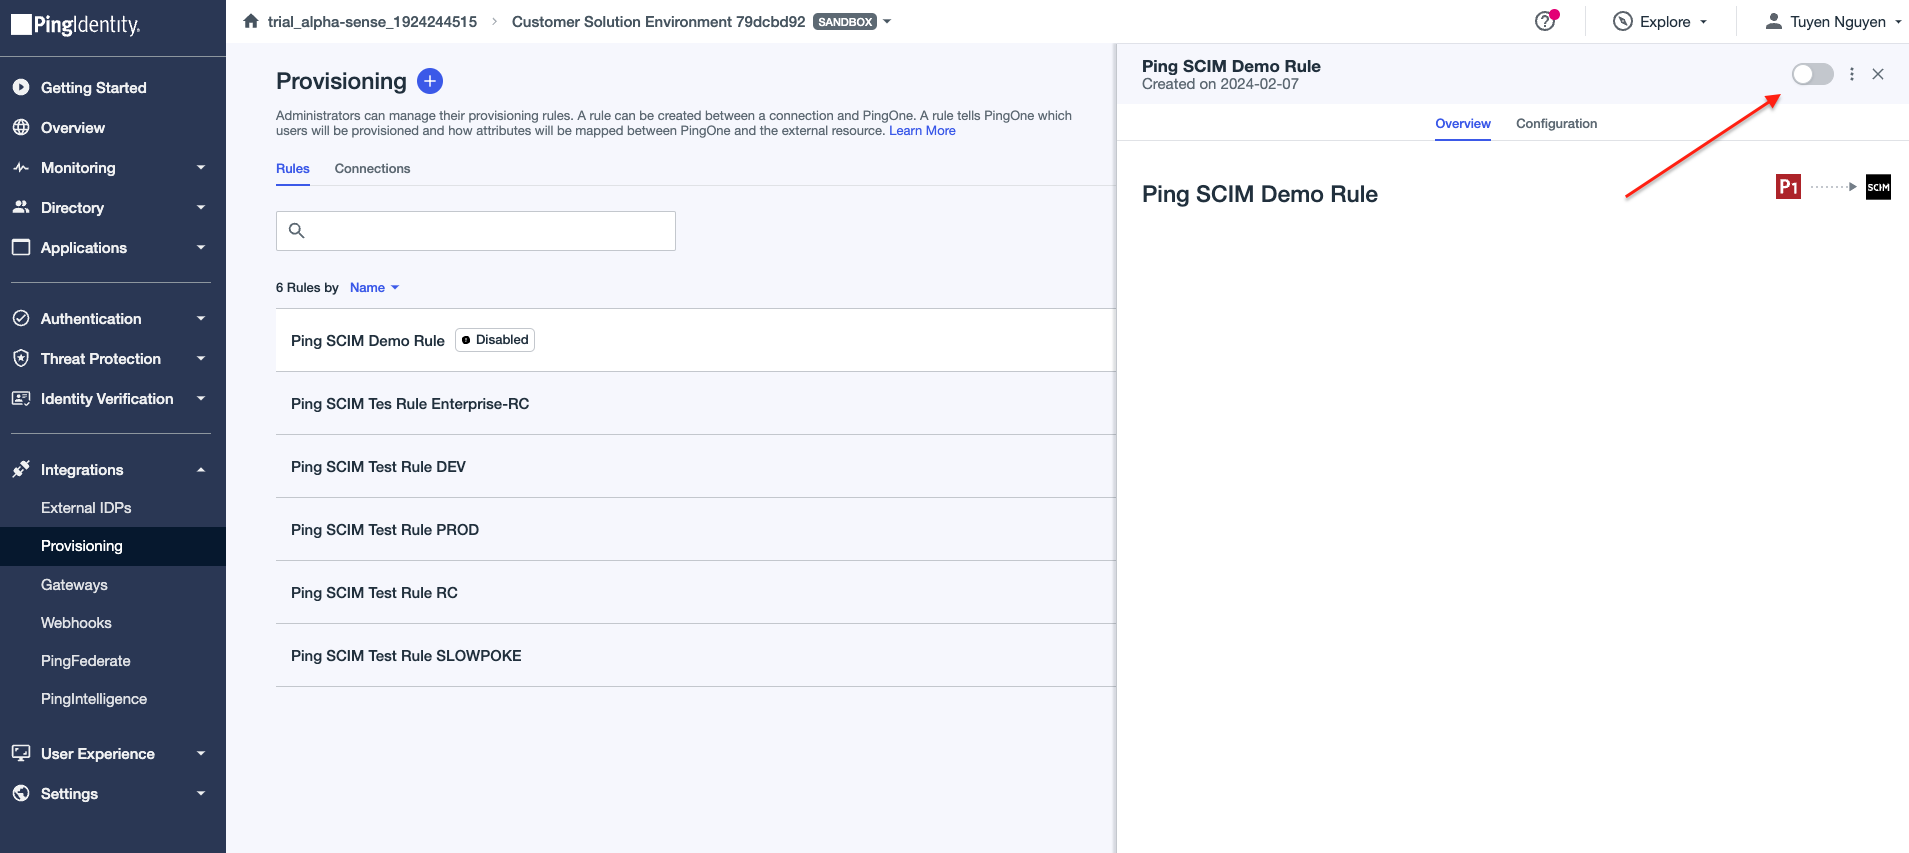
- Switch the button to enable the rule:
- The sync status will show as below:
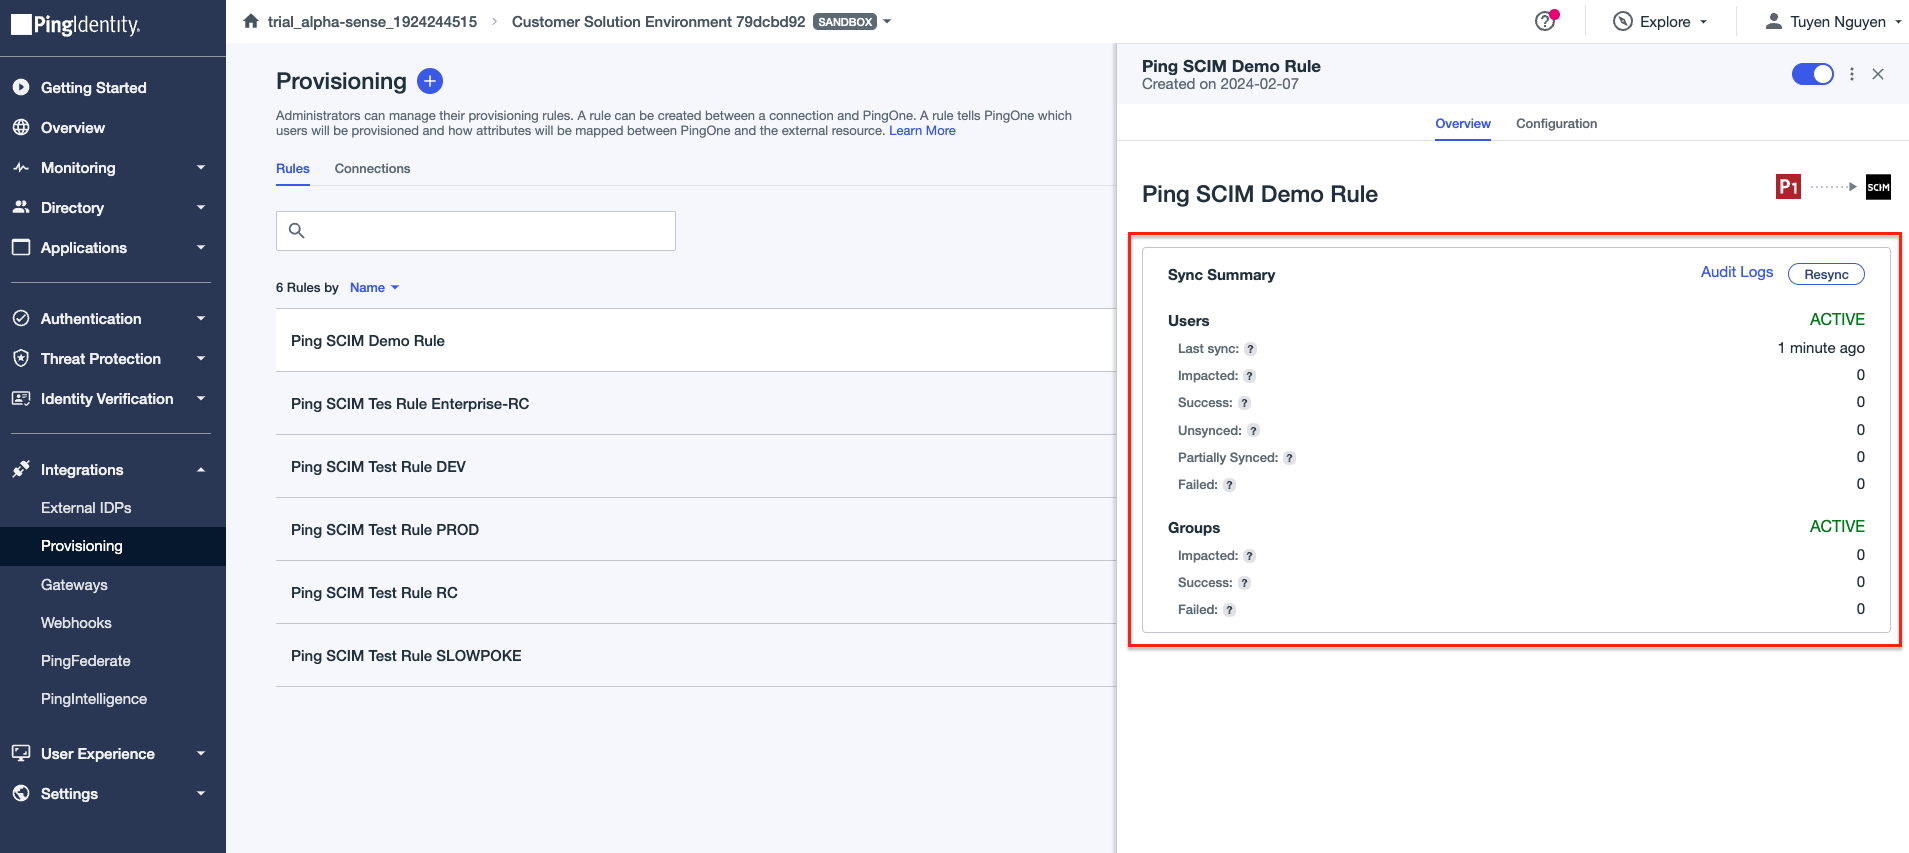
note
There is no user to sync because you haven’t created any user that match the filter “ Username equals testUser " as provided example.
4. Create a user
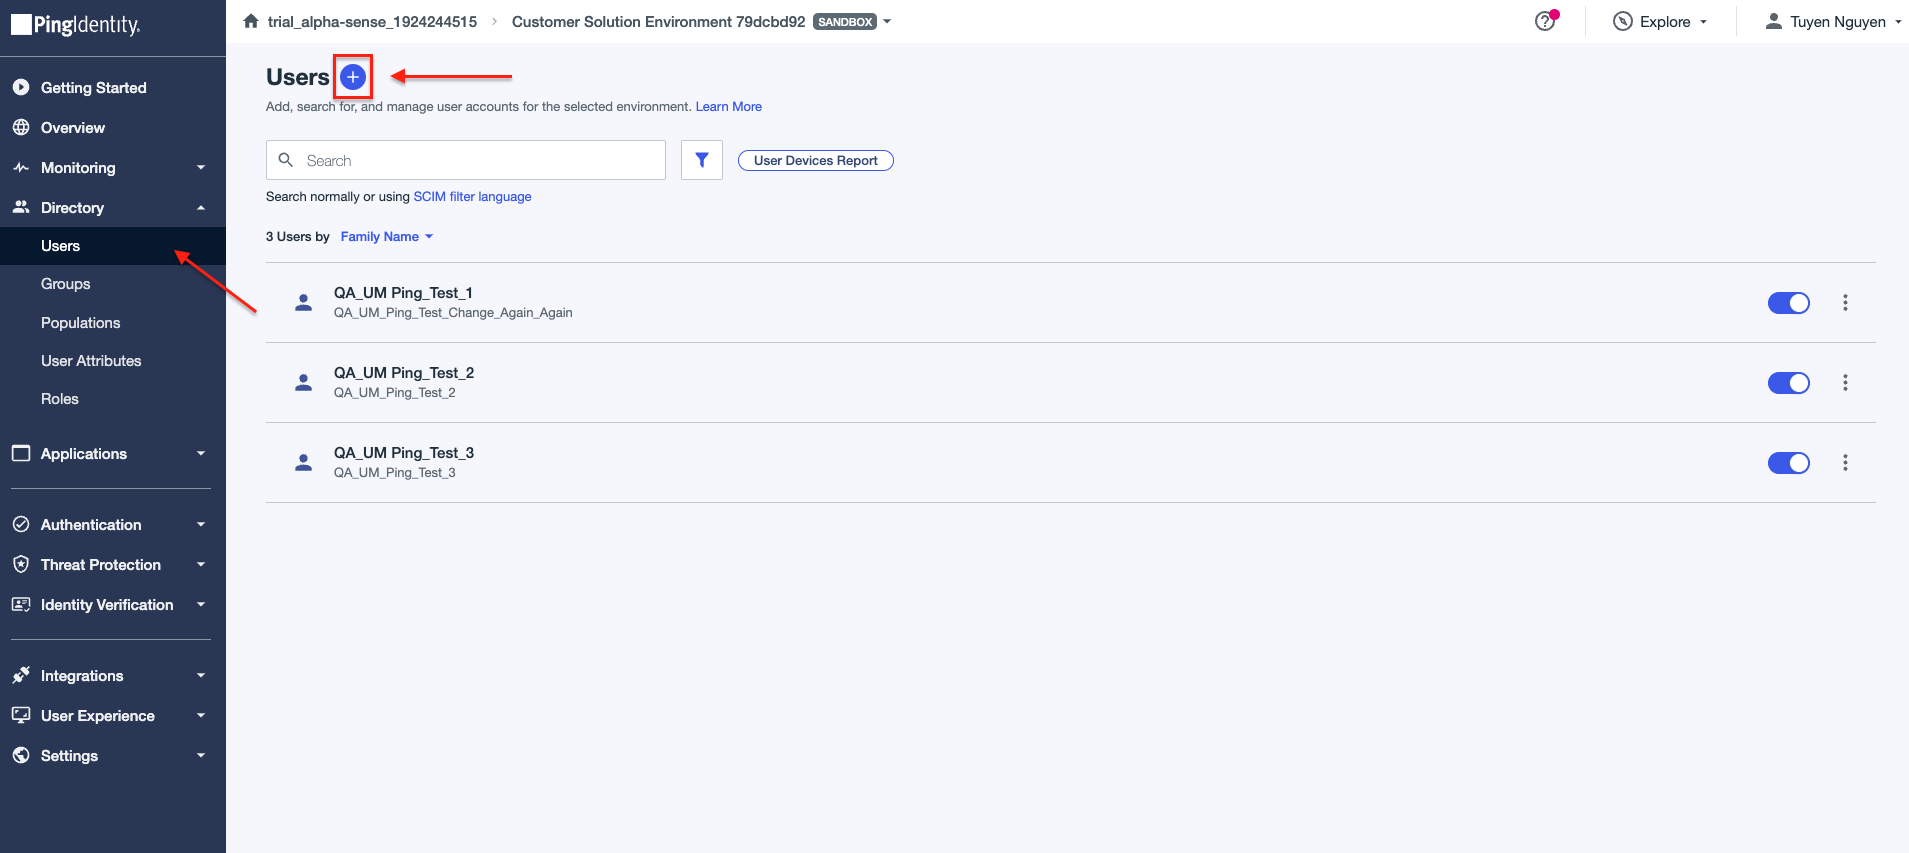
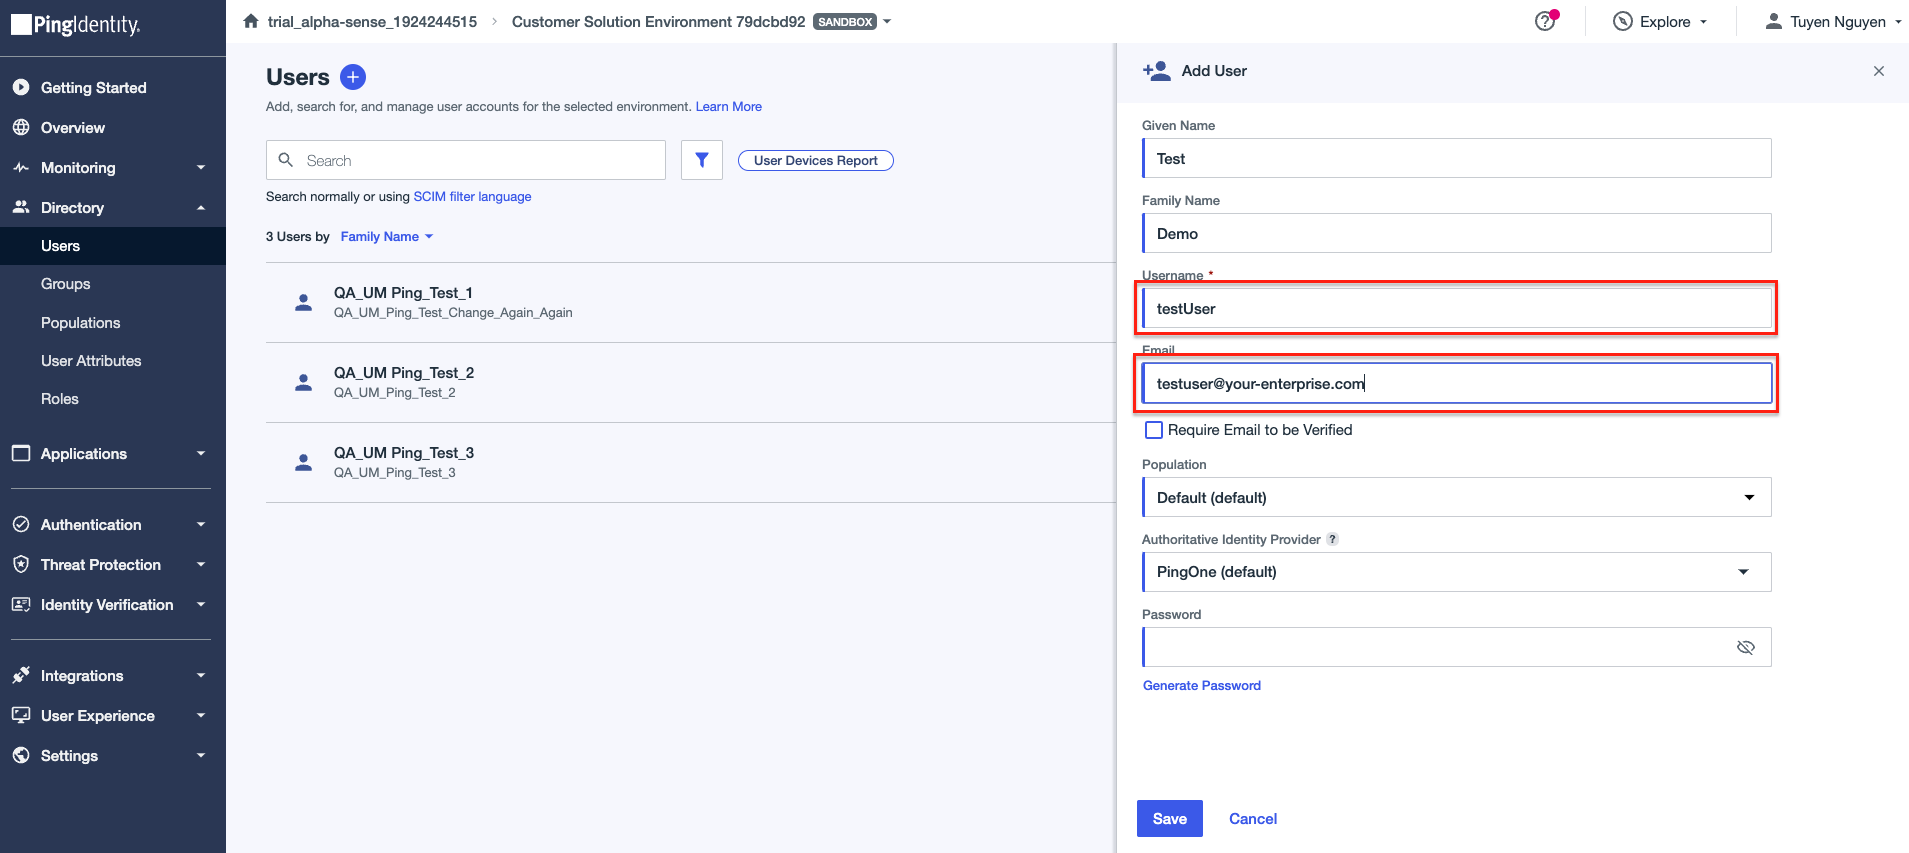
- Navigate to Users under Directory, select plus icon to create new user:
- Fill in some initial details:
- Given Name: name of user.
- Family name: family name of user.
- Username: this is important as it was defined as the attribute to be filtered and selected for provisioning. In the scope of this demo, to satisfy the filter “ Username equals testUser ", you need to set Username as testUser.
- Email: this is important as the email of setting the password for user upon first time login will be sent to this mailbox.
- Then click Save to continue.
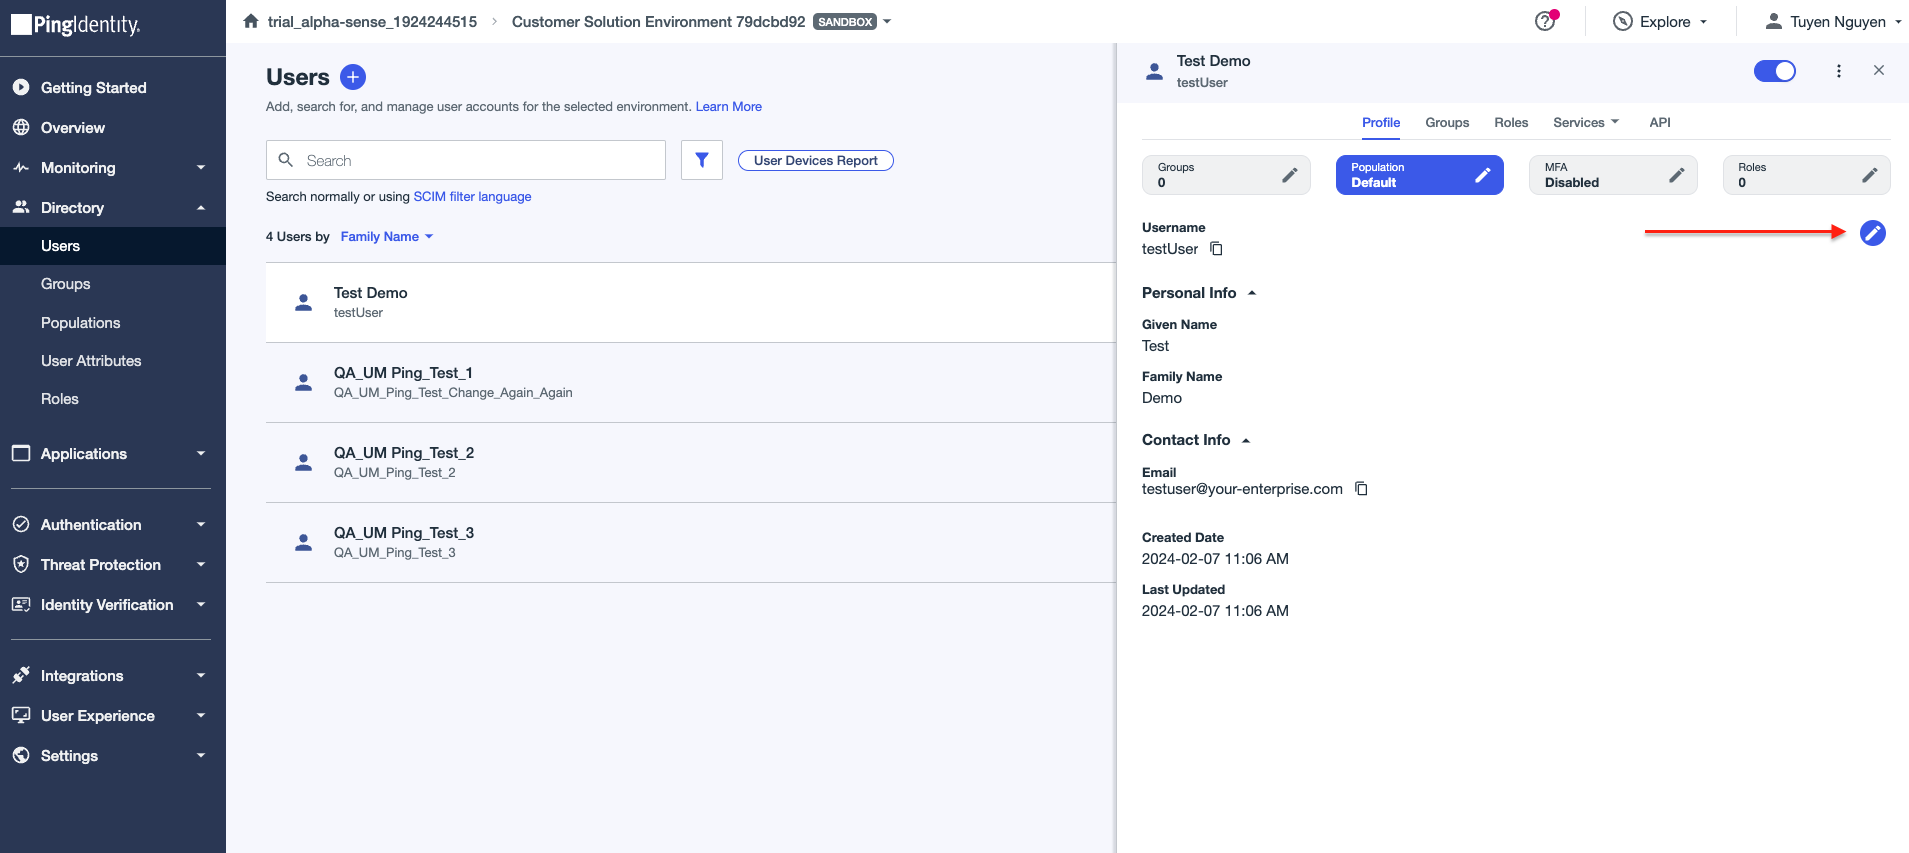
- Click on pencil icon to add more details:
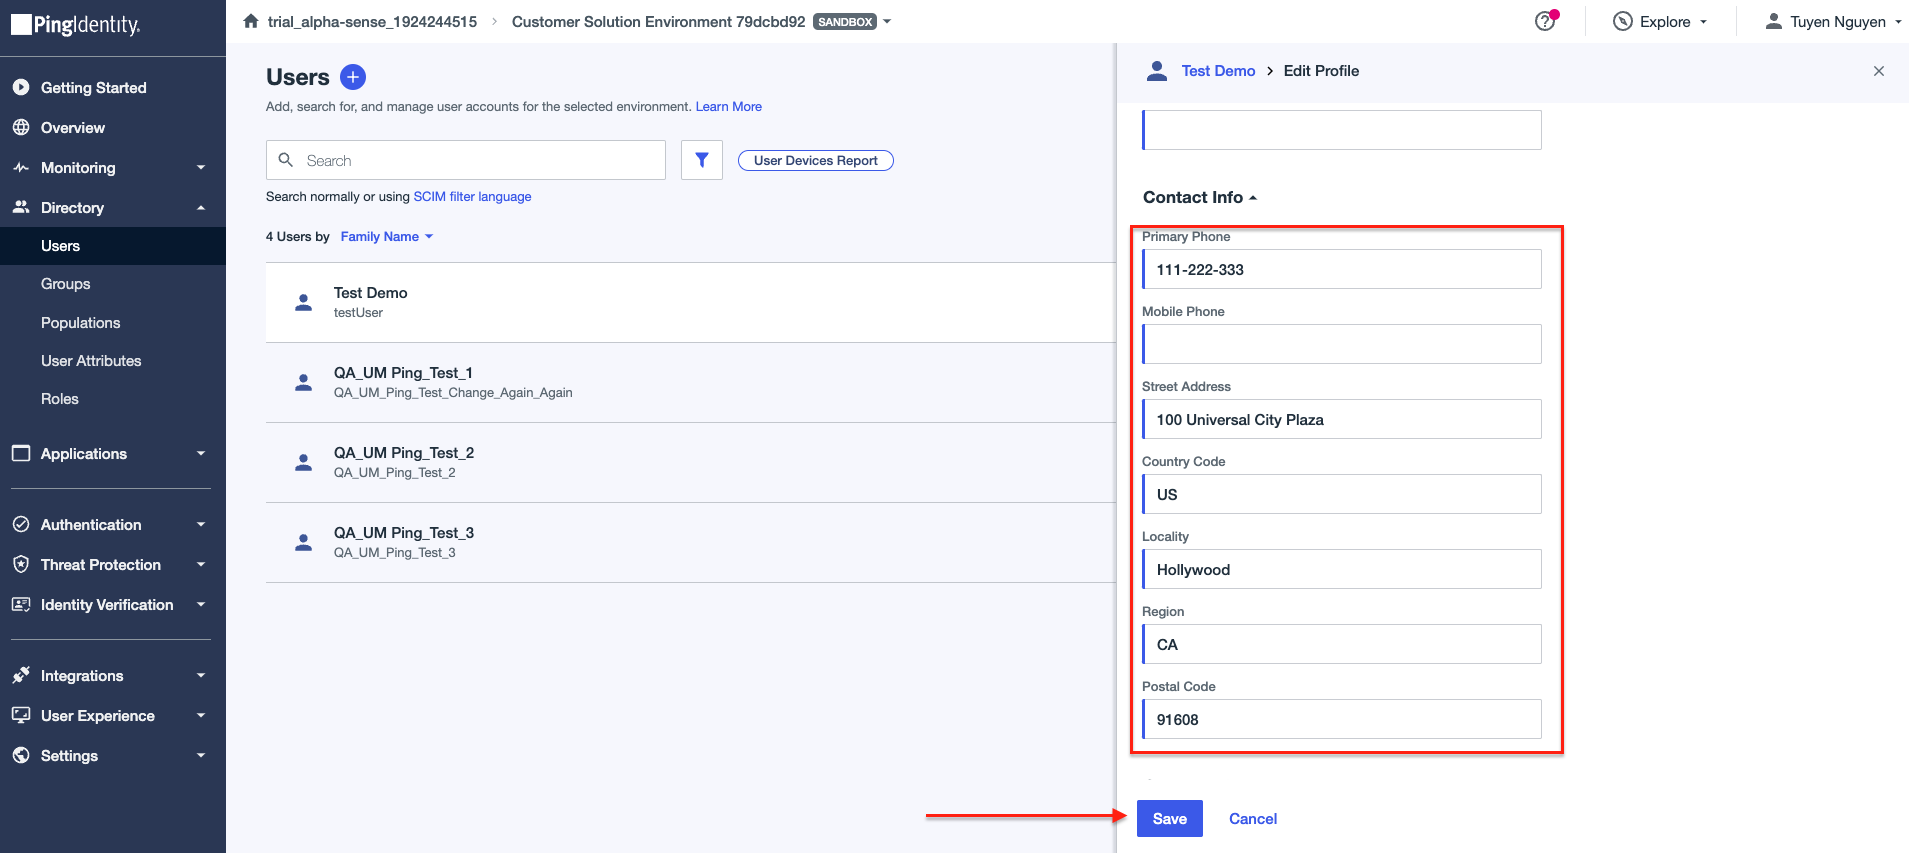
- You can optionally fill in some additional fields to make sure provisioned user in AlphaSense
will have these details. Then click Save to finish updating:
5. Verify user is created in AlphaSense
Navigate to Additional Guides and follow the guide to check: Verify User is Created in AlphaSense