SCIM with OneLogin
1 Prerequisite
- Admin account created with permission to create new application in OneLogin: OneLogin: Market-Leading Identity and Access Management Solutions
2. Create new application in OneLogin
-
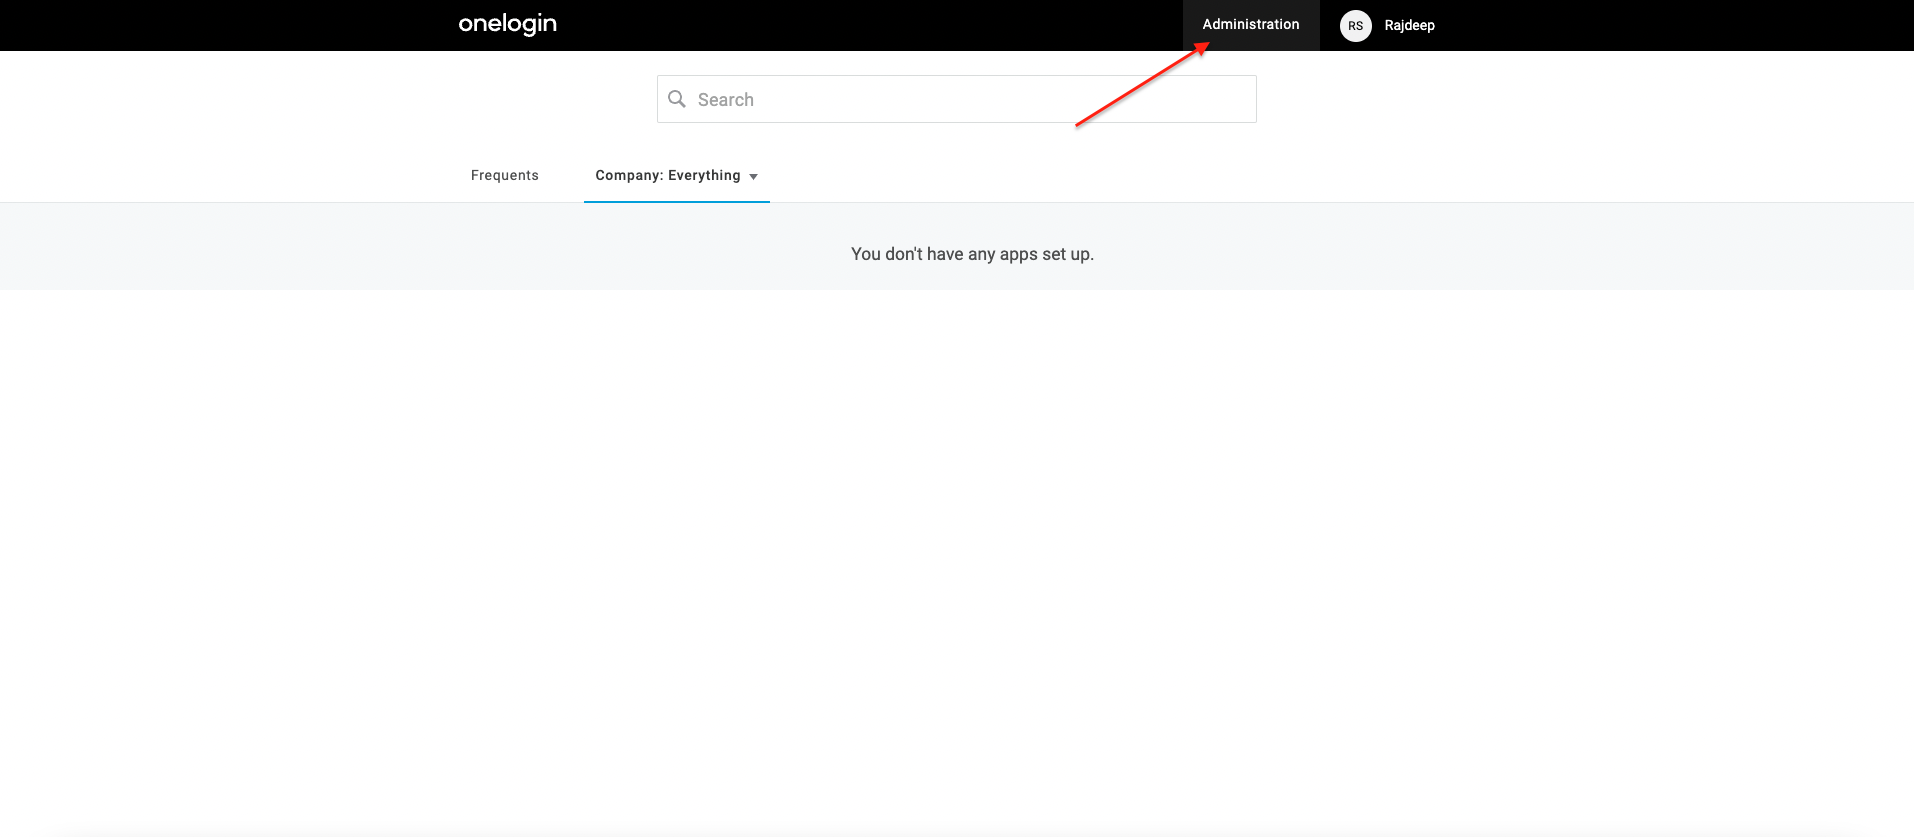
After logging into OneLogin with admin account, click Administration to navigate to admin portal:
-
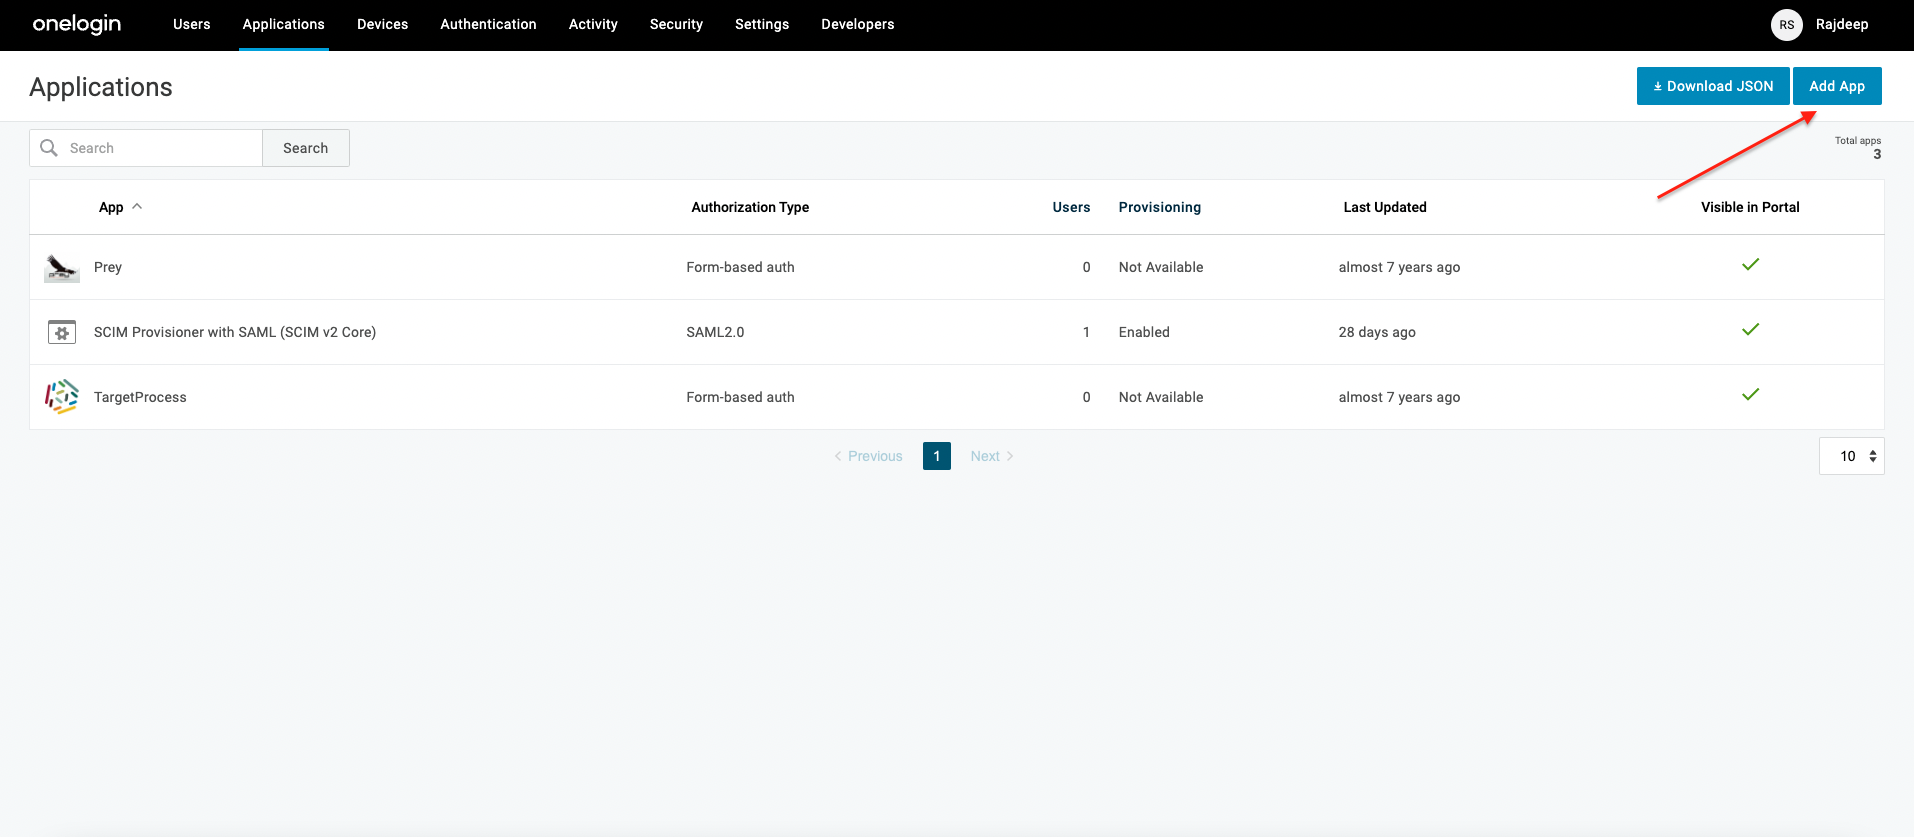
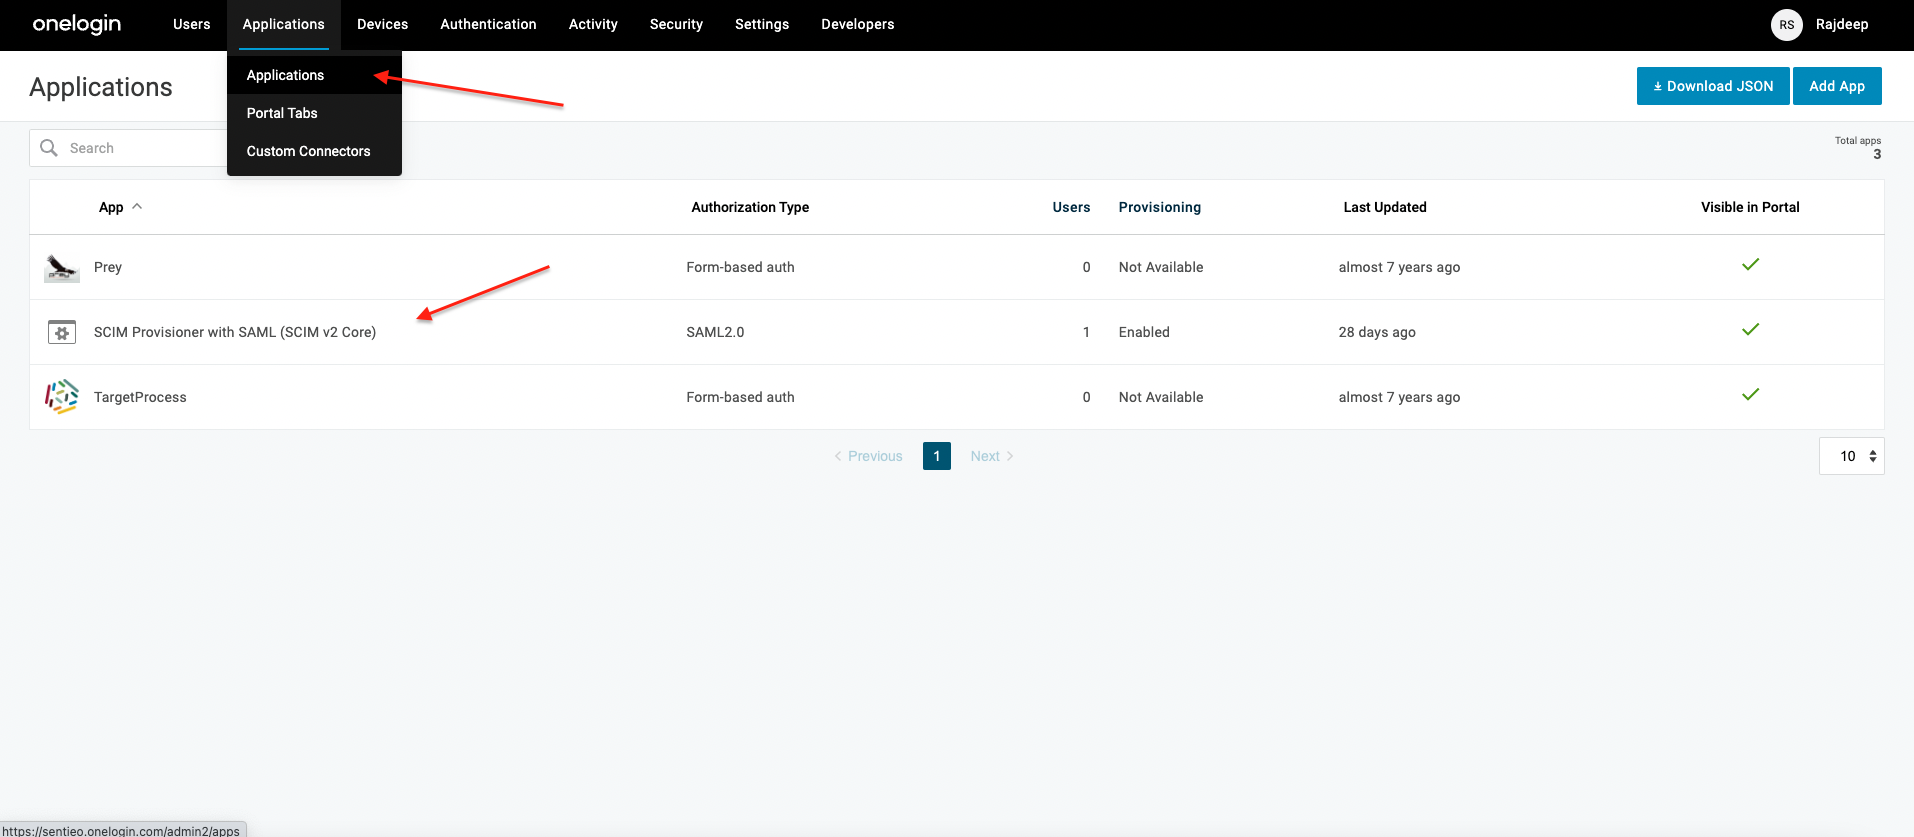
Go to Applications under Applications menu:

-
Click on Add App to add new application:
-
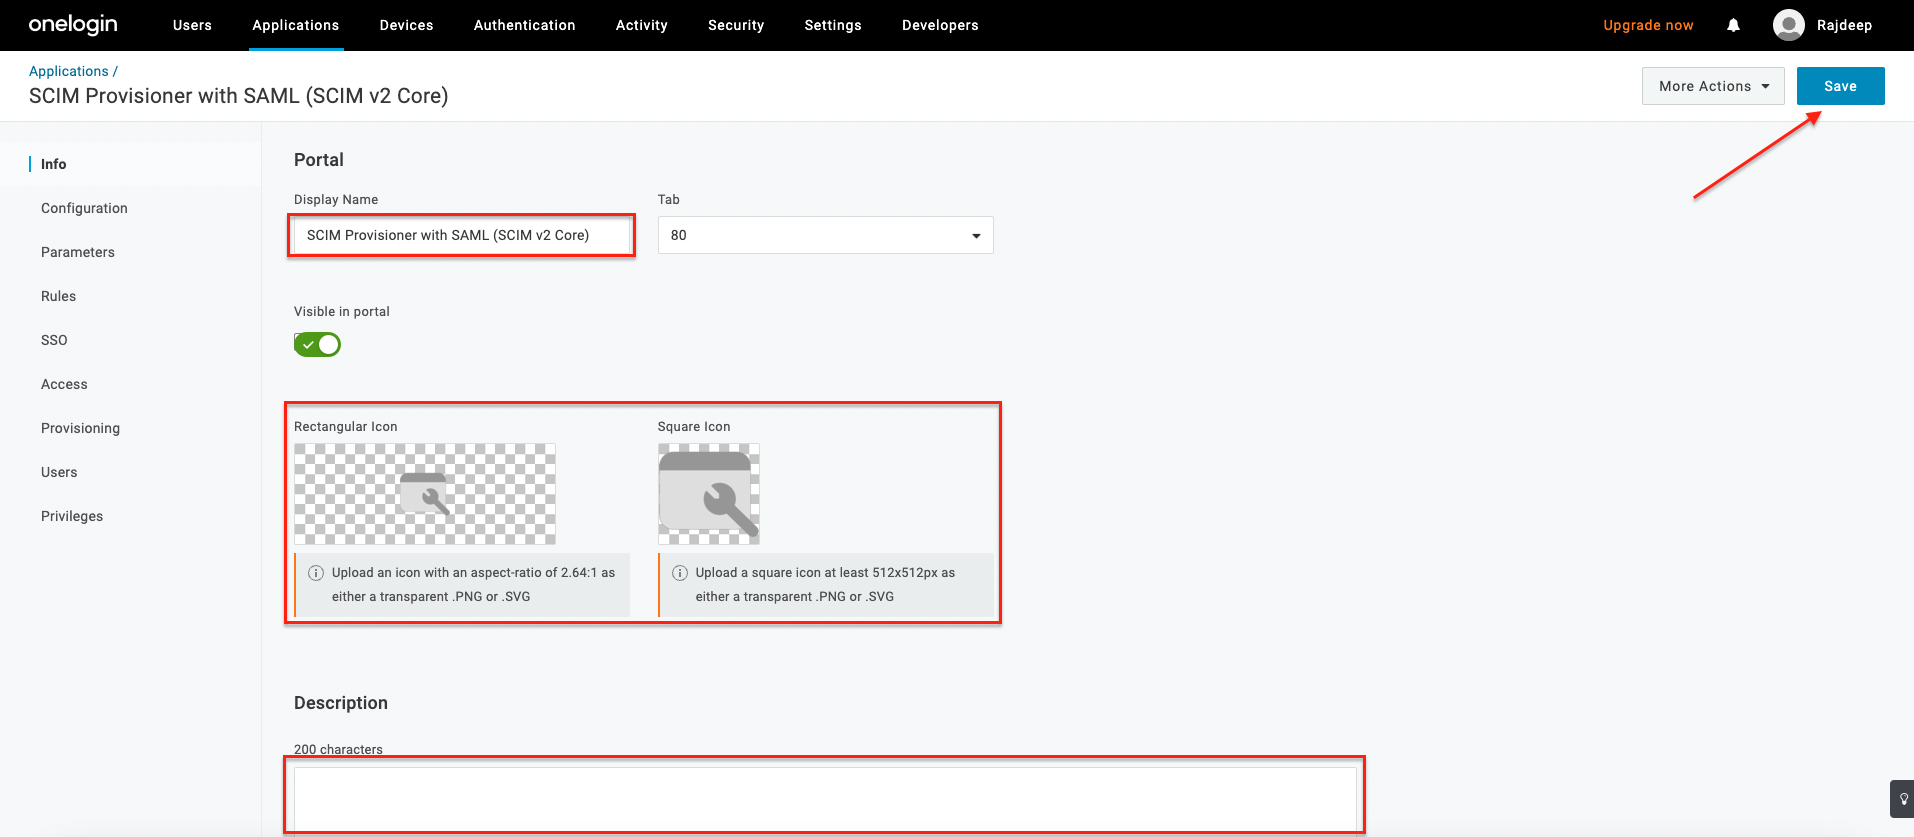
Search for SCIM and select application with SCIM v2 Core:

-
Change the DisplayName, add Icon or Description if needed. Then click Save to apply changes:
-
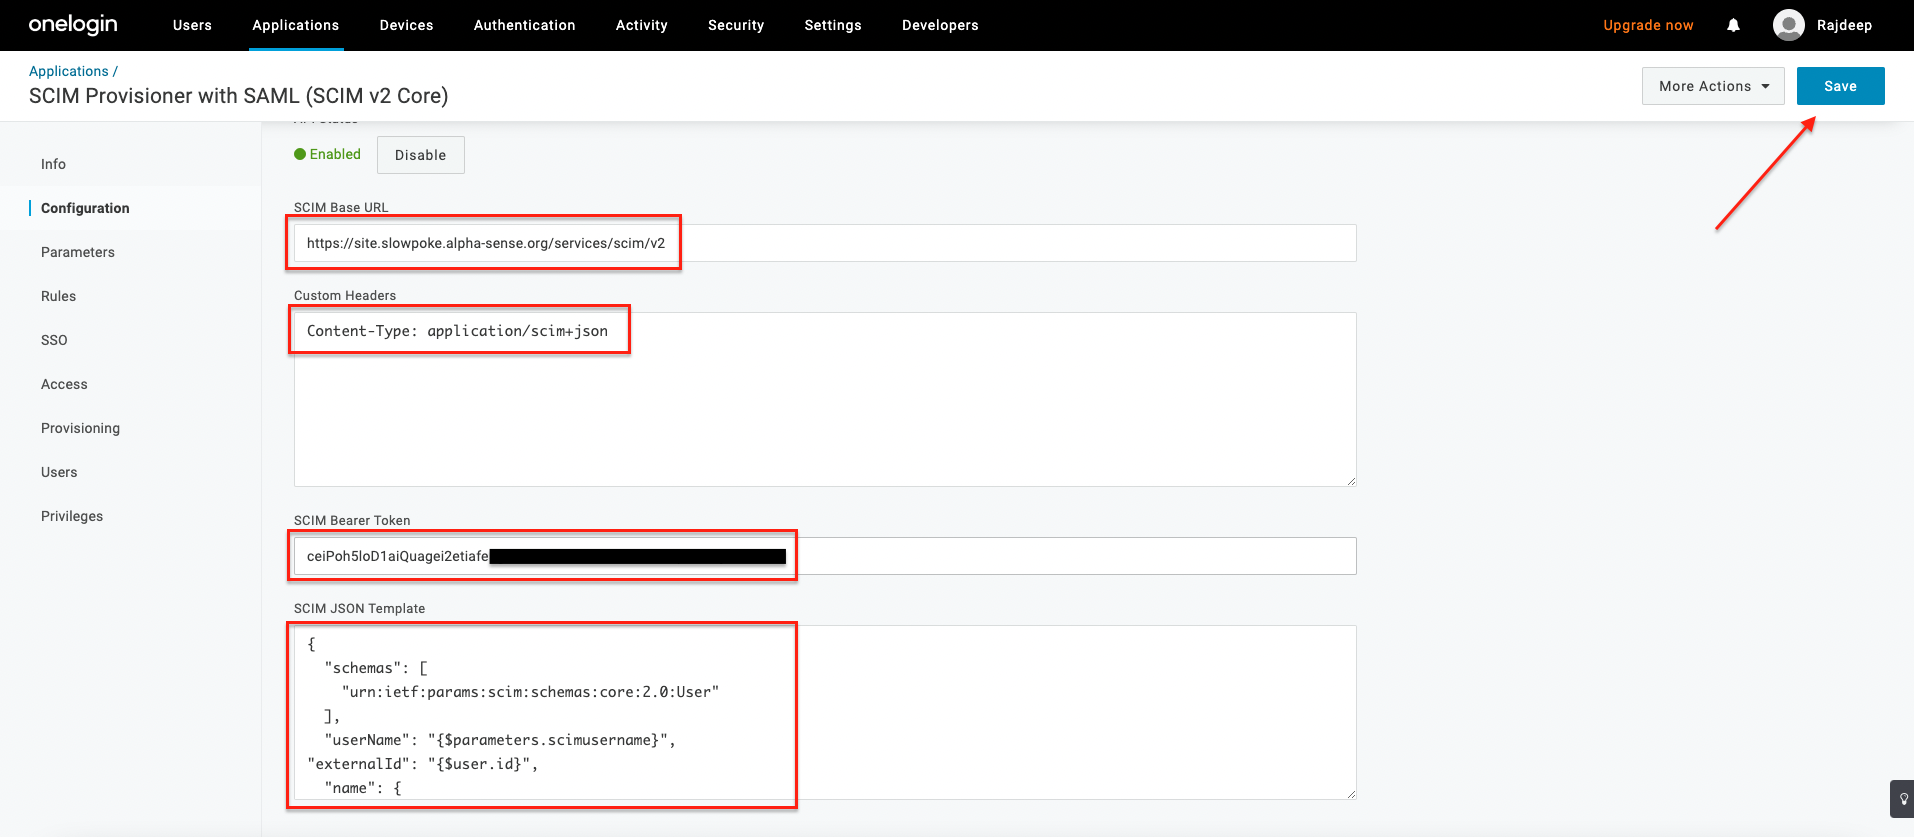
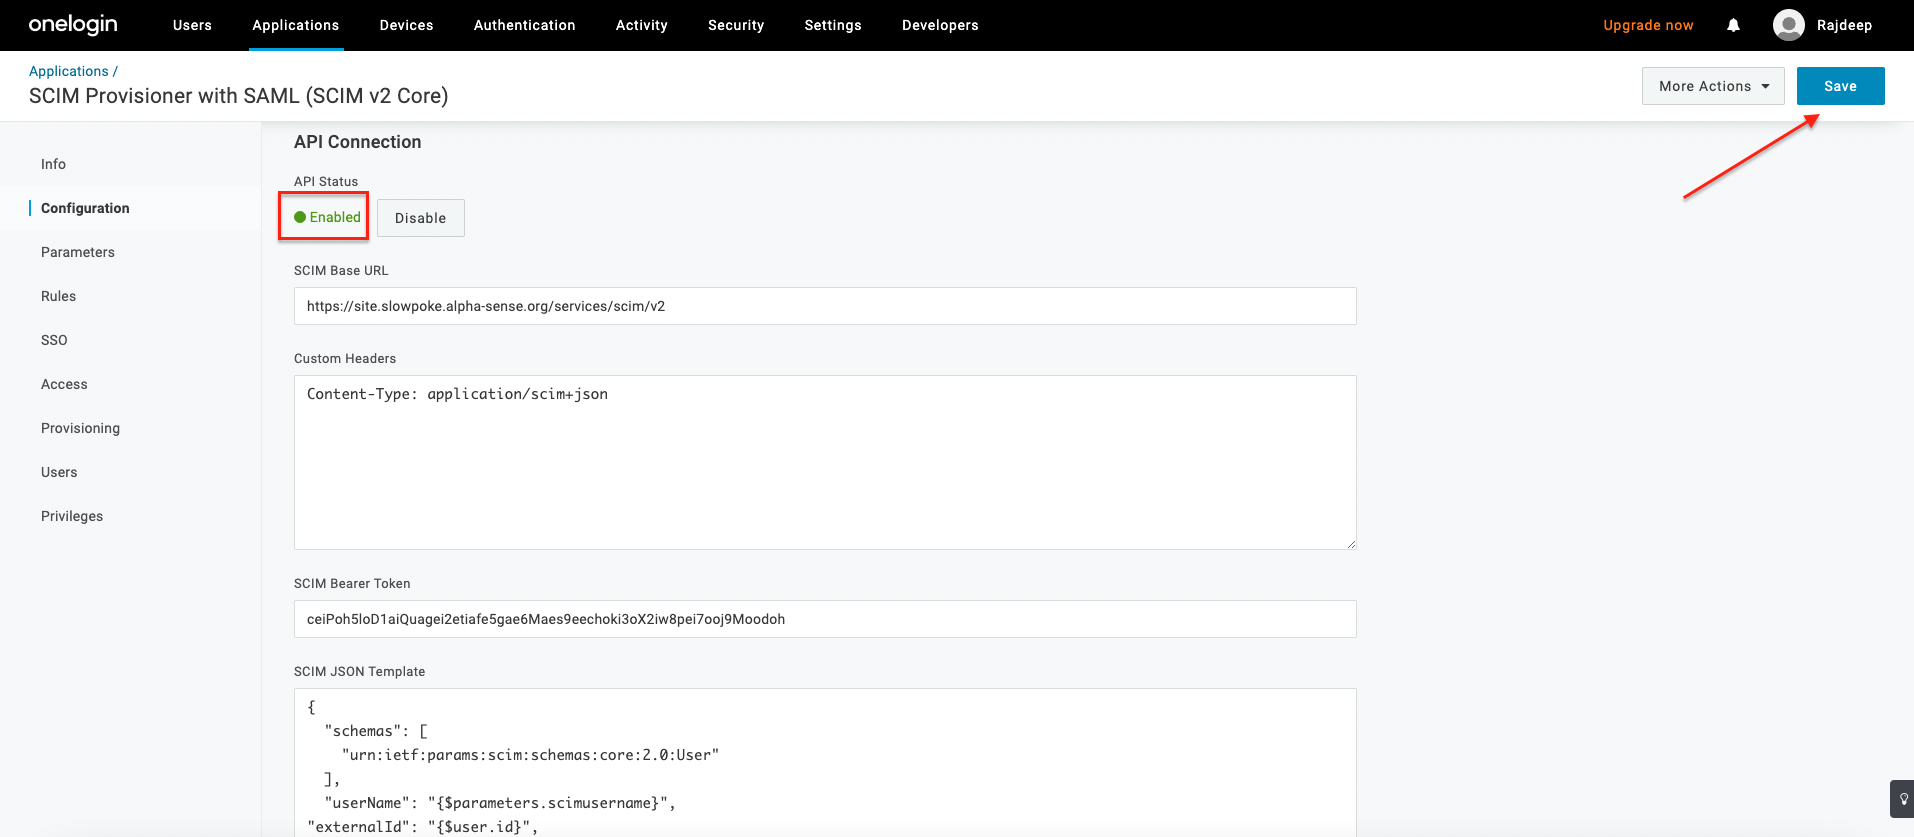
Select Configuration tab and set up connection:
- SCIM base URL: This is pointing to your deployed SCIM service:
- Format: {domain name}/services/scim/v2
- Custom Headers: This requires application/scim+json as Content-Type.
- SCIM Bearer Token: The API key to interact with SCIM service: Retrieve Your SCIM API Key
- SCIM JSON Template: You have to define the template where fields you desire to send to SCIM service are included. Since OneLogin not handled the externalId correctly with your current SCIM service, you need to provide it explicitly.
{
  "schemas": ["urn:ietf:params:scim:schemas:core:2.0:User"],
  "userName": "{$parameters.scimusername}",
  "externalId": "{$user.id}",
  "name": {
    "givenName": "{$user.firstname}",
    "familyName": "{$user.lastname}"
  },
  "emails": [
    {
      "value": "{$user.email}",
      "primary": true,
      "type": "work"
    }
  ]
} - SCIM base URL: This is pointing to your deployed SCIM service:
 7.
Click Save and once the connection is set up successfully, API Status will be Enabled:
7.
Click Save and once the connection is set up successfully, API Status will be Enabled:
3. Enable provisioning for OneLogin application
- Select Applications under Applications menu to see all available applications. Then
select our created application:

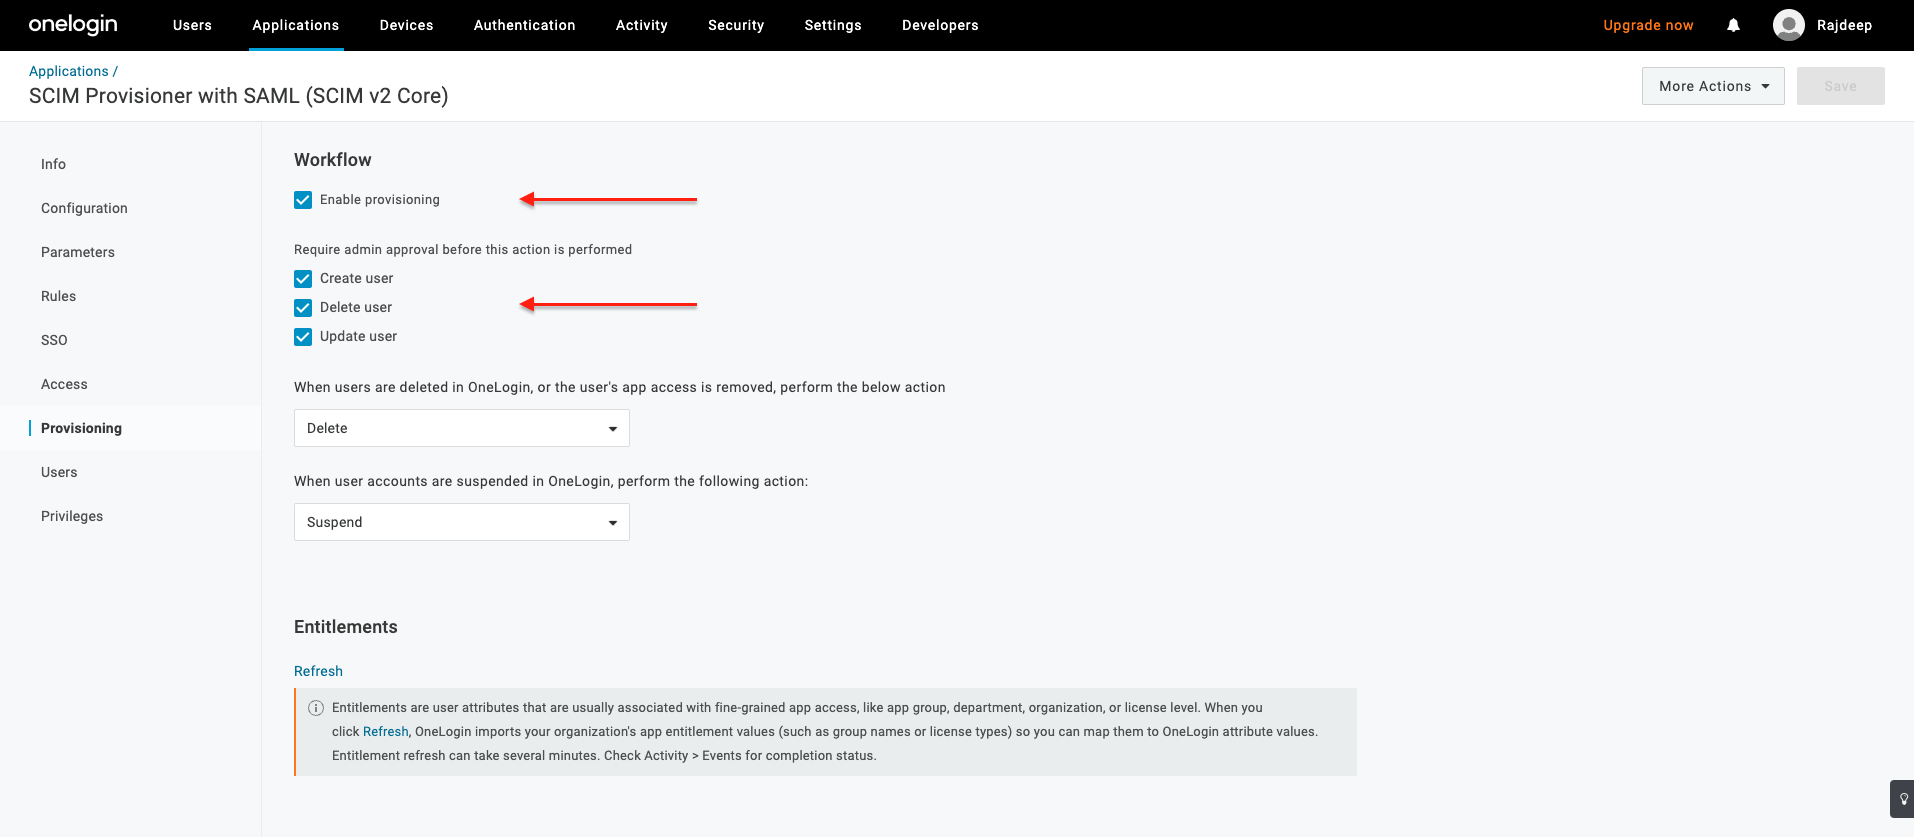
- Navigate to Provisioning tab, then check Enable provisioning, Create user, Delete
user, Update user and keep others as default:
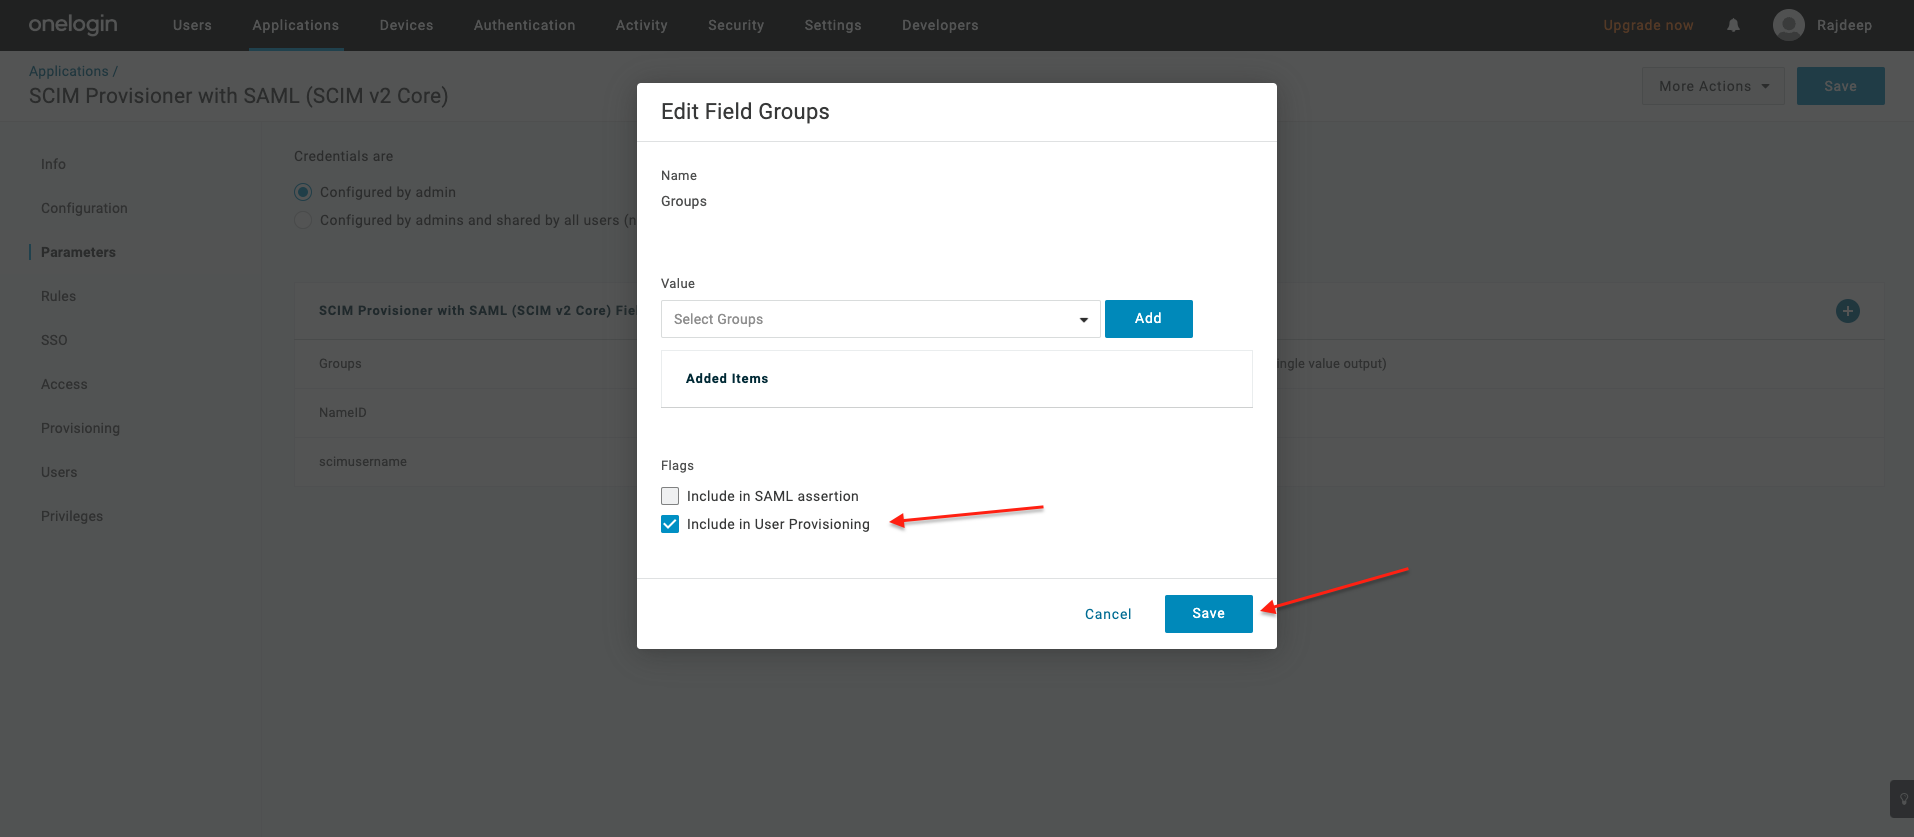
4. (Optional) Enable group provisioning for OneLogin application
- Select Applications under Applications menu to see all available applications. Then
select our created application:
- Navigate Parameters tab, click on Group field:
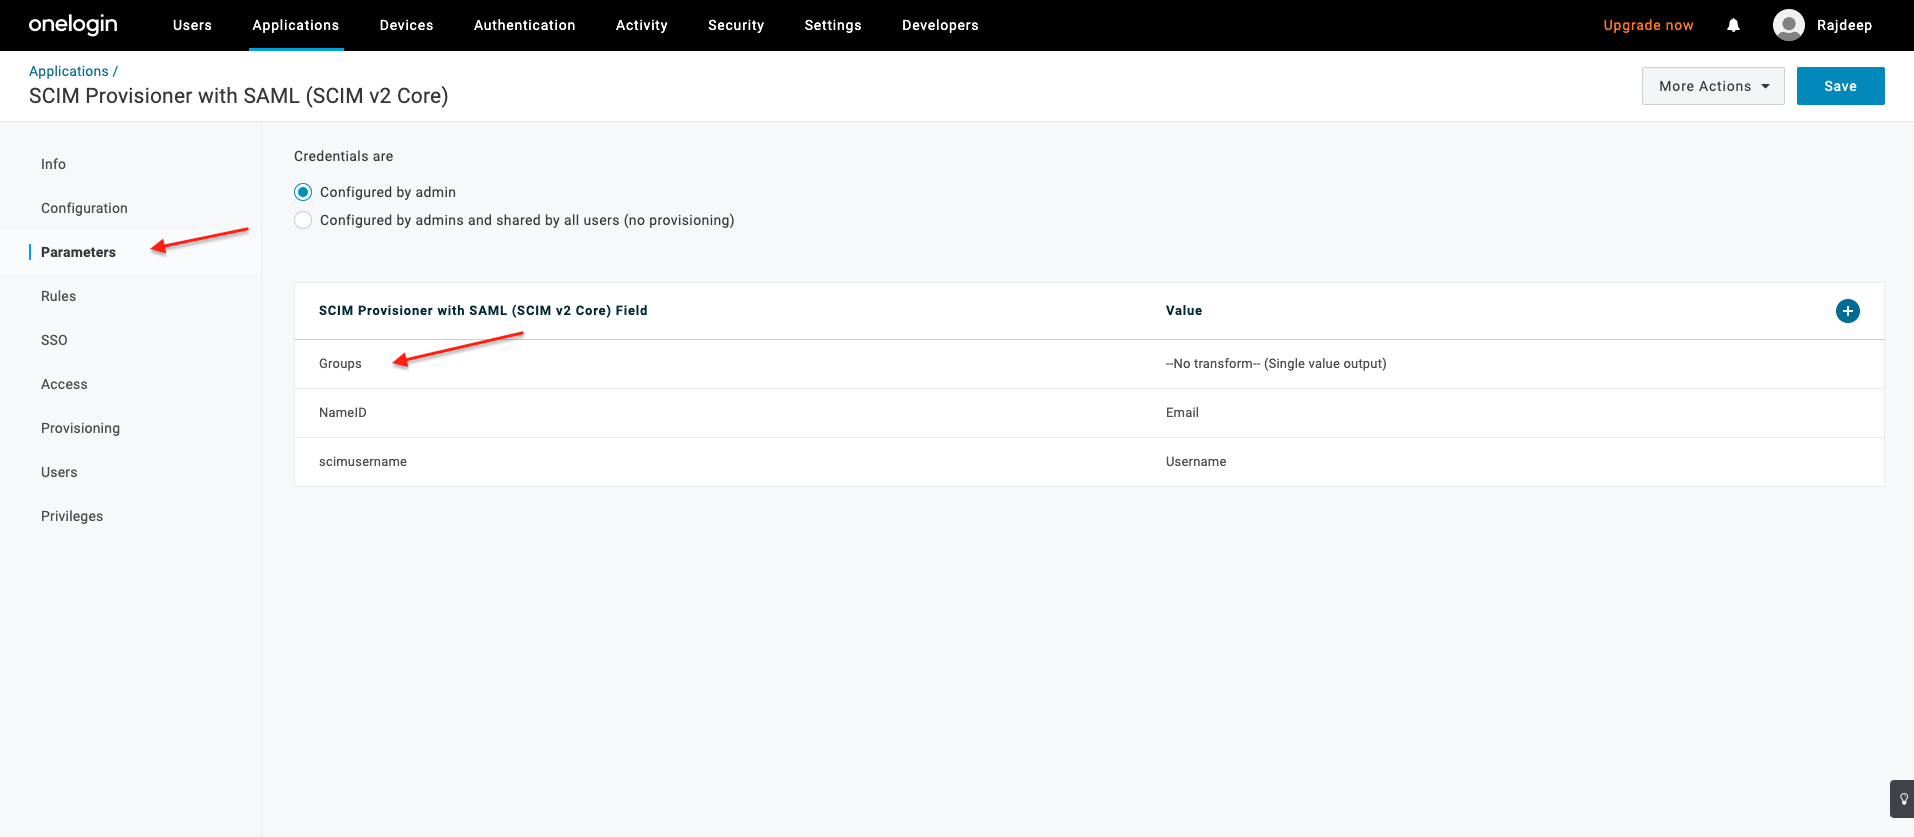
- Check Include in User Provisioning and then Save to apply changes:
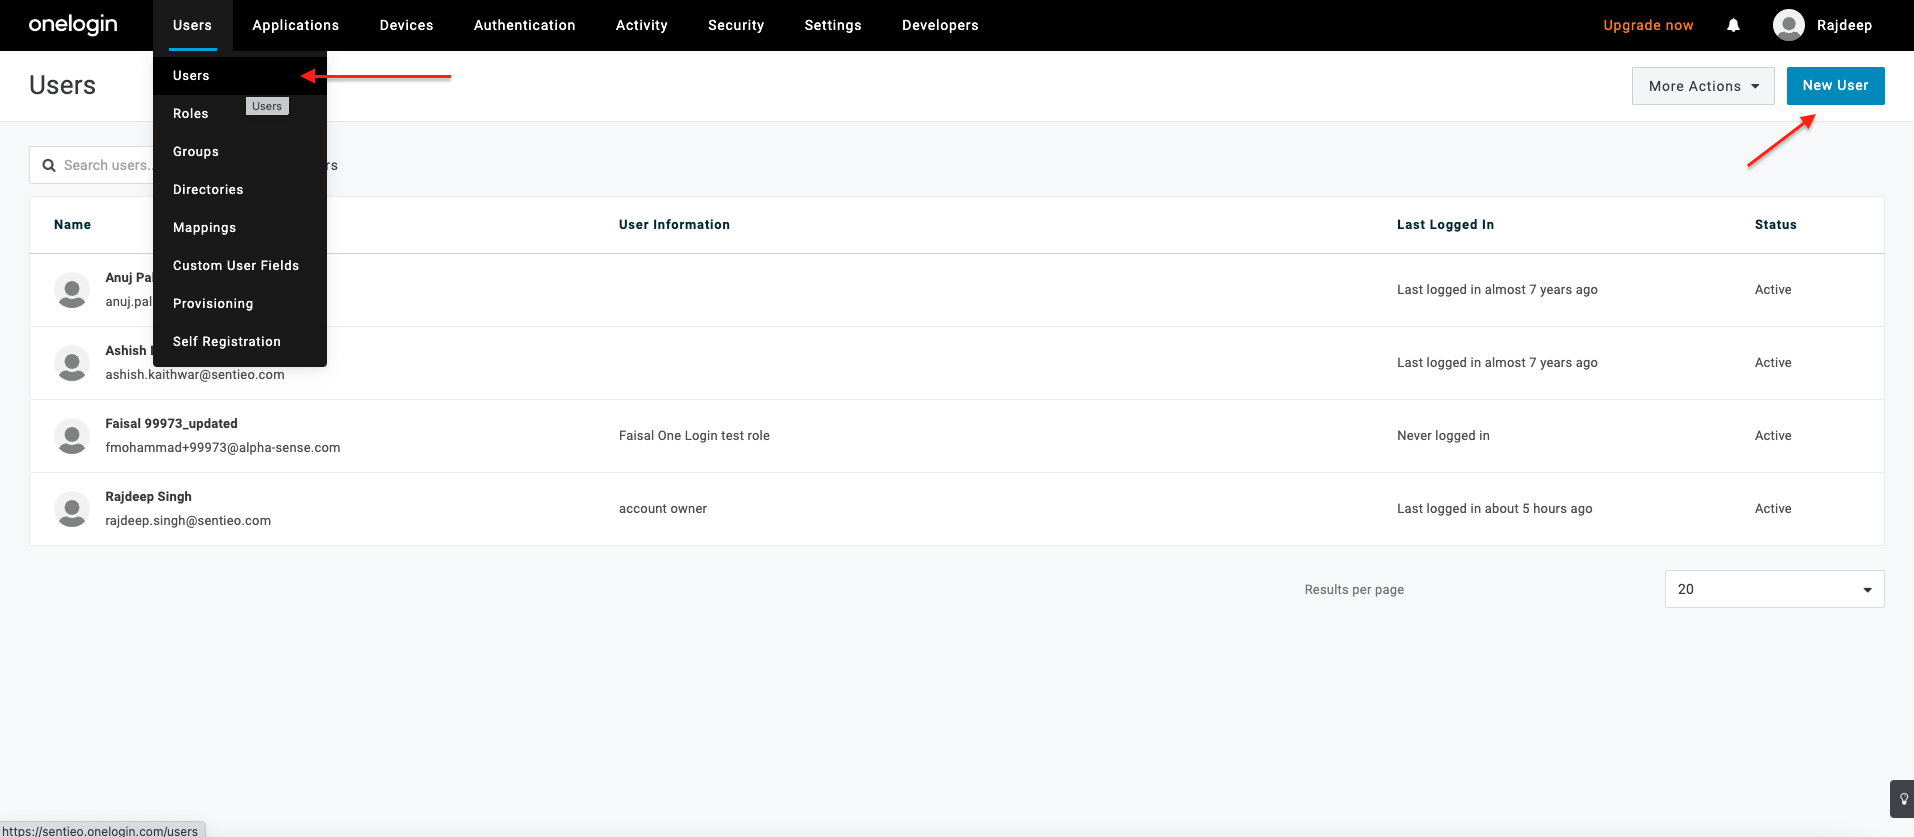
5. Create a user
- Select Users under Users menu, all available users listed, then select New User to
add user:
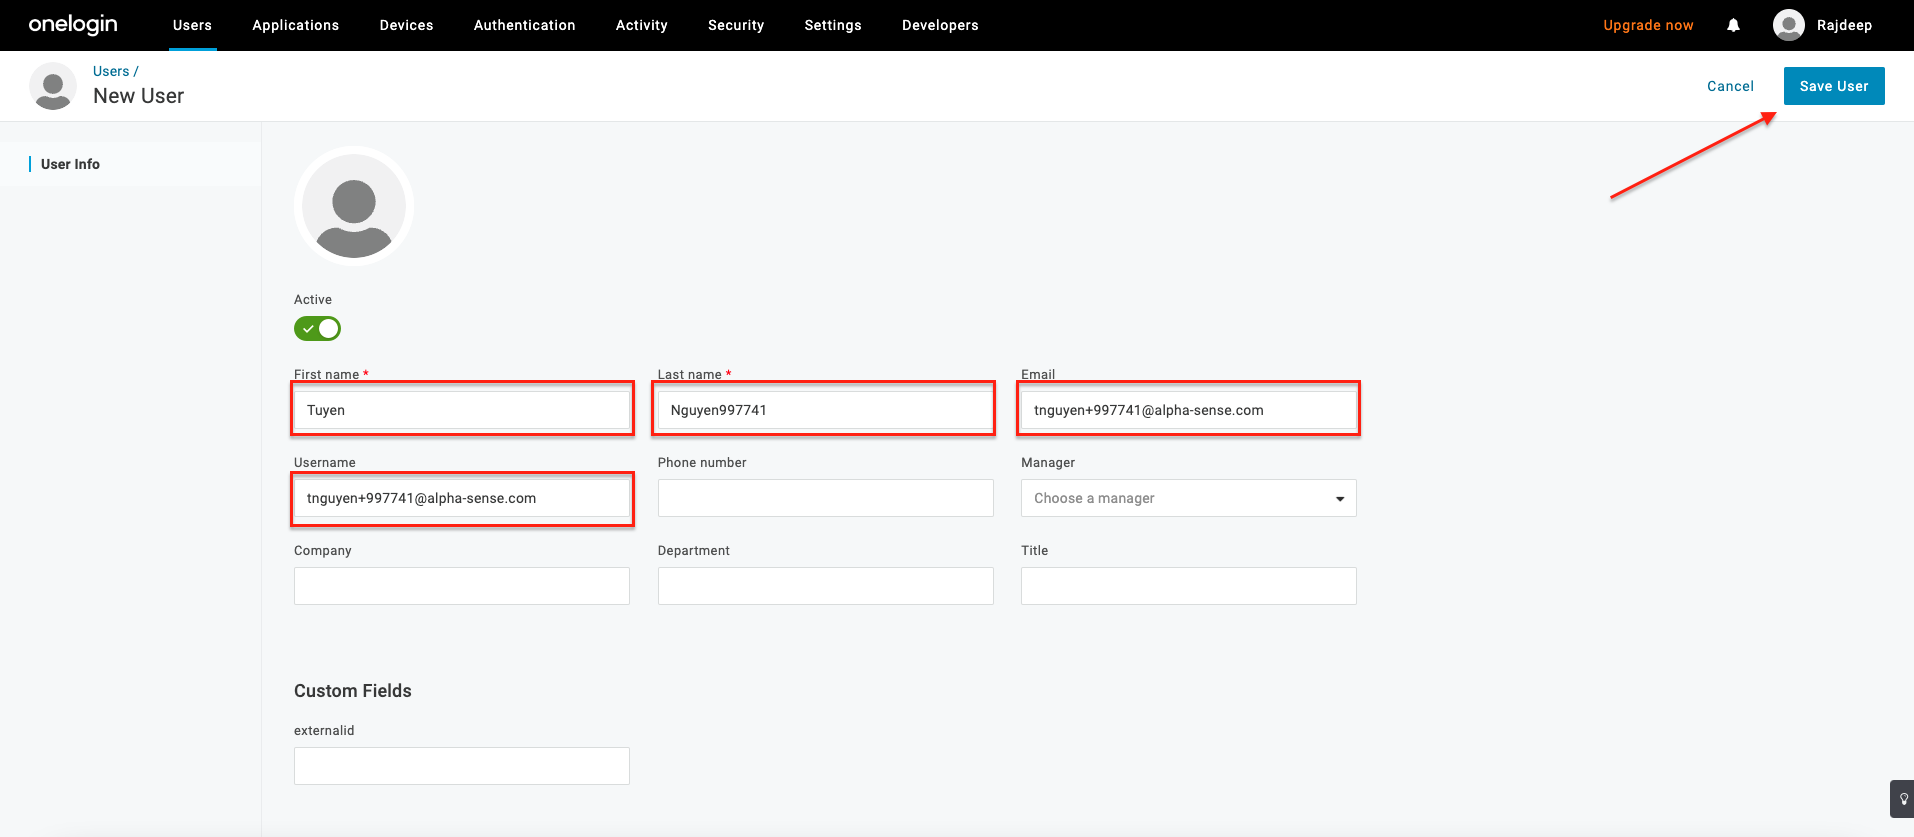
- Add First name, Last name, Email, Username then click Save to create user:
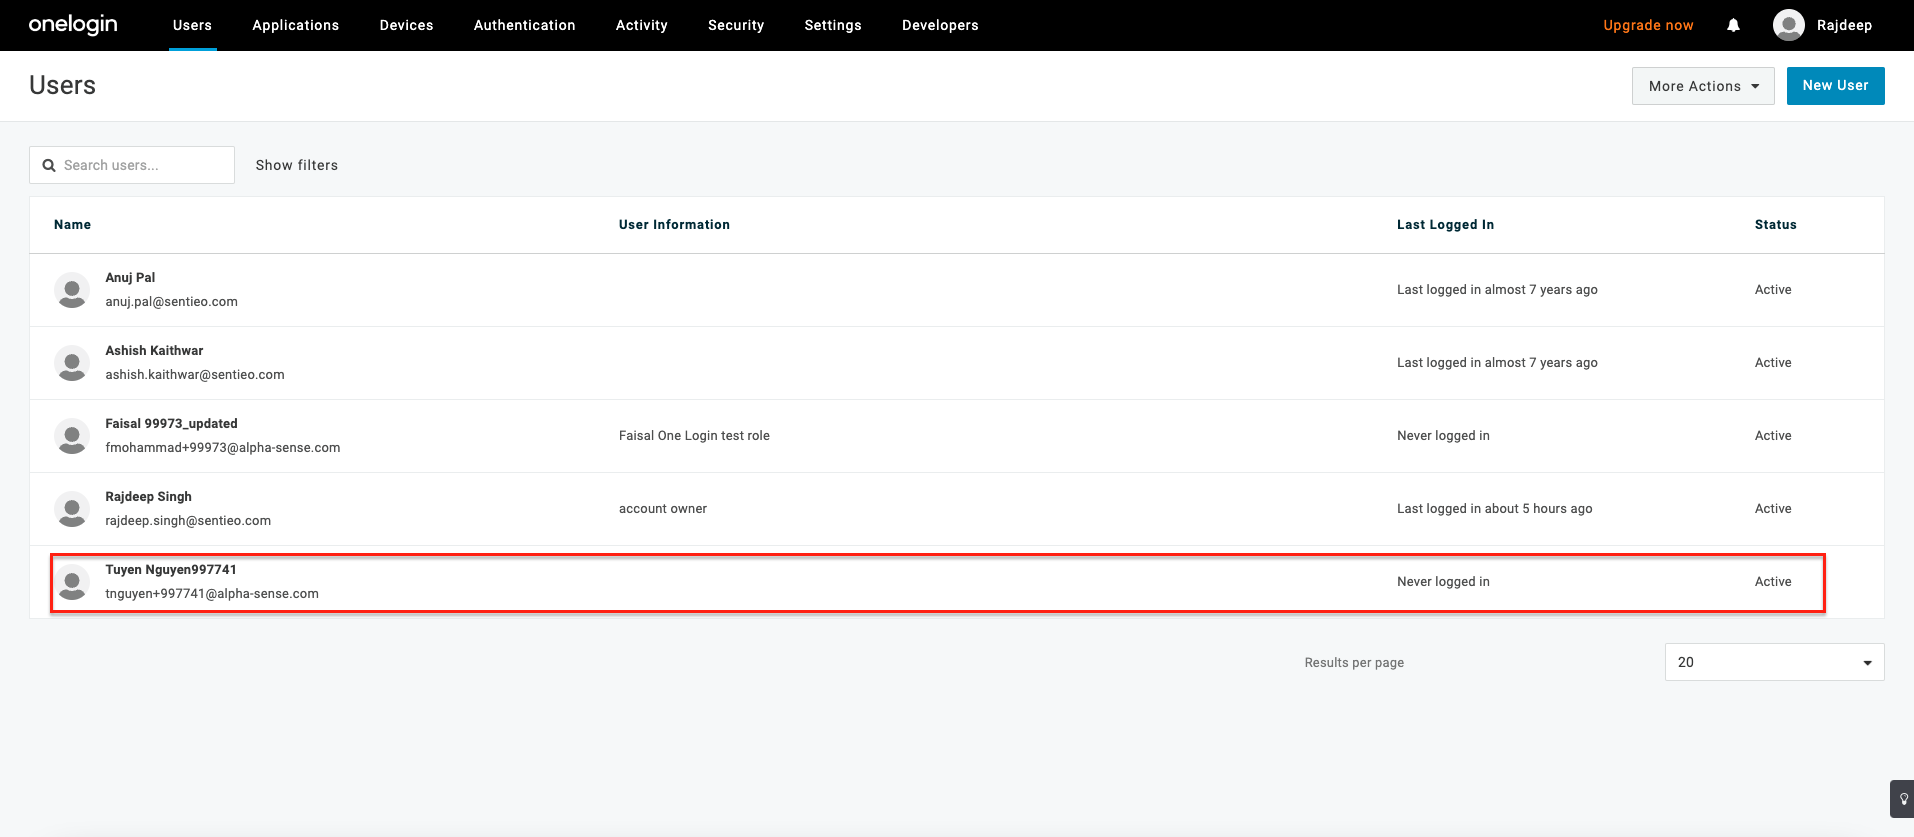
- New created user should be listed:
6. Create a role
Users in OneLogin can be only assigned to application through mapping with roles. You need to create a new role in order to assign new user to your created application.
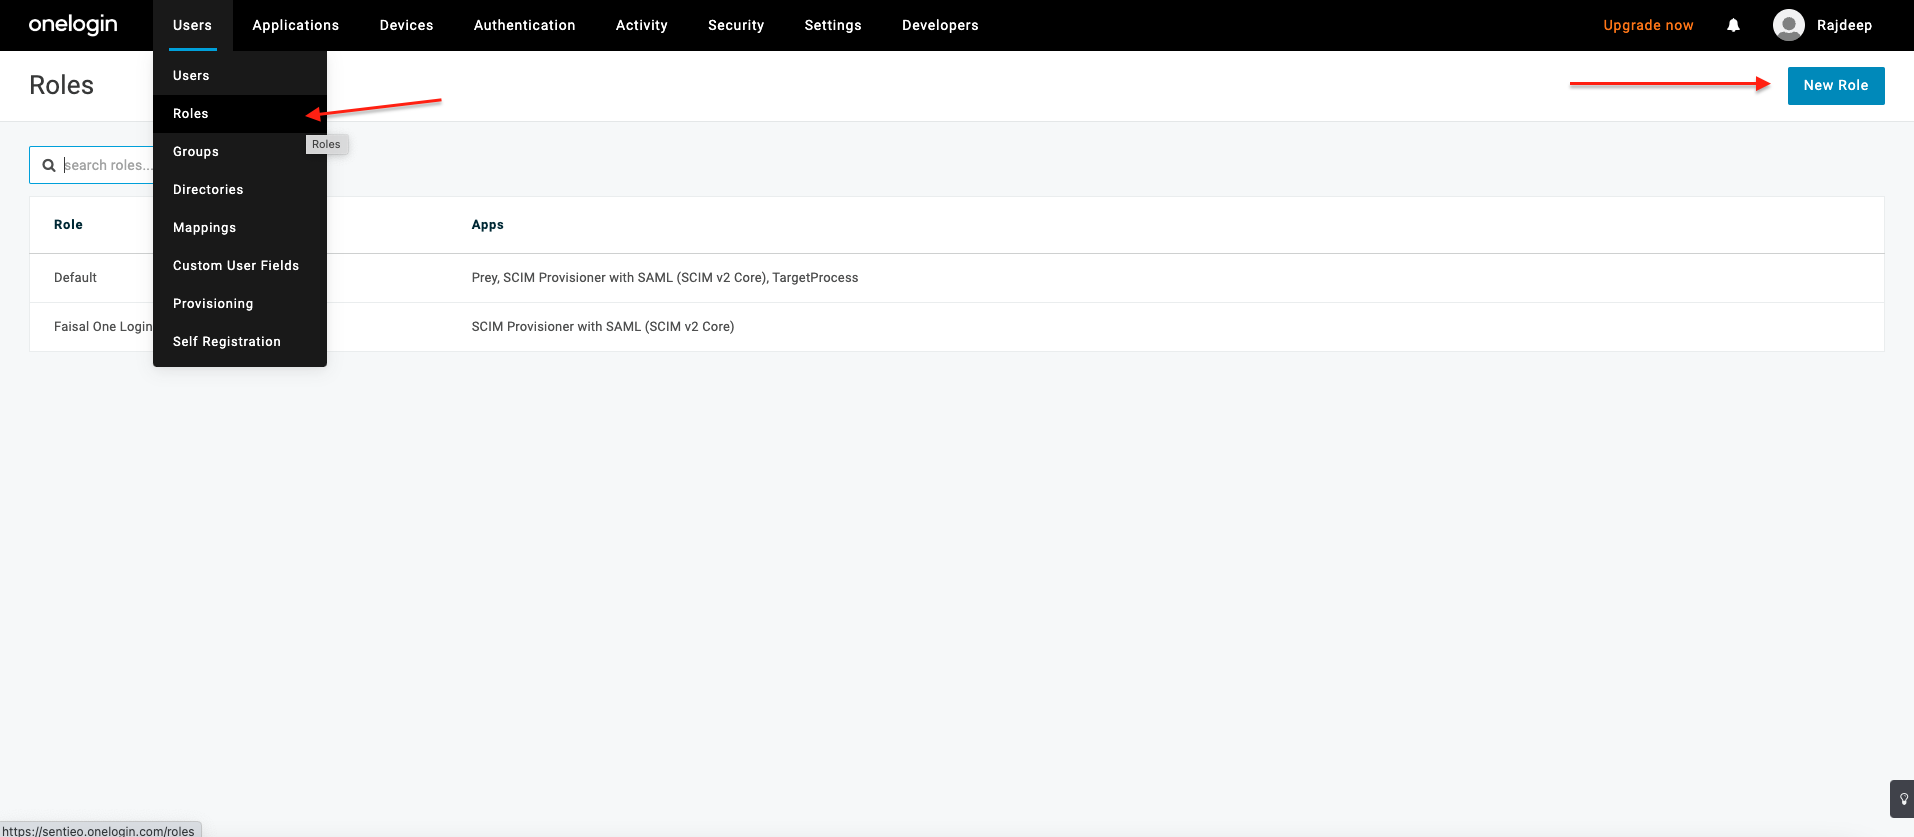
- Select Roles under Users menu, click New Role:
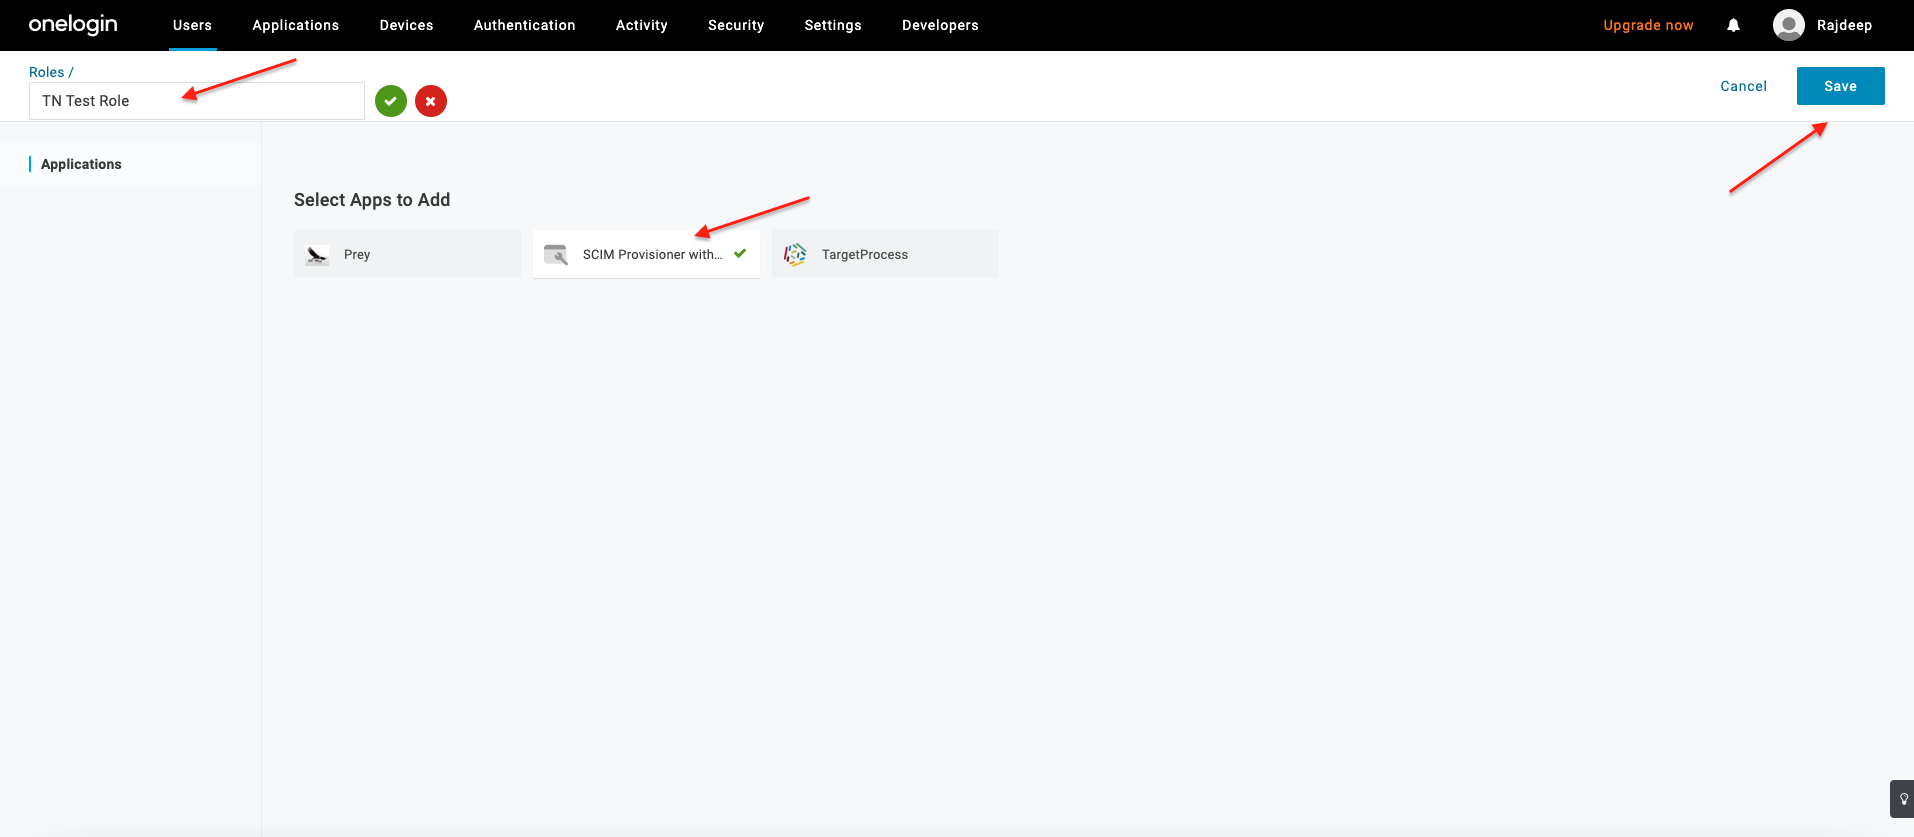
- Add a name for role, select our application and click Save to create role:
7. Assign new user to created role
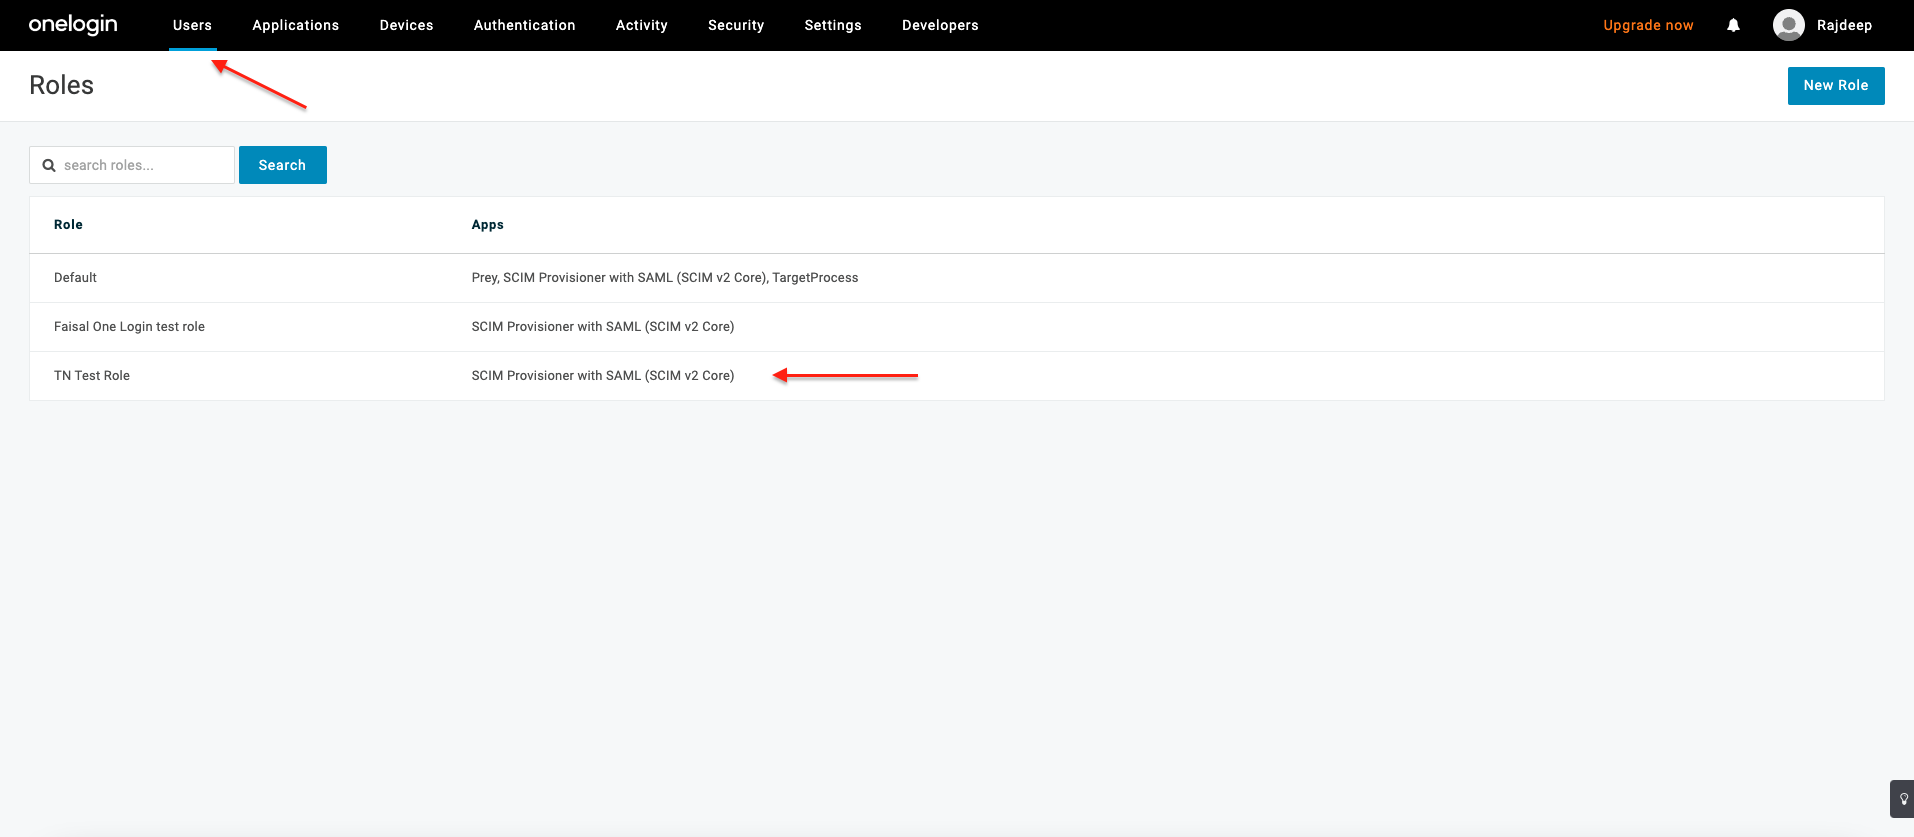
- Select your created role listed in Roles (under Users menu):
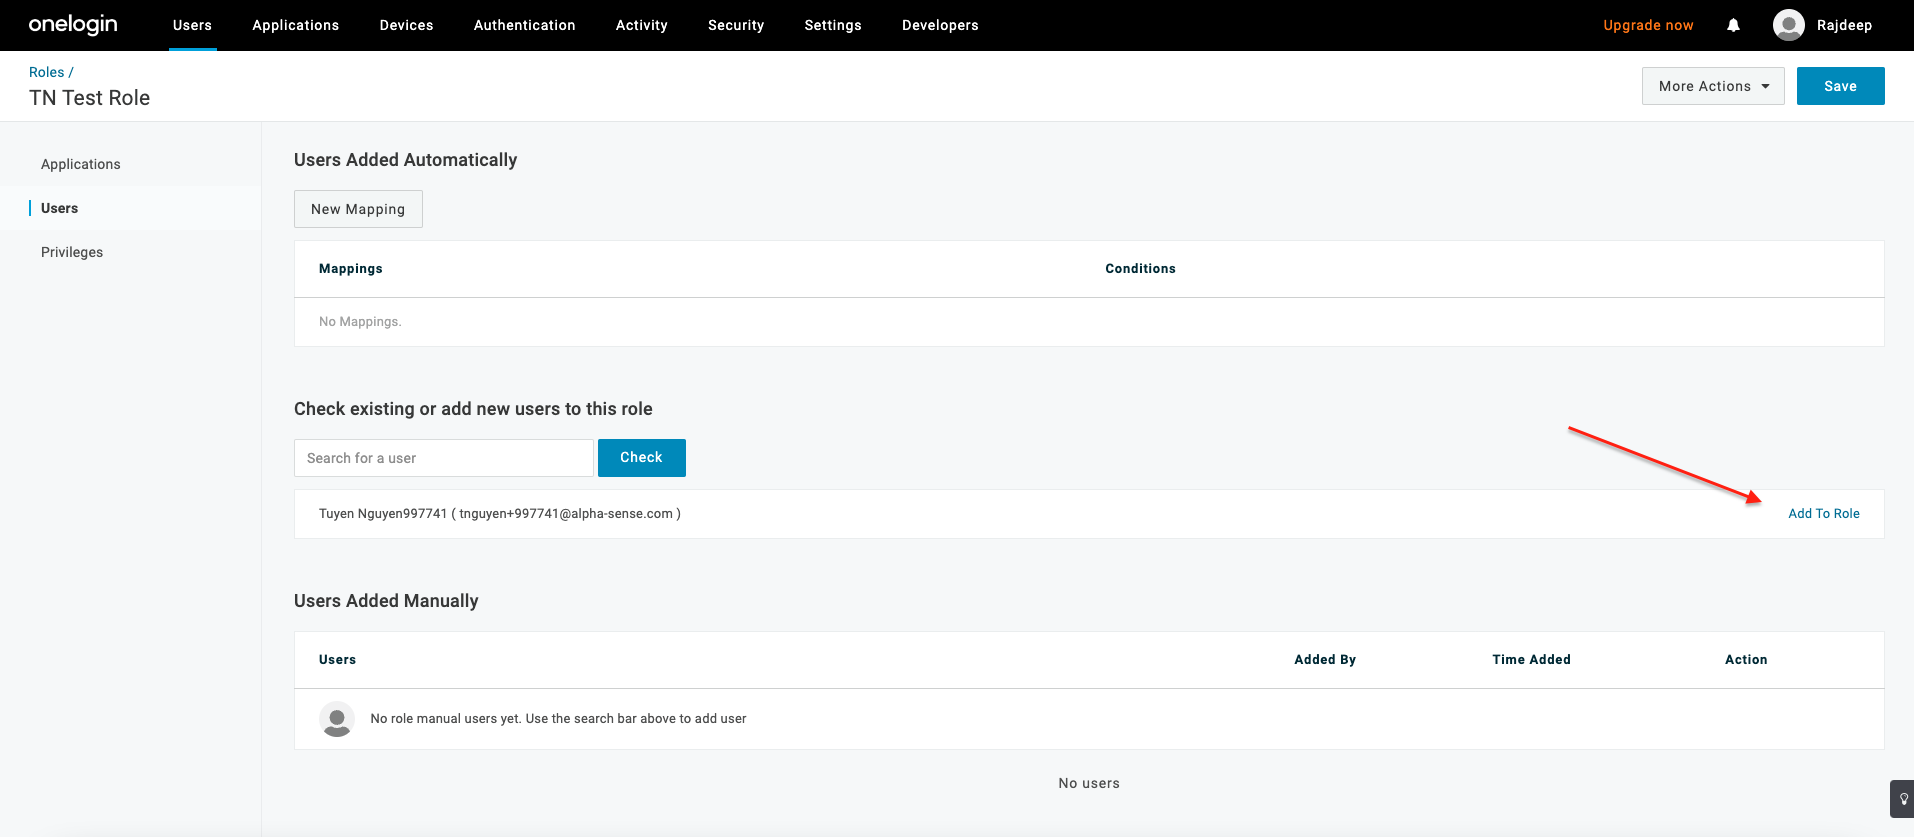
- Select Users tab, and find for your created user:
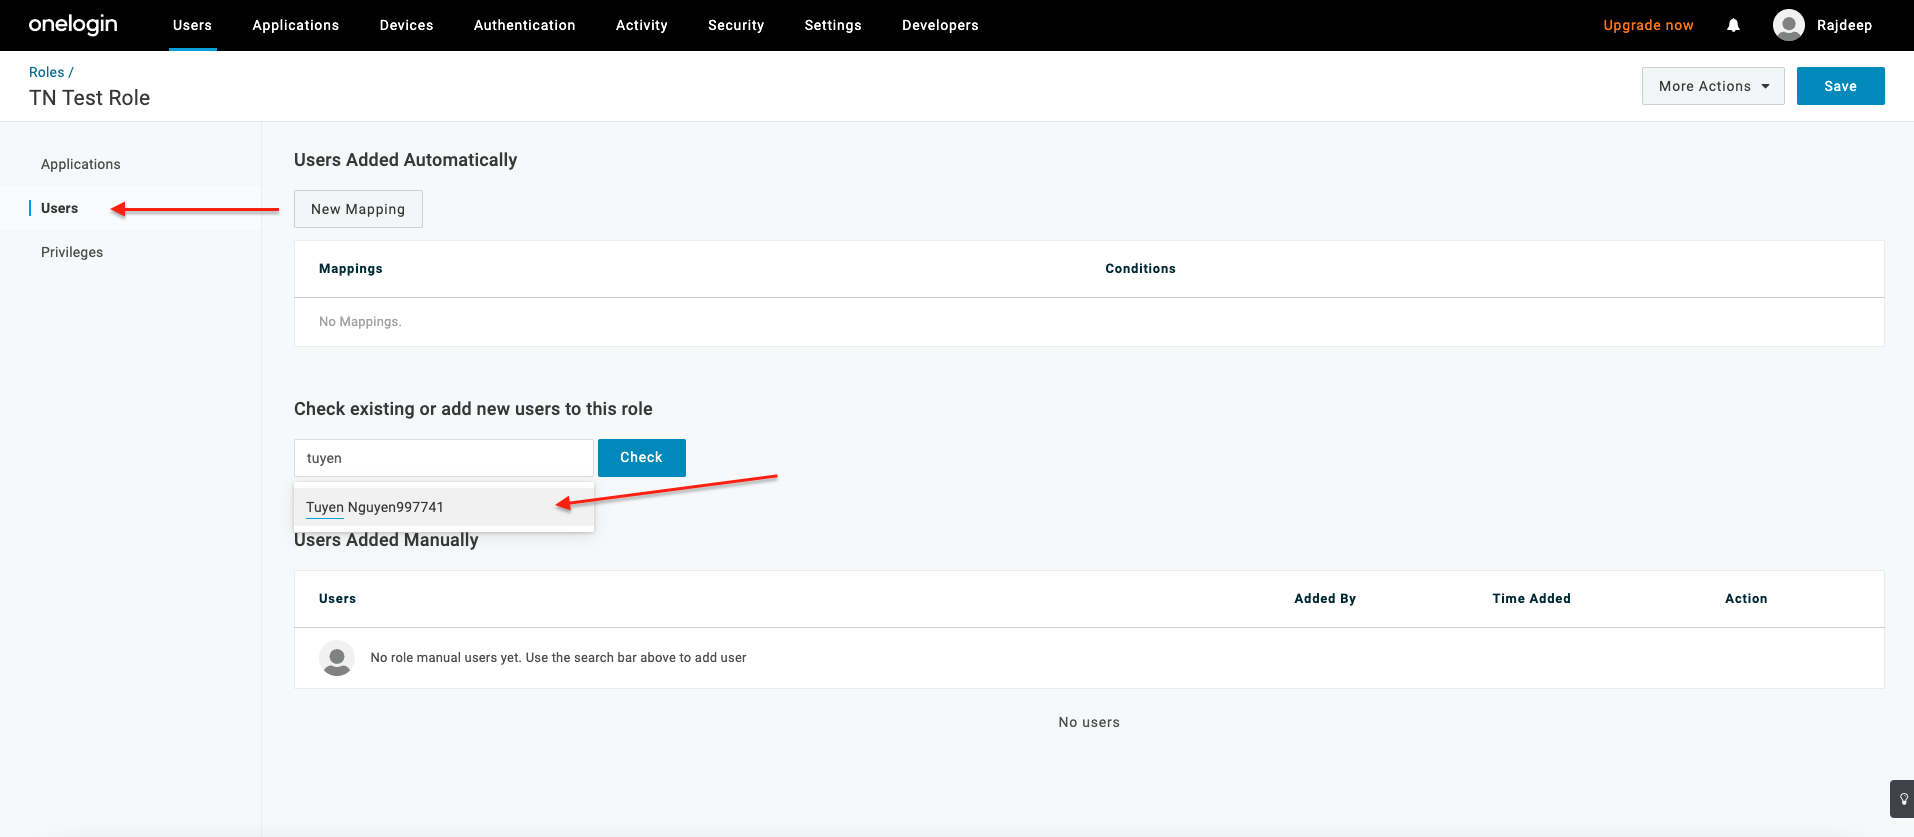
- Click Check then Add to Role:
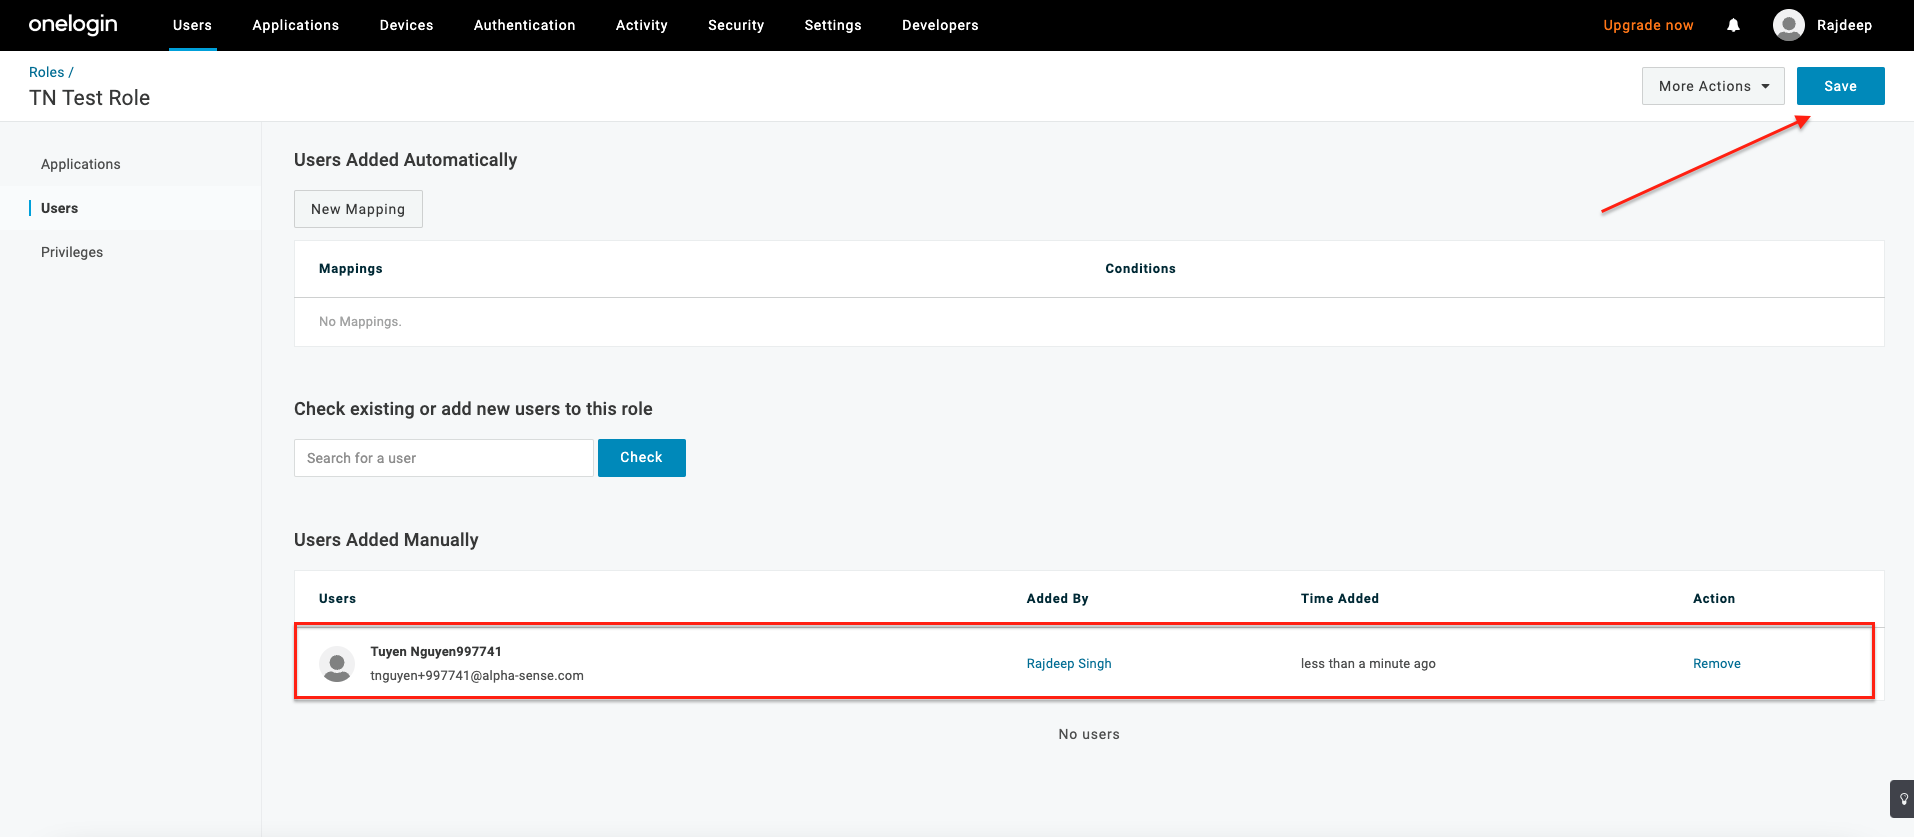
- User will get listed under Users Added Manually, then Save to apply changes:
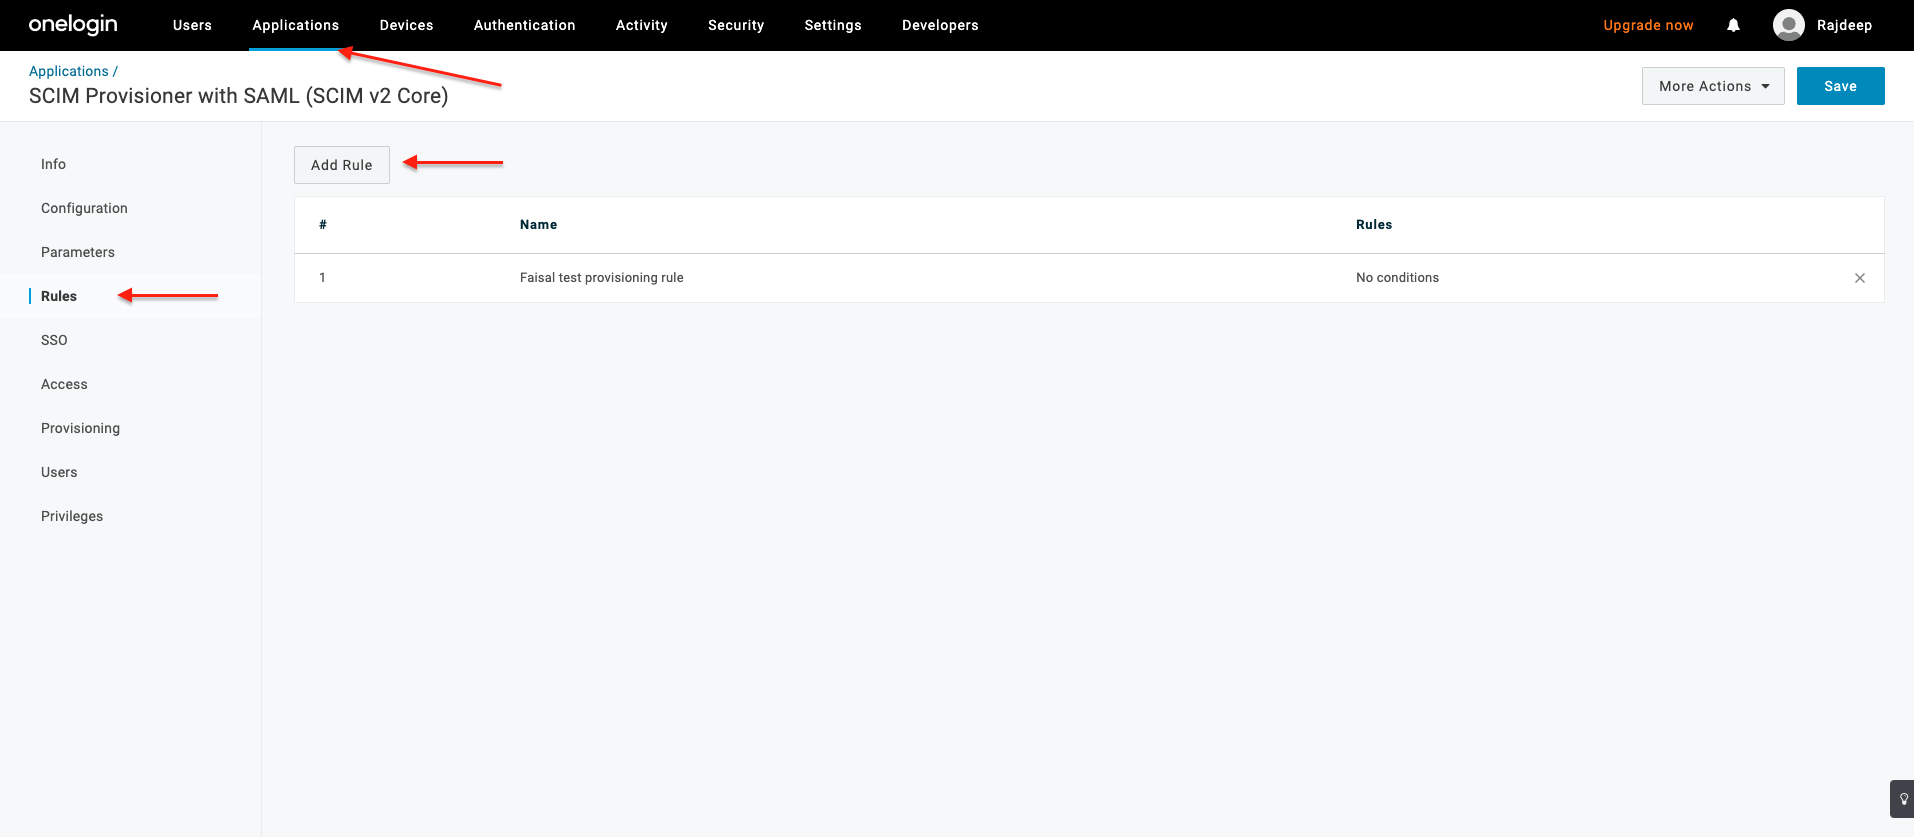
8. Add rule to your application
- Go to our application listed under Applications menu → Applications. Then select
Rules tab and click Add Rule:
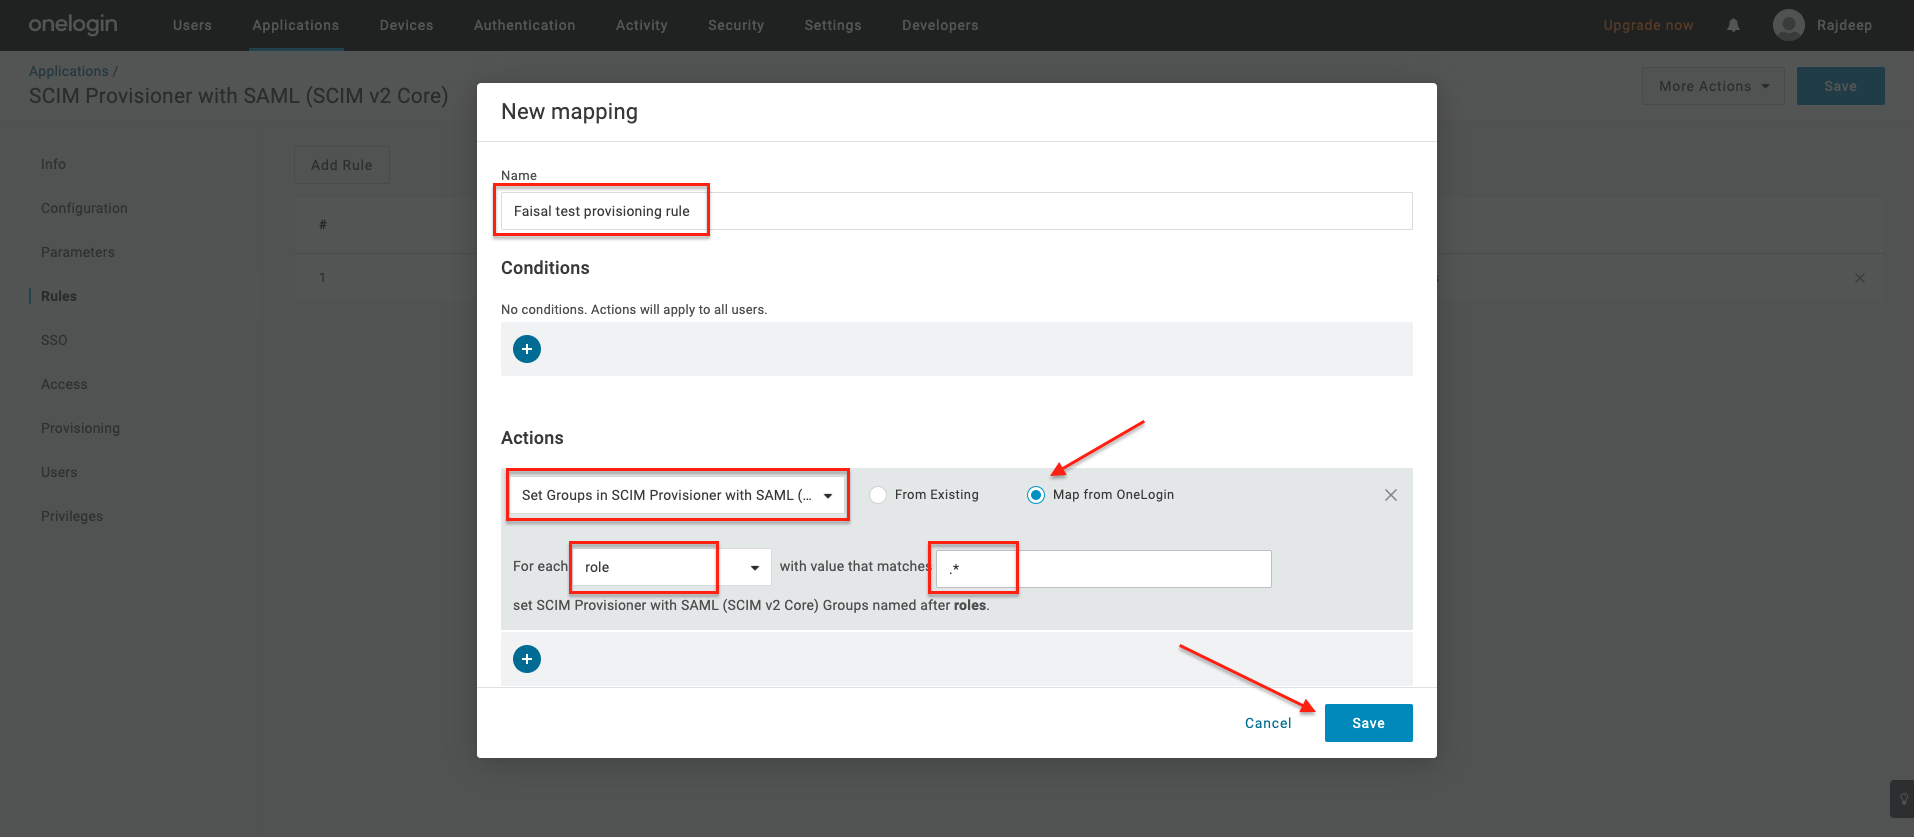
- Add Name, select Actions as Set Groups in SCIM, check Map from OneLogin, select
for each role with value match -*. Then Save to apply changes. This below
configuration example will set all roles defined in OneLogin as SCIM groups:
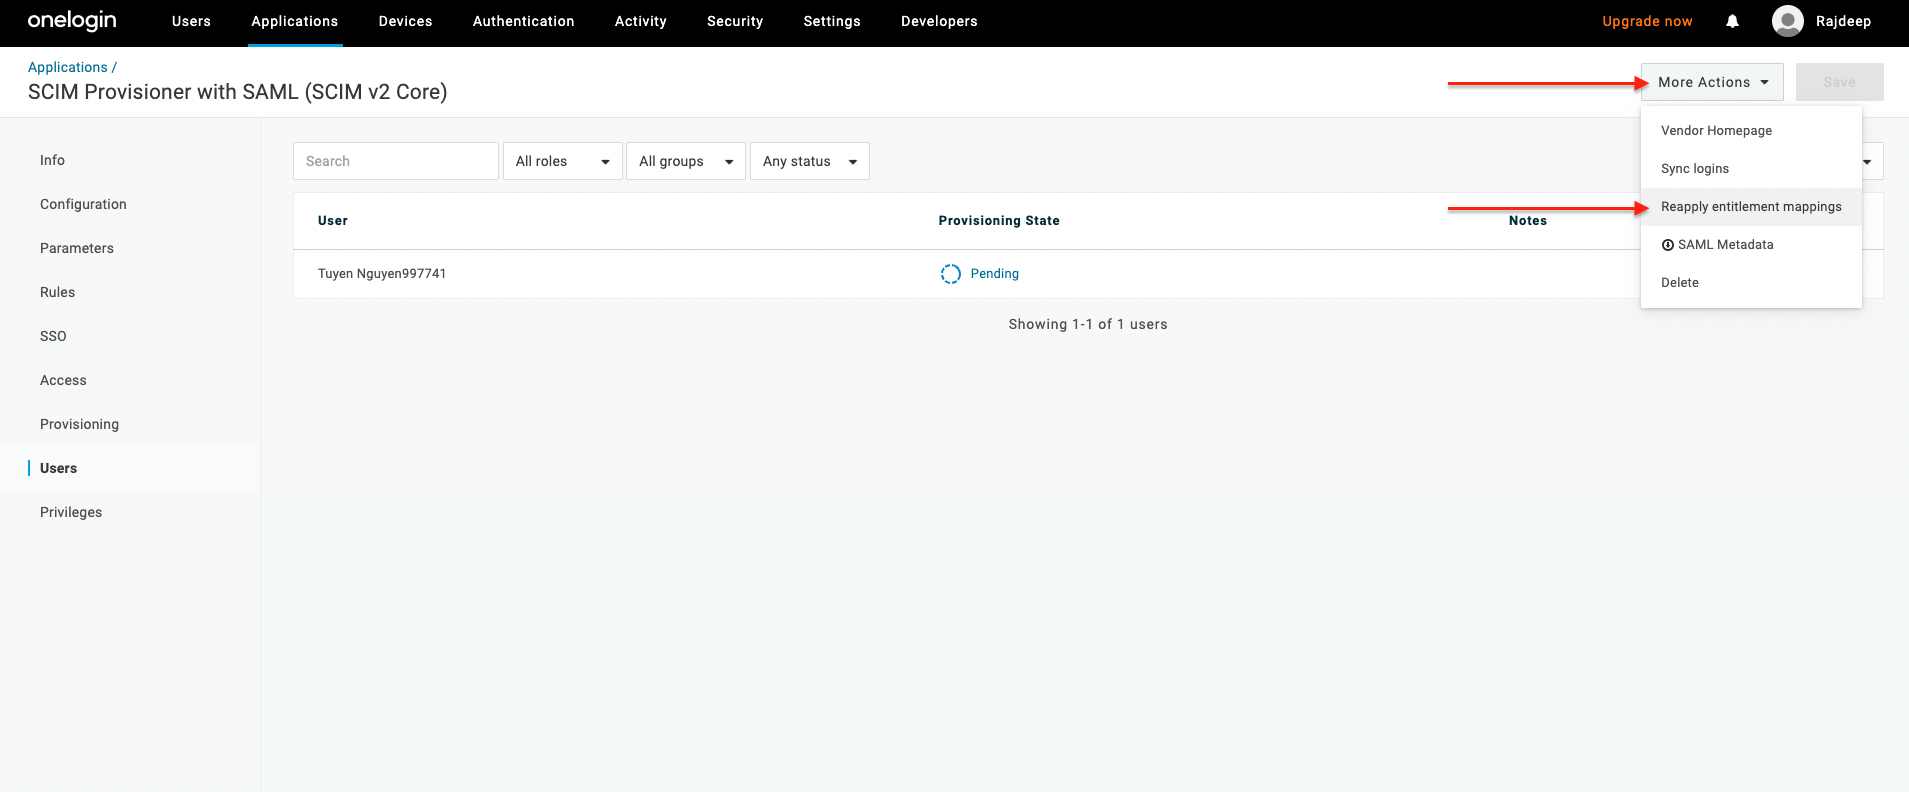
- Navigate to Users tab and select Reapply entitlement mapping under More Actions:
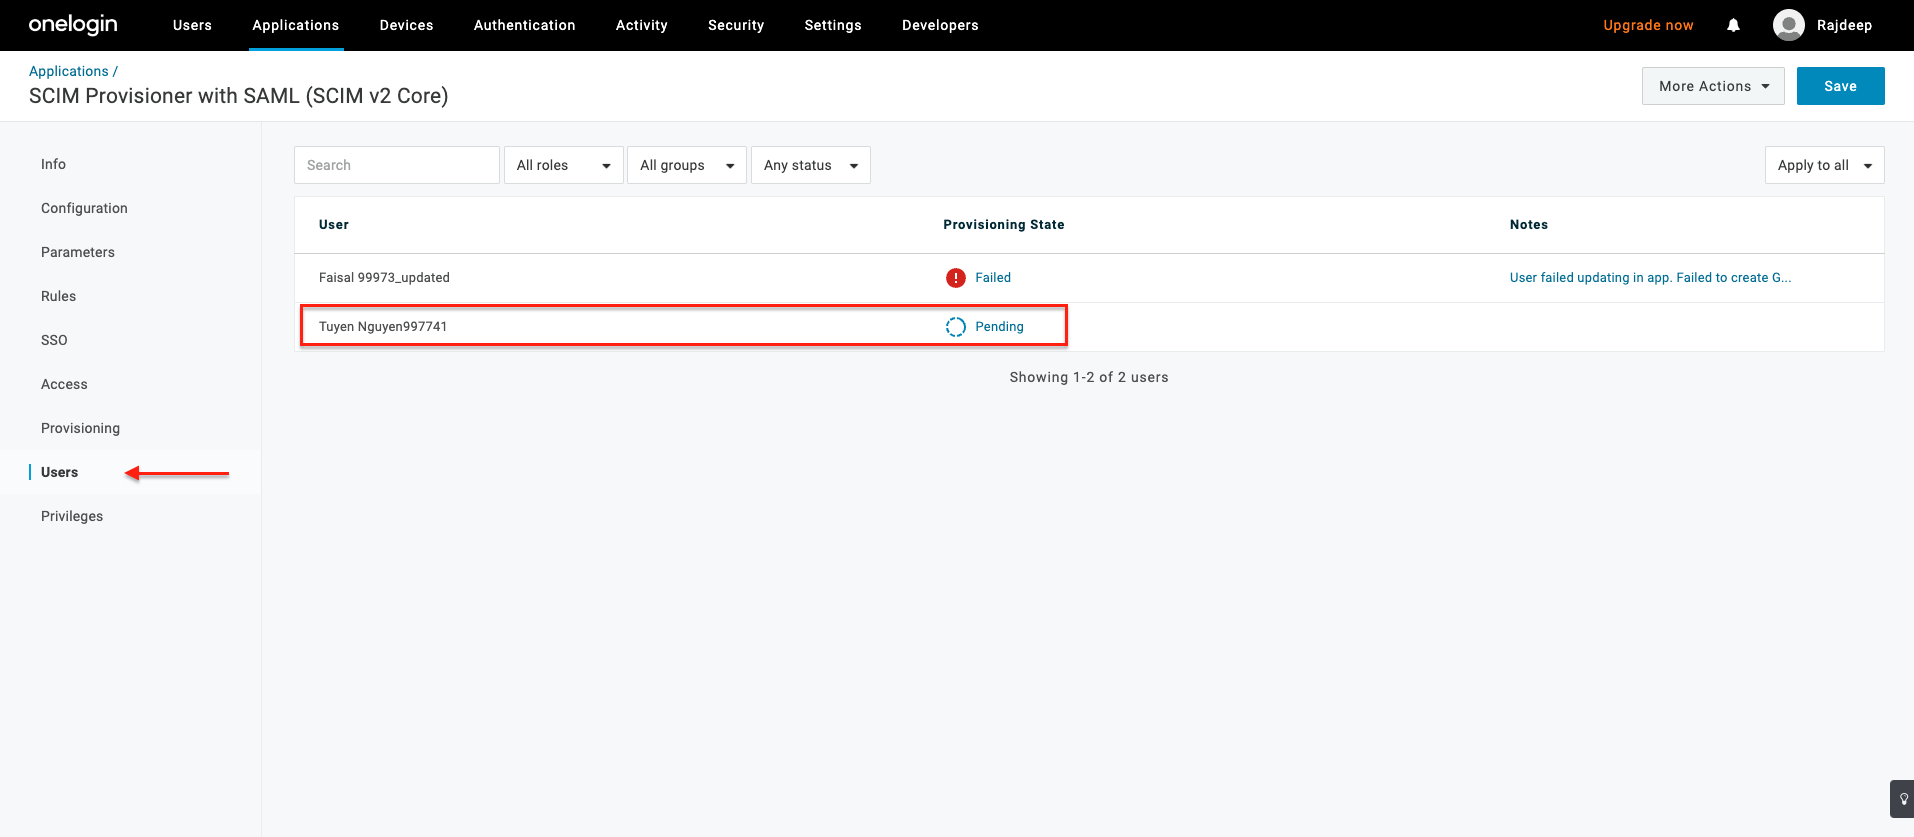
9. Provision user on demand
- Navigate to Users tab of our application, there will be a list of users (including the users
that you assigned to role that mapping to SCIM service). Those created users will initially have
Provisioning State as Pending:
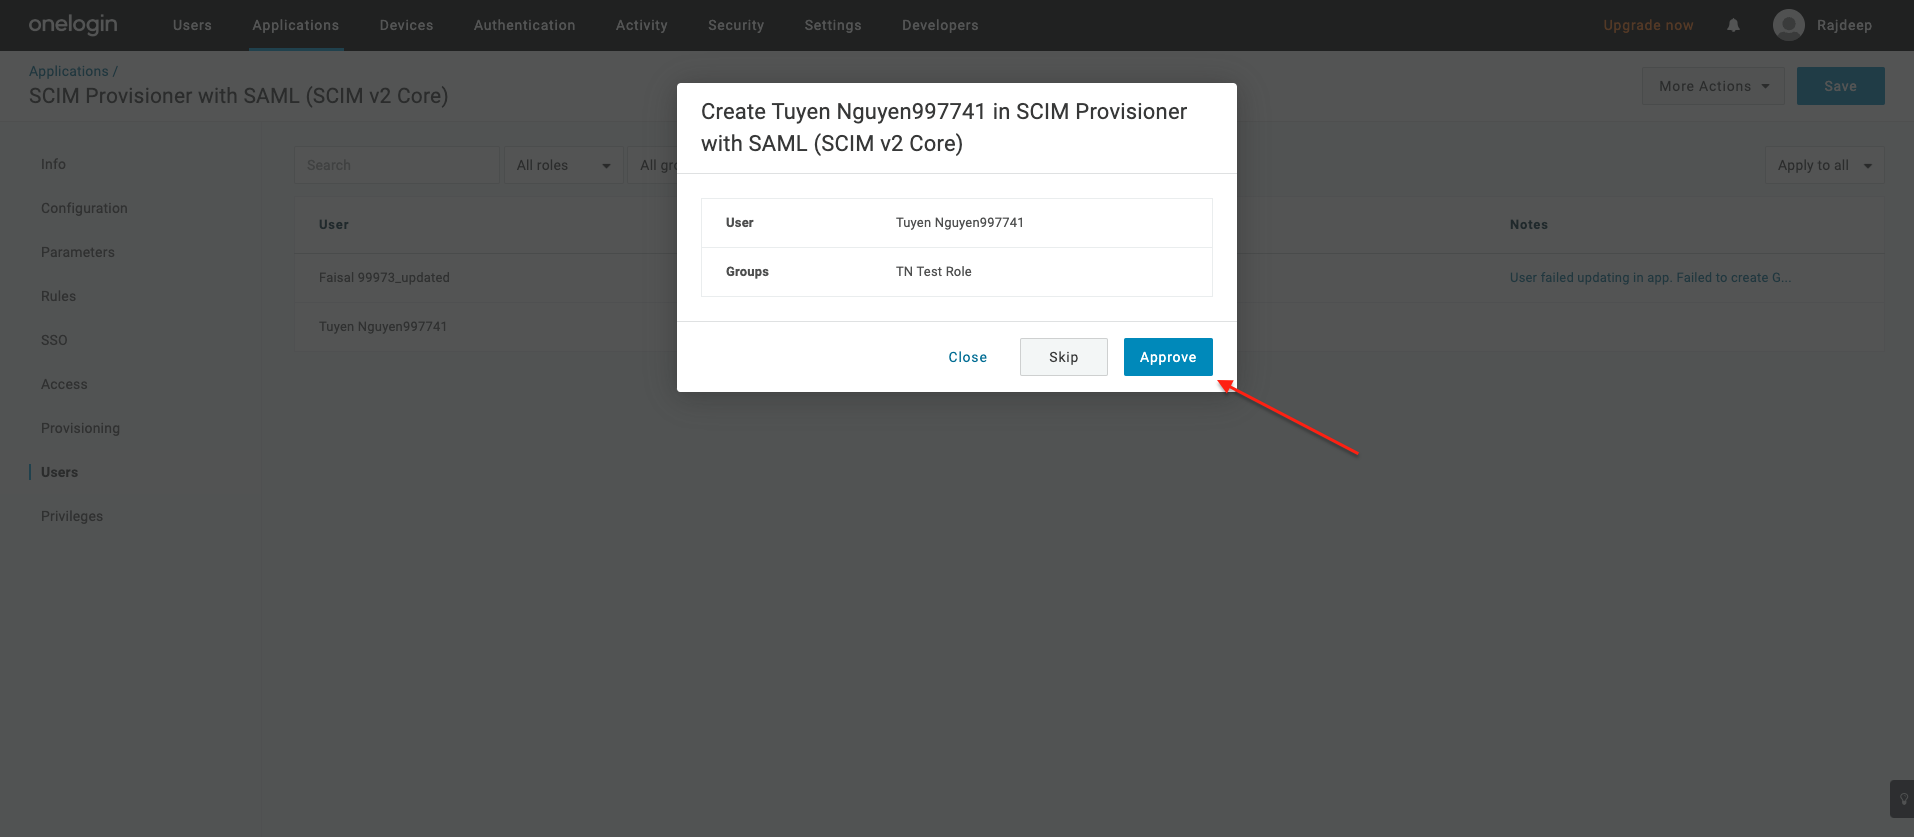
- Click on Pending text, there will be a dialog to approve the provision. Click on Approve:
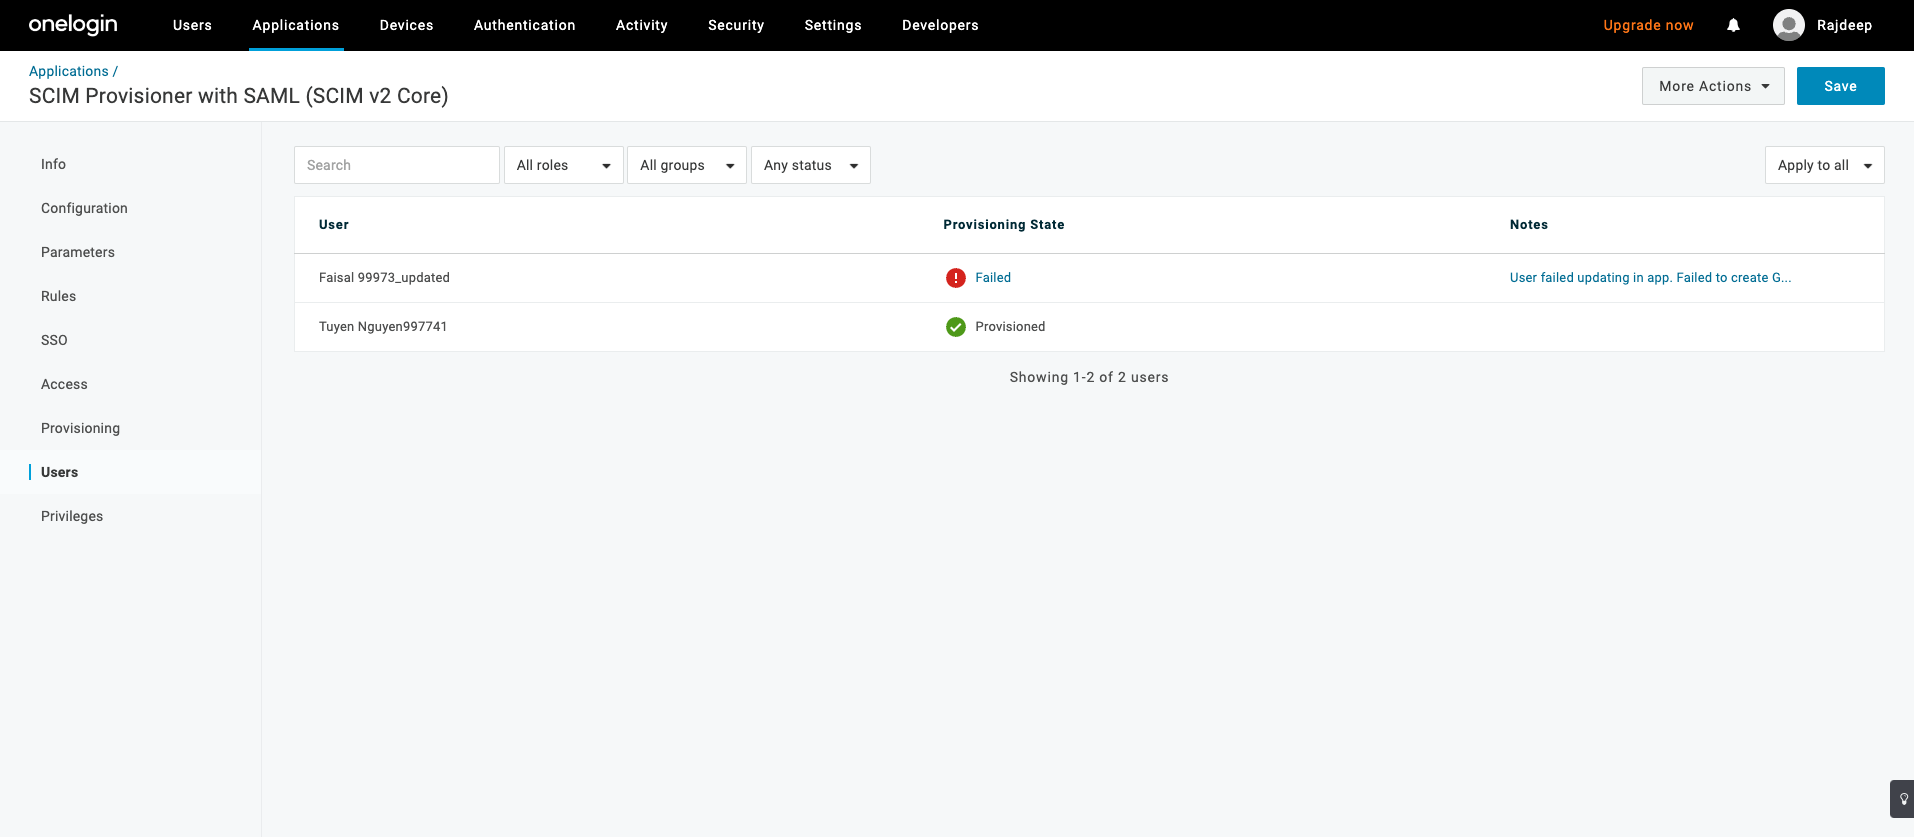
- User that got successfully provisioned will have green mark in Provisioning State:
10. Verify user is created in AlphaSense
Navigate to Additional Guides and follow the guide to check: Verify User is Created in AlphaSense